This Unity tutorial guide shows you how to setup VR controllers for games in Unity. You’ll setup controllers for tracking with your left and right hand and also create test hands to use in VR.
Your controllers let you interact with options and things in virtual reality. Having a smart control scheme is key and there are a few considerations to make when designing for first person VR.
In this Unity tutorial, you’ll learn:
- How to add hand objects and sync them to your VR controllers.
- How to setup fake hands to use for testing purposes
- How to add objects and interaction with them using your VR hands in Unity
This is the four tutorial in our Unity XR development series. You can complete this tutorial on its own or follow along in our series of guides. Check out the previous tutorials here:
- The 3 Things You Need to Make a VR Game
- How to Install Unity Hub and Setup Unity for VR
- How to Setup Your Unity Camera for VR Games
This is a Unity VR tutorial guide that we’ve partnered with Valem on. Valem is a Unity expert on Youtube and his tutorials have helped thousands of new Unity developers out. Take a look at our VR development section to learn how to make a game in VR!
Check out Valem’s channel, discord, and patreon below!
How to Setup VR Controller Hands in Unity
In this tutorial, you will learn how to create and setup VR controllers in Unity. You will learn how to assign a prefab model to act as hands.
Total Time: 10 minutes
Create Hand Game Objects

To make your first person VR controllers in Unity, you first have to create two game objects underneath your VR camera offset object. Right click on your camera offset and select Create Empty. Name one Left Hand and the other Right Hand.
Assign Hands to XR Controller
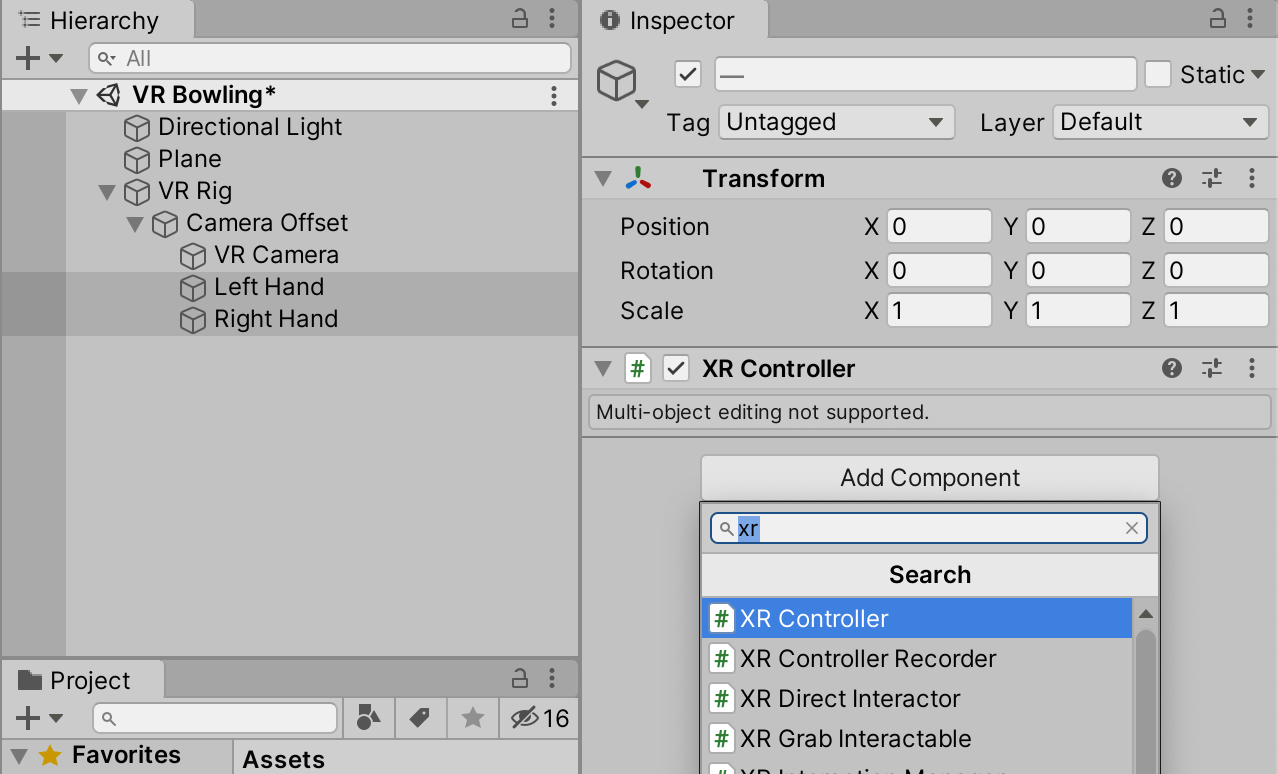
The Unity XR toolkit has an awesome component called XR Controller which does a lot of the heavy lifting for us and makes things simple!
Use command (Mac) or control (Windows) and select both your Left Hand and Right Hand objects so that they are both highlighted. Then on the right in the Inspector Window, click on Add Component. Start typing “XR” into the search bar and then select XR Controller.
Assign Controller Nodes
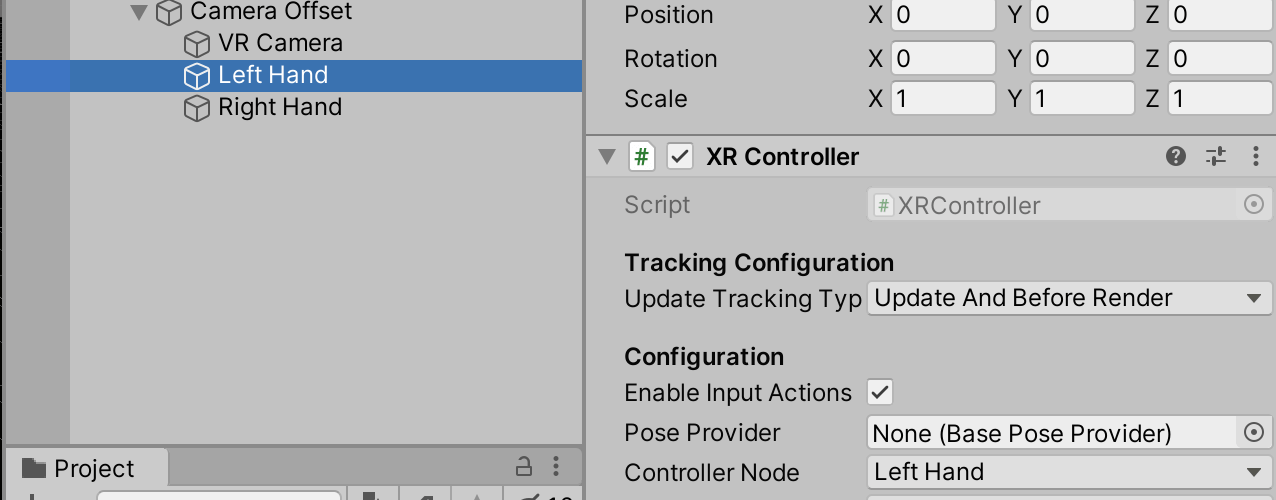
Click on the Left Hand object by itself and then change the Character Node (Inspector window) to Left Hand. Click on the Right Hand object and set the Character Node to Right Hand.
If you click play while your VR headset is connected, you should see some invisible markers for your left hand and right hand moving when you do! You won’t see visual hands yet, because you haven’t created them.
Create Dummy Cube Hands
If you want to create dummy rectangles to use as hands, it’s easy! This allows you to keep developing in Unity and worry about importing lifelike objects later. To start, create a new game object by left clicking in the Hierarchy window to clear all selections. Then right click in the Hierarchy window and select Create Empty. Rename the object to Controller.
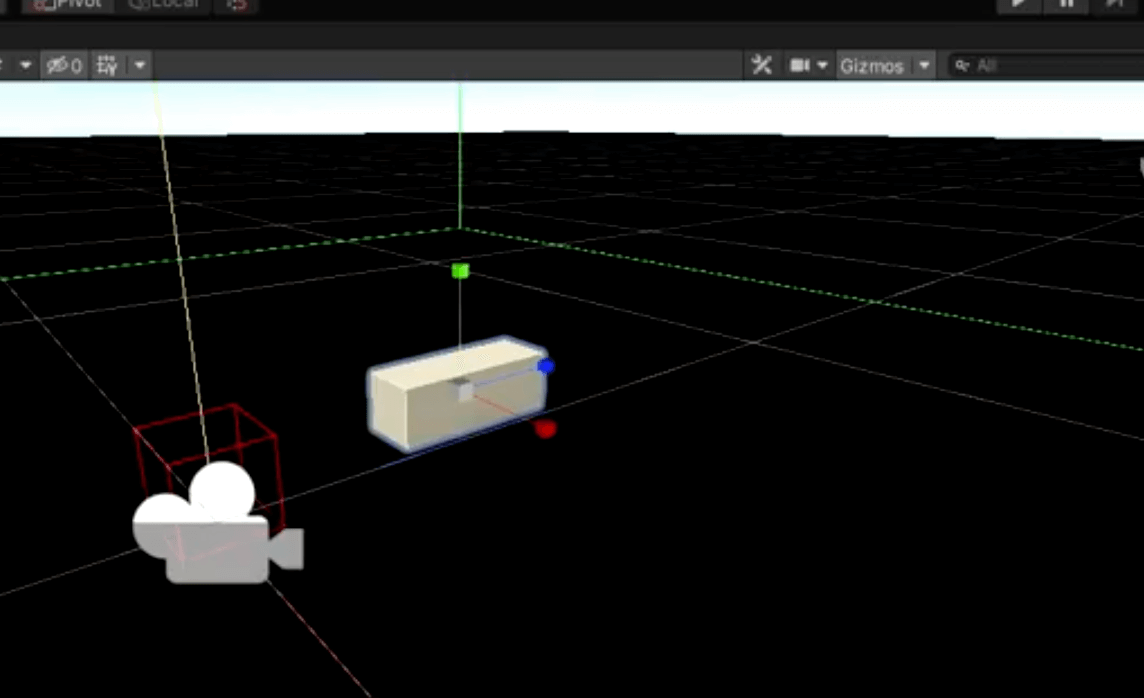
Right click on Controller and select 3D Object > Cube.
Press the R key on your keyboard to change the scale and then drag your cube until it’s size goes down to 5 centimeters (0.05 scale in the inspector window). Then, drag the z-axis (blue) out to be size 0.15 so that you’ve created a rectangle.
Color the Rectangle
![How to Setup VR Controllers in Unity [TUTORIAL]](https://arvrtips.com/wp-content/uploads/2020/06/05-white-material.png)
Click on the highest most Assets folder in the Project Window. Then, right click in the empty space inside of the folder and select Create > Material. By default, the Base Map should be set to white. Rename this material “White” and then drag it on top of your cube that you created.
Create Prefab Object

To make your rectangle hand a pre-fab object that can be used over and over again, drag the parent Controller game object down into your Project folder below. It will appear in this folder as an object that can be used over and over again.
Set Model Prefab to Controller

Now, you can select your “Left Hand” and “Right Hand” objects under the Camera Offset and drag your controller into the Model Prefab spot.
If you click on play now, you should now see your rectangle objects being controlled by your hands in real life.
You’ve just setup VR controllers in Unity.
Video Tutorial
If you want to see the video tutorial for setting up your Unity camera for VR games, click on the play button below!
Underneath the video, we summarize some key concepts from this Unity tutorial.
Key Concepts in This Tutorial
XR Controller Component
Unity XR has a component called XR Controller which standardizes the control, movement, and commands of VR hand controllers. This is a must-have component to include in your Unity XR projects. In the future, we’ll talk about XR Controller and its usefulness more.
Prefab Models
Prefab models are components that can be used over and over again. They are useful because you don’t have to manual create and configure the same object each time. In the tutorial above, we created a simple 3D rectangle for hands and turned it into a prefab model so that we can quickly import it whenever we need a dummy object. This allowed you to setup VR controllers quickly.
In the next Unity tutorial, we will learn how to interact with objects with your hands. If you have any other Unity tutorials you’d like us to go through, comment down below and let us know!