![How to Perform VR Interaction With Objects [Unity Tutorial]](https://arvrtips.com/wp-content/uploads/2020/06/unity-vr-interaction-tutorial-300x225.png "How to Perform VR Interaction With Objects [Unity Tutorial]")
In this Unity tutorial, we go over VR interaction basics. We’ll show you how a player can interact with objects using their real hands in virtual reality.
We’ll also go over some Unity XR components that handle gravity, movement, and other basics.
This is the fifth tutorial in our Unity XR development series. You can complete this tutorial on its own or follow along in our series of guides. Check out the previous tutorials here:
- The 3 Things You Need to Make a VR Game
- How to Install Unity Hub and Setup Unity for VR
- How to Setup Your Unity Camera for VR Games
- How to Setup VR Controllers
This is a Unity VR tutorial guide that we’ve partnered with Valem on. Valem is a Unity expert on Youtube and his tutorials have helped thousands of new Unity developers out. Take a look at our VR development section to learn how to make a game in VR!
Check out Valem’s channel, discord, and patreon below!
How to Perform VR Interaction With Objects in Unity
In this VR Interaction tutorial, we’ll teach you how to interact with objects in virtual reality. You’ll learn about important movement and interaction components such as RigidBody, XR Direct Interactable, and Sphere Collider.
Total Time: 15 minutes
Create a Table
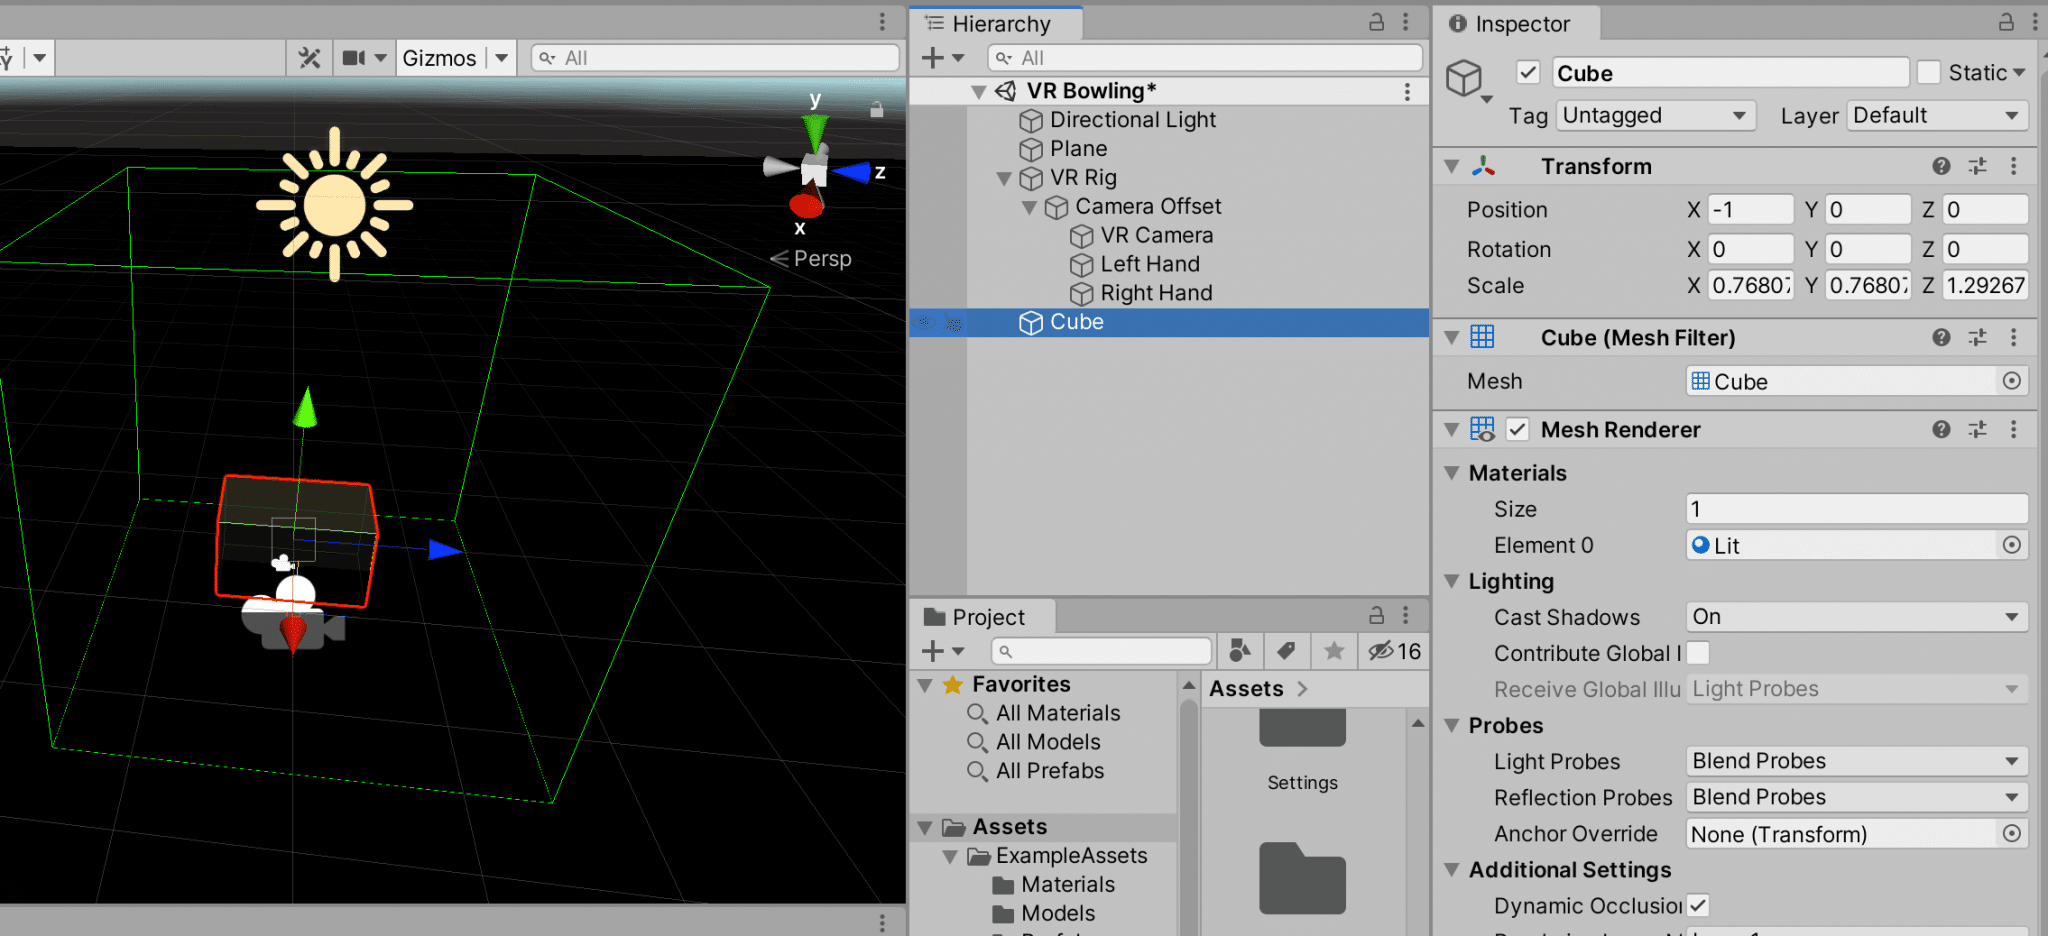
Let’s start by creating a table in our 3D virtual world. To do this, right click in the Hierarchy Window and select 3D Object > Cube.
Press R on your keyboard to switch to the scale too. Then, click and hold the cube and drag it upward to increase its size to about 0.75 (in the inspector window’s x, y, and z axis). Drag the z-axis (blue) arrow outward to about 1.3 so that you have a rectangle table.
Lastly, press the W key (move tool) and move your table slightly off of the center axis. Refer to the picture above for reference.
Create a Sphere
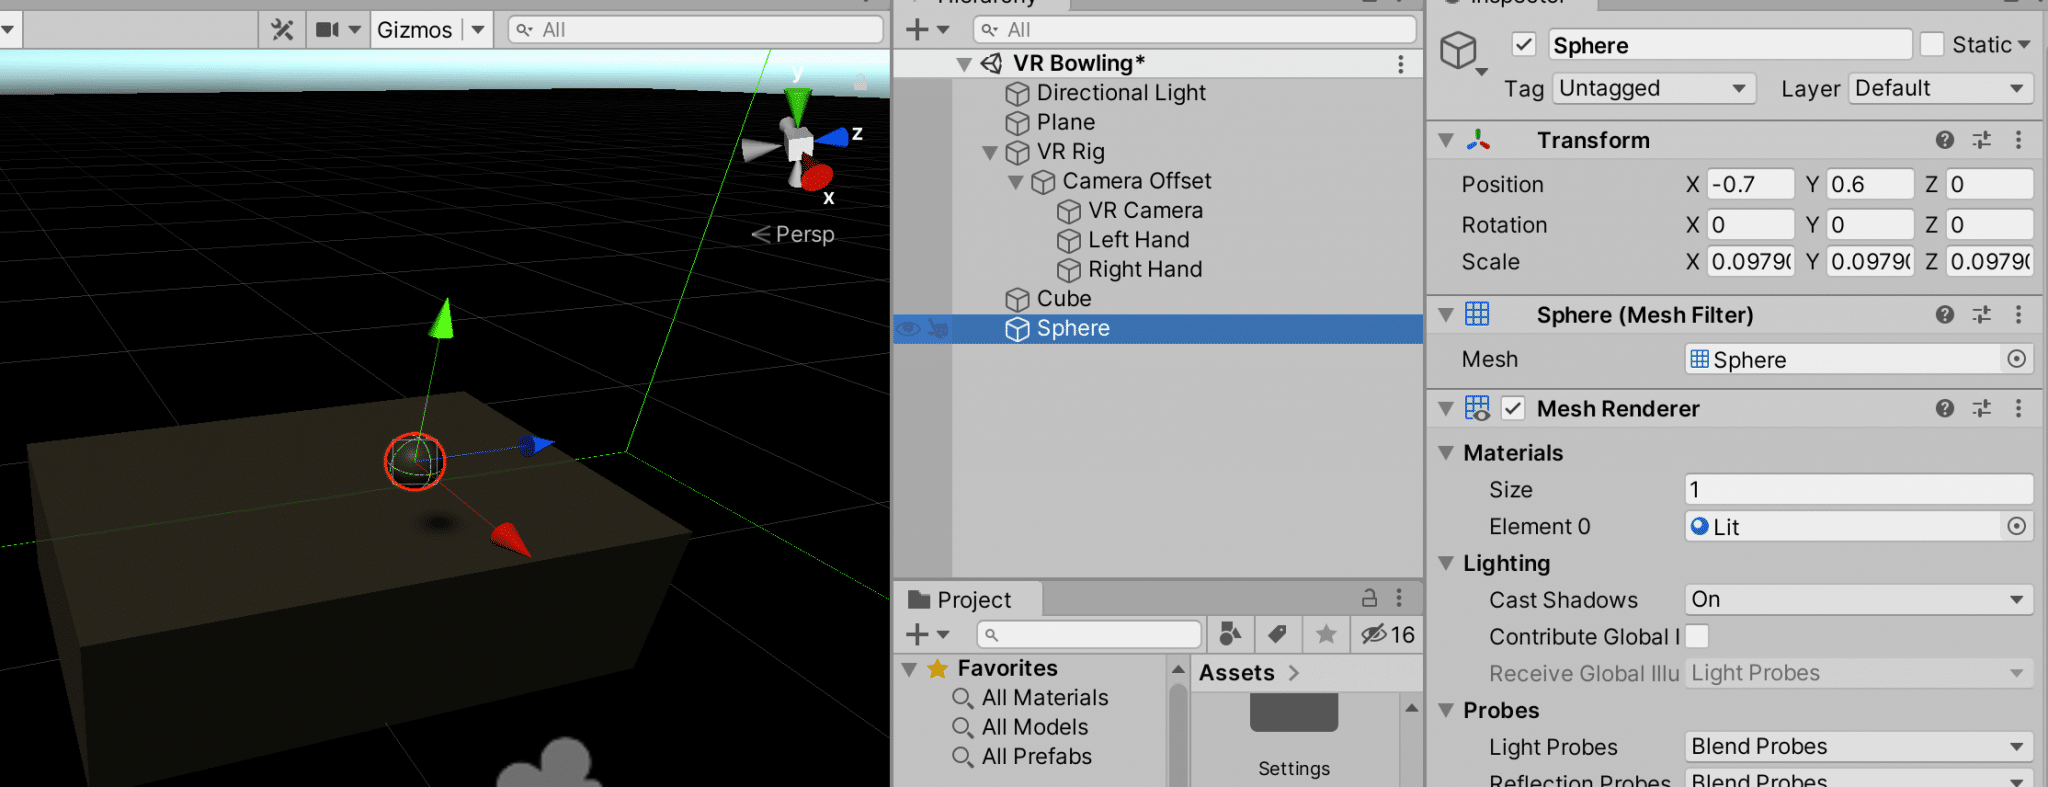
Next, let’s place a ball hovering over our team. Right click in the Hierarchy Window and select 3D Object > Sphere.
Scale down the sphere the same way you did the cube until about 0.1 around.
Use the move tool to place the sphere hovering over top of your table. Refer to the picture above for reference.
Create a Red Material & Assign it to the Sphere
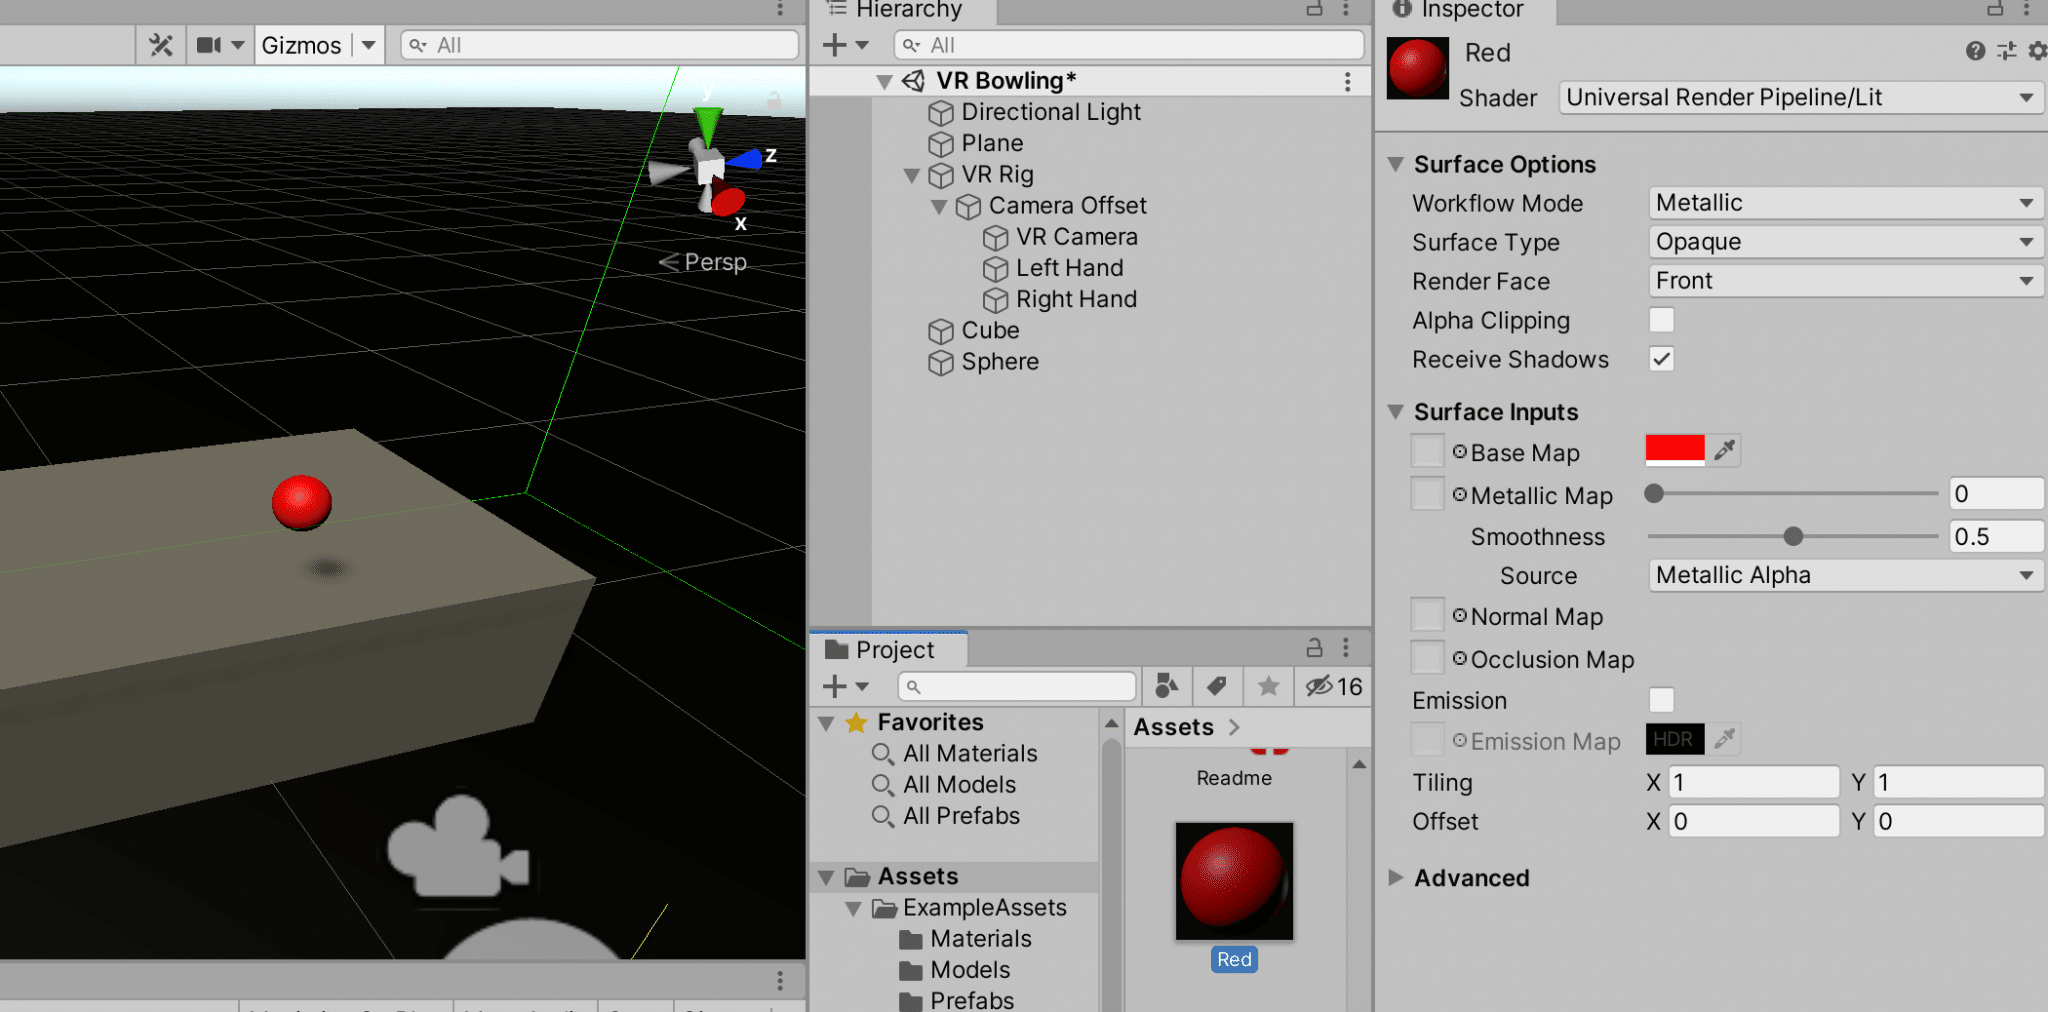
Let’s color the sphere red by creating a new material. Right click in the Project window and select Create > Material and name your new material “Red”.
Click on the color swatch beside the Base Map attribute in the Inspector Window and change this color to Red.
Lastly, drag the new Red material file on top of the Sphere file to change its color to red.
Make the Sphere a RigidBody Component
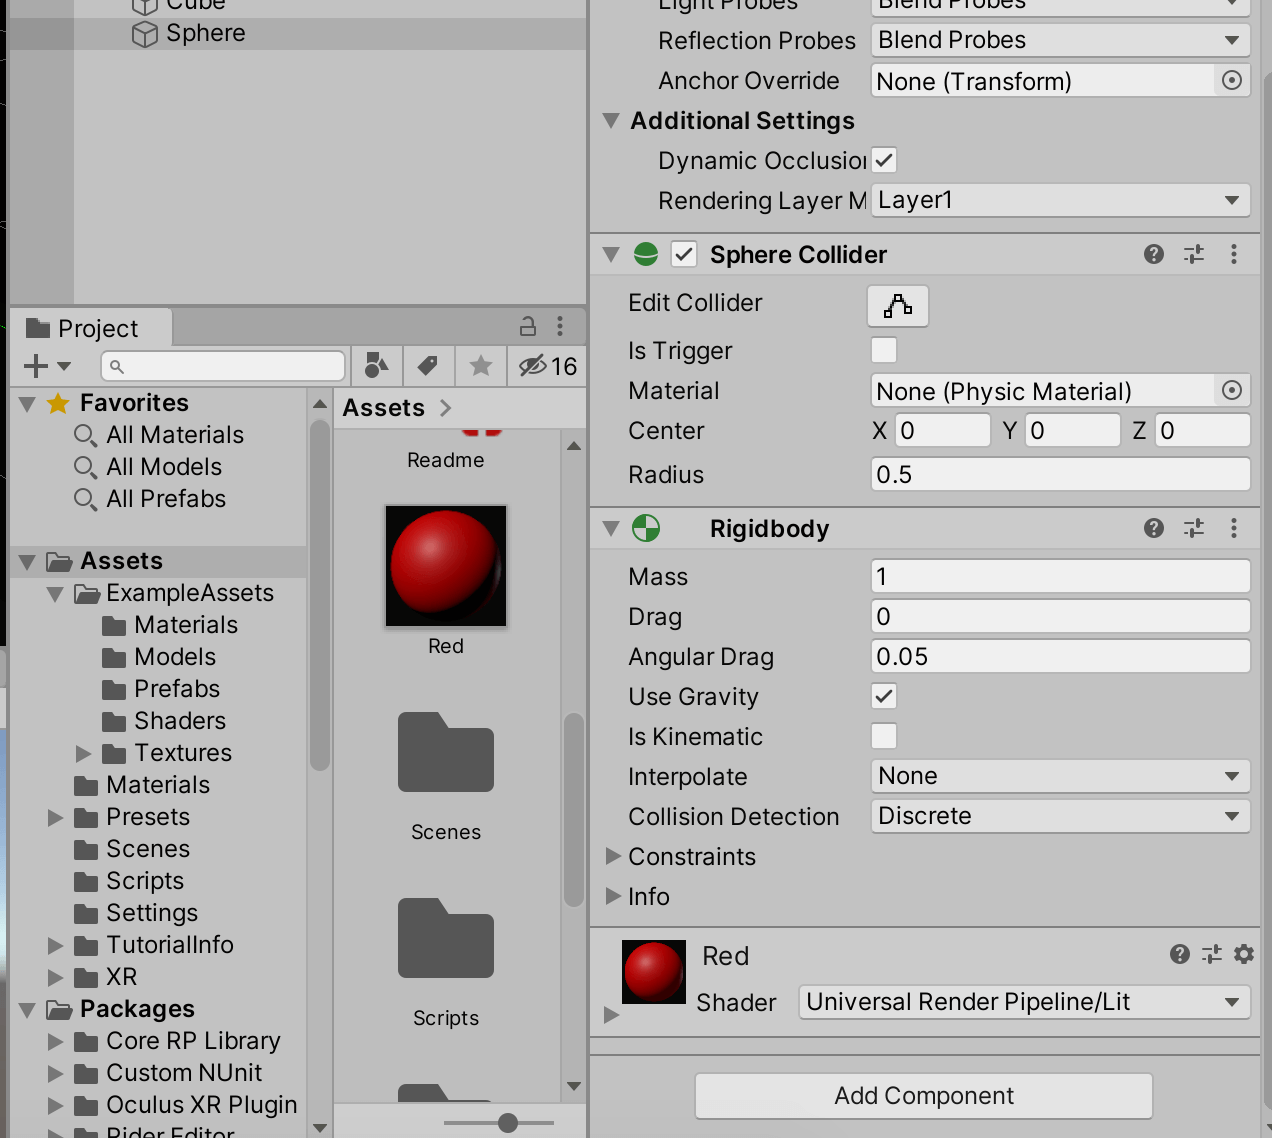
Click on the Sphere layer in the Hierarchy window and then click Add Component in Inspector Window on the right. Search for and select RigidBody to assign the sphere to this component type.
A RigidBody object assigns a ton of gravity, friction and weight related properties to the object so that you don’t have to do this manually! If you test out your application, you’ll see the ball fall onto the table. Then, you can move and manipulate the ball with your hands and perform basic VR interaction with it.
Make Sphere Interactable
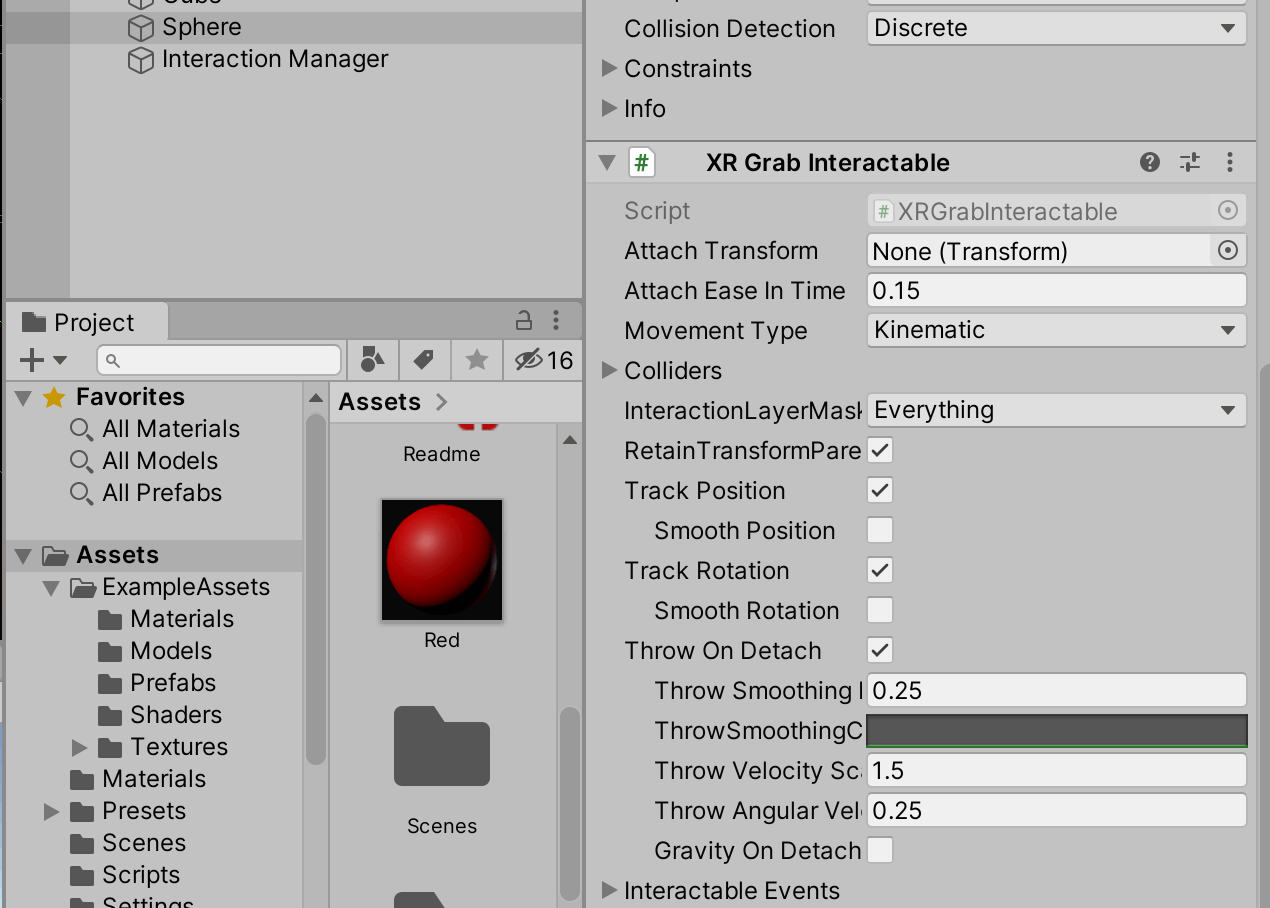
The ball now has movement properties, but you still can’t grab it. To do this, we have to assign another component to the sphere called XR Grab Interactable. This component allows the object to be grabbed in virtual reality.
To add this component, make sure your Sphere is selected and then click on Add Component against. Search for and select XR Grab Interactable.
Assign Hands as Interactor
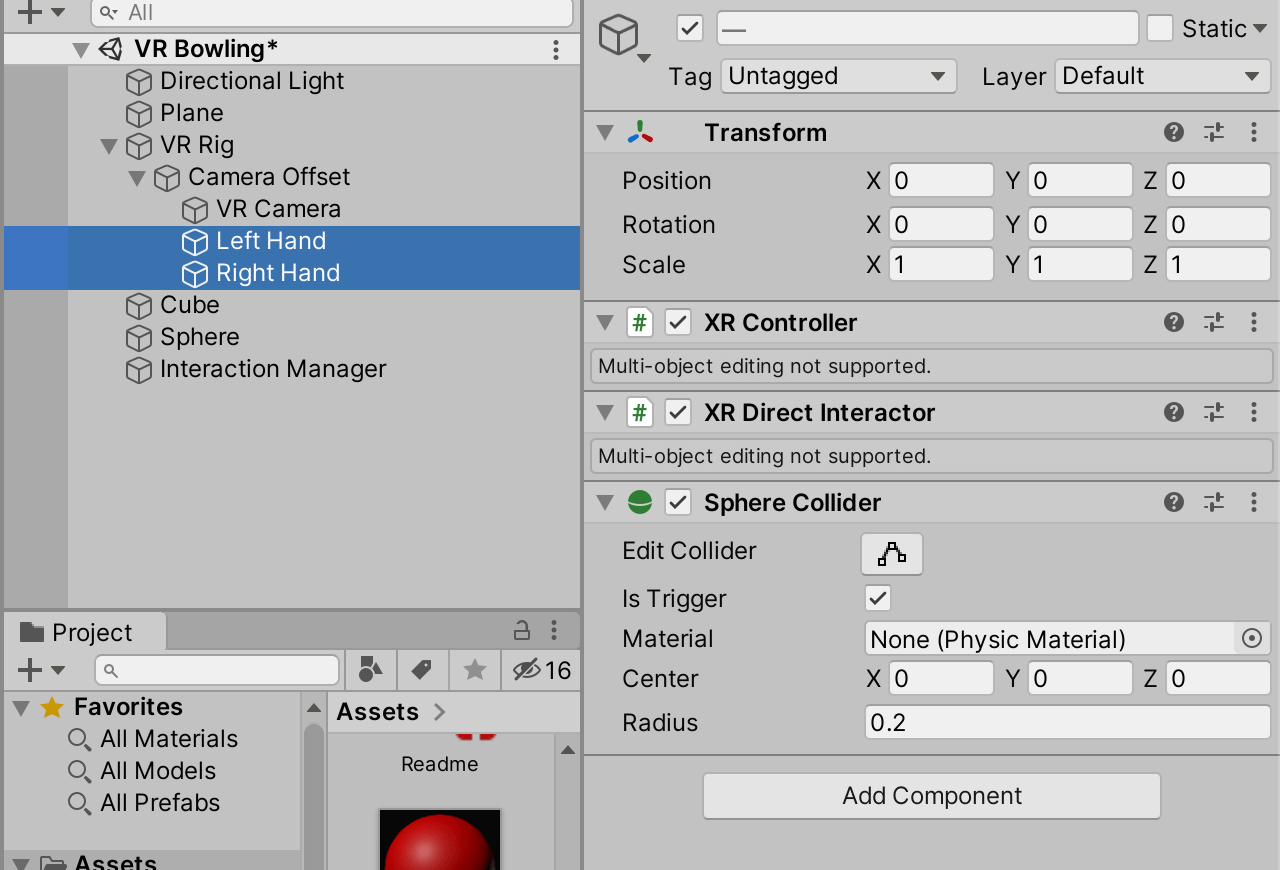
We have to assign our VR hands as Interactors so that our program knows that they can interact with objects. Hold command (Mac) or control (Windows) and select both the Left Hand and Right Hand components.
Click on Add Component in the Inspector window and search for and select XR Direct Interactor.
As well, click Add Component again and search for and select Sphere Collider and set the Radius to 0.2. Also, check the box beside Is Trigger. The Sphere Collider component tells our hands how to interact with sphere objects when our hands get close to them.
If you test your app again, you can see that you can now interact with the sphere using your hands. You can toss the sphere in the area and switch hands and other cools things.
Adjust Camera Clipping Plane

One of the issues you’ll see is that you can place the sphere close to your head and “see through” it. To fix this, we have to reduce the clipping plane of our head camera.
Click on your VR Camera layer and then in the Inspect Window, expand the Projection tab. Reduce the Clipping Plane down to 0.1.
If you play your app now, you can see that your head no longer moves through the ball!
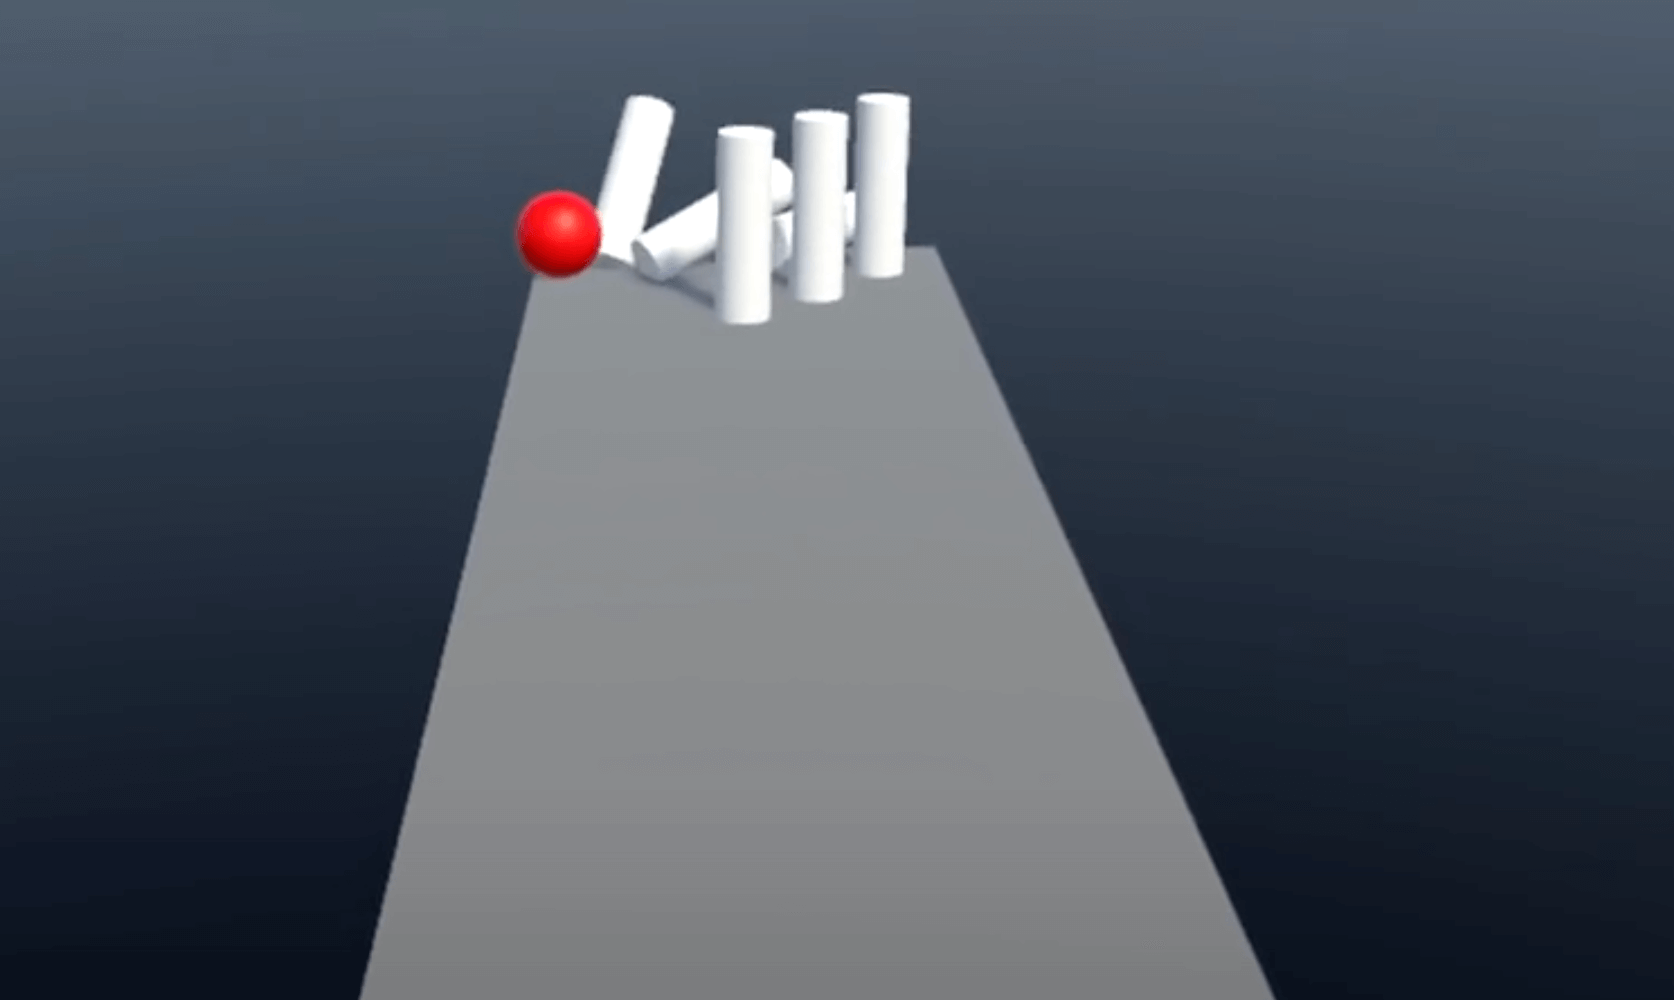
Create Bowling Alley
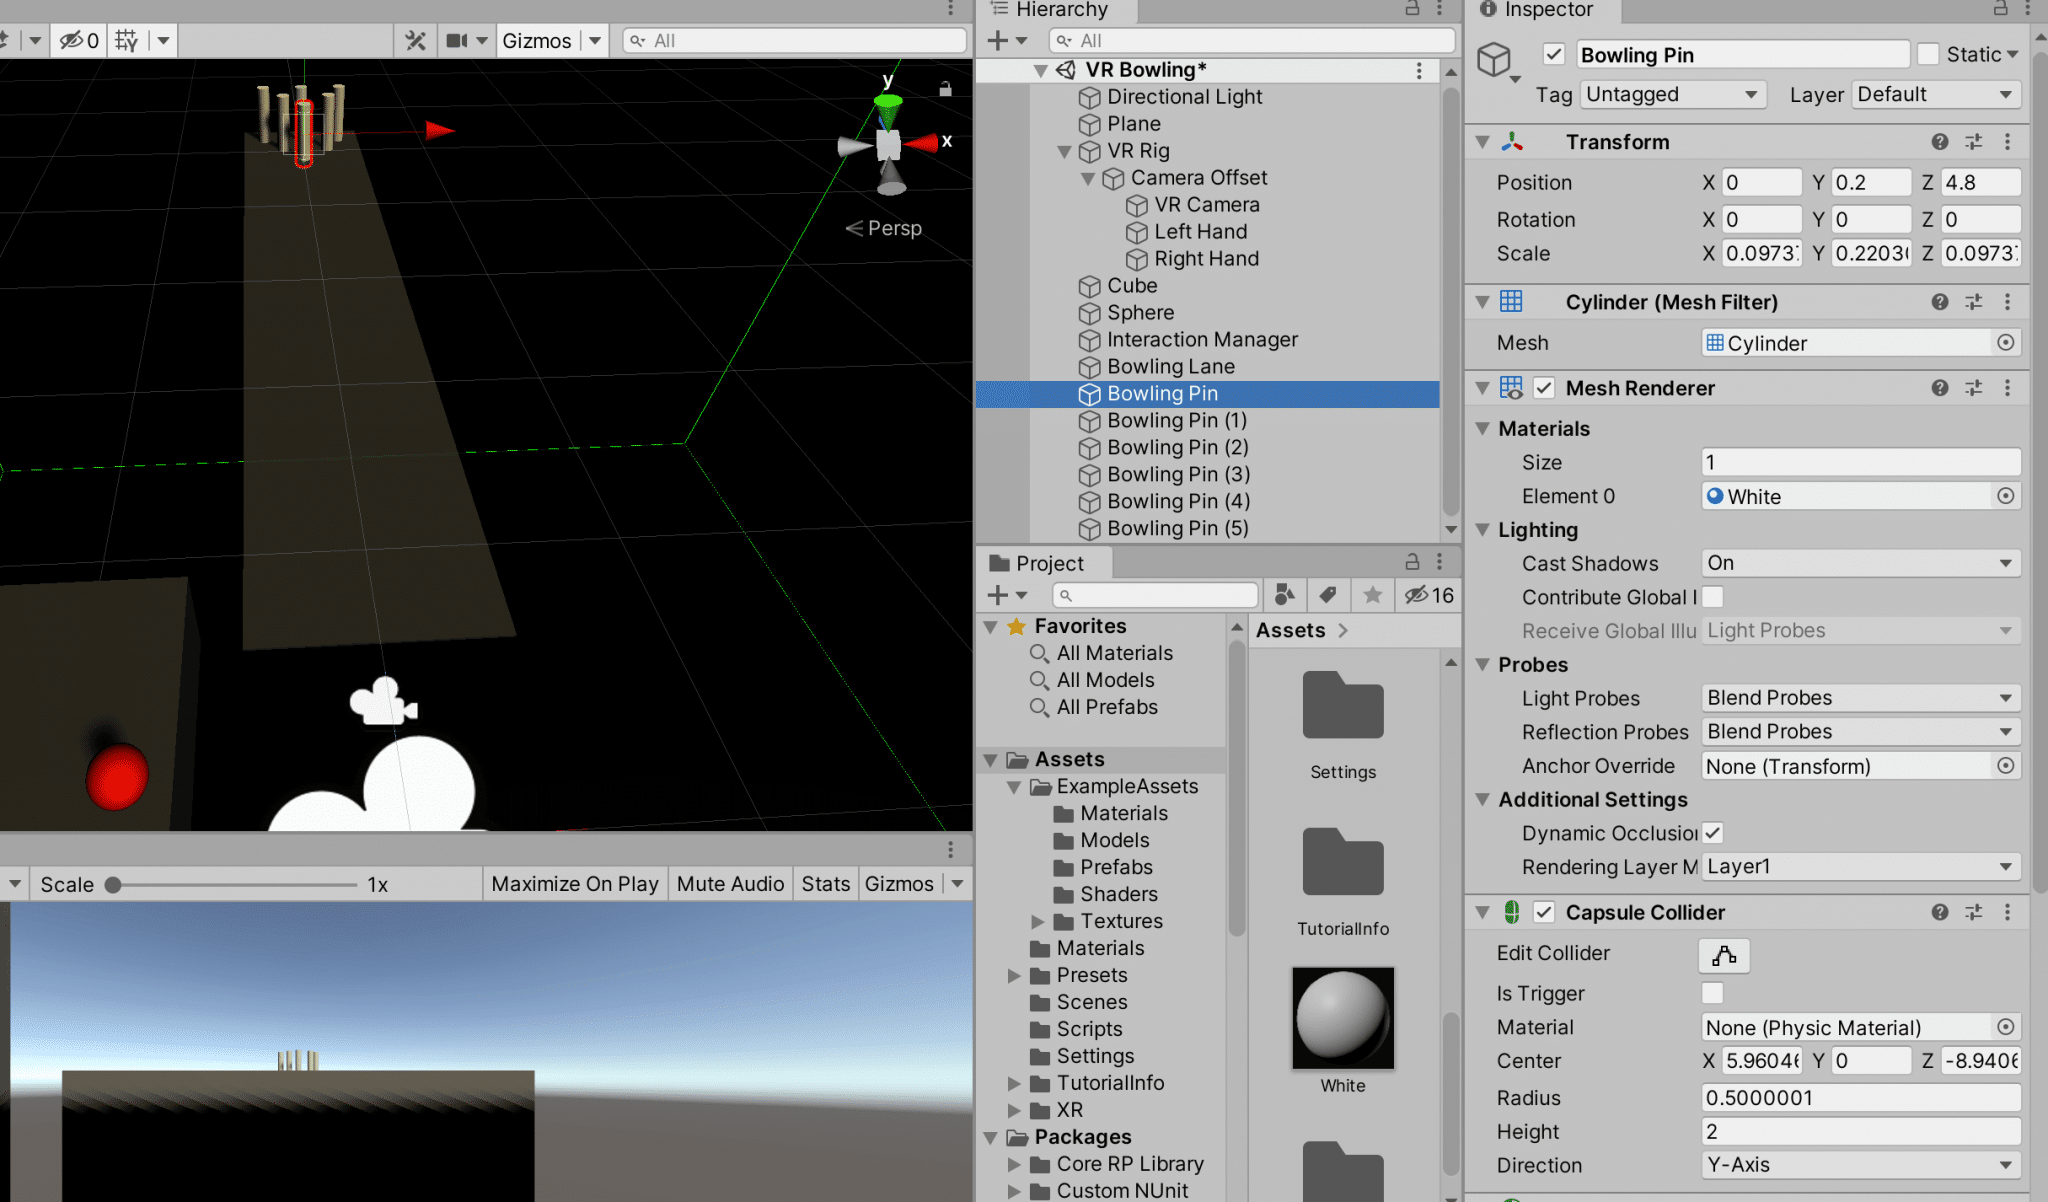
Now that you know how to create objects and assign interactable components to them, we can use the same concepts to create a bowling alley and pins!
The steps you can take are this:
1) Create a bowling lane and place it at the ground level.
2) Create a cylinder pin and place it at the end of the lane. Drag the “White” material over top of the pin to color it.
3) Add the RigidBody component to your pin.
3) Use command/control + D to duplicate the pin 4 times and place in a pyramid shape like a real bowling alley.
4) To make the bowling ball heavier, select it and increase its RigidBody’s mass to 7.
Press play and you’ll see that you now have a basic bowling prototype ready to go!
And that’s how you perform VR interaction with different objects in Unity XR. This is a key skill if you want to go after any AI Architect jobs.
See if you can complete all of the steps above on your own. If you have trouble, comment down at the bottom and we will help you out!
Check out the video instructions for this guide below and also some key concepts about this Unity tutorial.
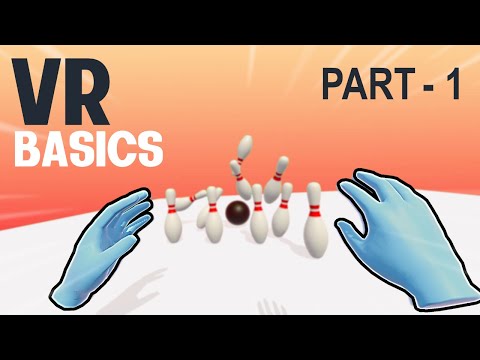
Video Tutorial
If you want to see the video tutorial for interacting with objects in VR, click on the play button below!
Underneath the video, we summarize some key concepts from this Unity tutorial.
Key Concepts In This Tutorial
RigidBody
Putting the RigidBody component under an object in Unity will apply basic physics laws to it such as weight, gravity, friction, and motion. You can adjust RigidBody components to make objects more realistic to real life. This is a very common VR interaction tool you can use to create games in Unity XR.
XR Grab Interactable
This component sets an object to be interactable by VR controllers. This class is used to assign objects in VR games tht are playable verses those that are non-playable (static). Objects that are given this component can be manipulated by the VR controller nodes.
Sphere Collider
Colliders in Unity allow different objects to interact with each other. Unity has colliders in different shapes, which set the area that can collide with other objects.
Colliders work closely with RigidBody in the VR interaction engine.
Clipping Plane
Clipping Plane is a property that adjusts the depth perception of objects relative to your camera’s field of view. In VR games, the clipping plan is used to hide objects that become too close to your headset. It tells the object when to hide itself from your view and can remove some display bugs in Unity.
You can play around with these components above to change your VR interaction and tailor your game however you want. In our next tutorial, we’ll show you how to compile and export your Unity XR game so that you can install and play it anytime you want!