This guide shows you how to install Discord on Steam Deck and use it to keep up to date with your favorite communities and updates. The whole process will only take you five minutes and I’ll teach you a few tips and tricks along the way!
The Discord Linux app we install in this guide works pretty smooth to let you chat with friends.
If you have any questions, comment below and let me know!
Switching to Desktop Mode
If you want to install Discord on Steam Deck, you first need to switch the console over to Desktop Mode. SteamOS is built around Gaming Mode, which gives you that console-like experience, but to install apps like Discord, you’ll need access to the Linux desktop environment.
Step-by-Step Guide to Accessing Steam Deck’s Desktop Mode
- Press the Steam Button located on the lower left-hand side of the device. This brings up the main menu, where you can access various system options.
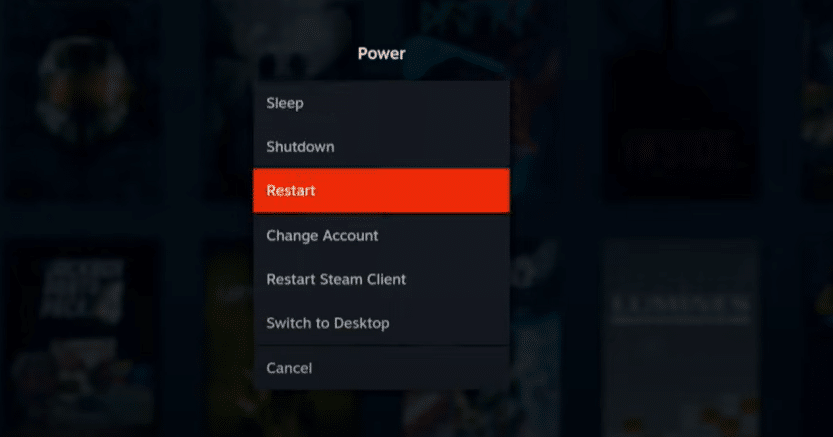
- Scroll down to the bottom of the menu and select the “Power” button option.
- Select “Switch to Desktop.” This option will remove you from the native Gaming Mode and launch the full Linux desktop. After a few seconds, you will be in desktop mode, which appears more like a traditional PC interface.
Recommended Settings Before Switching
Before making the switch to Desktop mode, here are some recommended settings to ensure a smooth transition:
- Enable Performance Overlay (Optional): This lets you monitor system performance while installing apps.
- Adjust Display Scaling: Some apps might look tiny on the Deck’s screen, so you can tweak the scaling under Display Settings if needed.
- Ensure a Stable Internet Connection: Since downloading Discord (along with other apps), you’ll want a solid Wi-Fi connection to prevent interruptions.
How to Install Discord on Steam Deck

Now that you’re in Desktop Mode, it is time to install Discord. Luckily, since the Steam Deck runs on SteamOS (a Linux-based system), installing apps using the built-in Discover app is straightforward.
Locating the Discover App in Desktop Mode
- Click on the Steam Deck’s Start Menu (Blue Bag Icon) in the screen’s bottom-left corner, similar to the Windows Start menu.
- Look for “Discover.” It’s the app store for SteamOS and has a shopping bag icon. If you don’t see it immediately, you can find it under the System category.
Search for the Discord Application
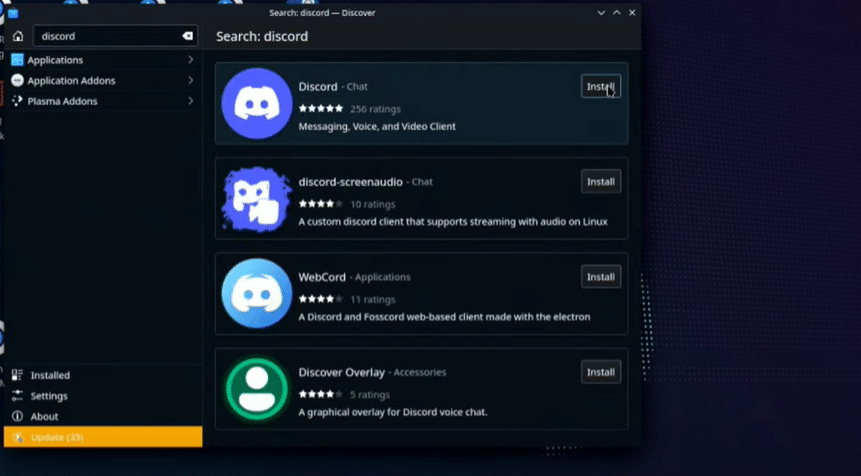
- Once Discover is open, locate the search bar in the top-left corner.
- Type “Discord” and hit Enter.
- You should see the Discord app as one of the top search results
Complete the Installation Process
- Click on the Discord app listing.
- Press the “Install” button.
- Wait for the installation to complete. Depending on your internet speed, this may take a minute or two.
Verifying a Successful Installation
Once installed, you’ll want to confirm that Discord is working properly:
- Go to the Start Menu (bottom left) and search for Discord.
- Click on the app to launch Discord.
- Sign in to your Discord account and ensure your Discord servers, voice chat, and messaging work.
How to Add Discord to Steam Library
Now that you’ve installed Discord, you’ll want a quick way to launch it in Gaming Mode without switching back to Desktop Mode every time. The best way to do this is by adding Discord to your Steam Library as a non-Steam game.
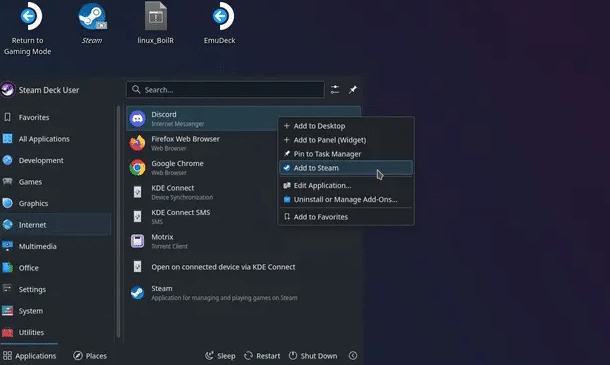
- In Desktop mode, click the Steam Deck icon in the bottom left corner.
- Head to the “Internet” section and find Discord. Right-click on the app and select “Add to Steam” to send it to Gaming Mode.
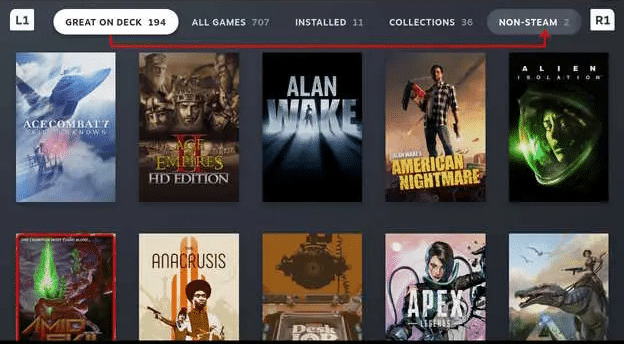
- Switch back to Gaming Mode and head into your Steam Library. Then, move over to the “Non-Steam” tab to find Discord.
- This is how you add a Non-Steam Game into your Steam library for future use on the Steam Deck.
Controller Settings for Discord on Steam Deck
Now that Discord is installed and added to your Steam Library, you’ll want to customize your Steam Deck controls to make navigation easier. The Steam Deck’s built-in trackpads and buttons work well for most tasks, but tweaking the controller settings can make your Discord experience smoother.
- Launch Discord in Gaming Mode from your Steam Library.
- Press the Steam Deck icon.
- Scroll to “Controller Settings” to view customization options for Discord.

By default, the Steam Deck treats Discord like a game, but you can improve navigation by doing the following:
- Mapping the Trackpads to Mouse Controls: This allows smoother scrolling and easier menu selection.
- Assigning Button Shortcuts: Map common actions like “Enter” (A button), “Escape” (B button), or “Push-to-Talk” (L4 or R4 back buttons).
- Adjusting Sensitivity: Fine-tune trackpad and joystick sensitivity to improve pointer movement.
- Enable Gyro for Mouse Control: You can tilt the Deck to move the cursor.
- Adjust Haptic Feedback: This lets you reduce vibrations for smoother interactions.
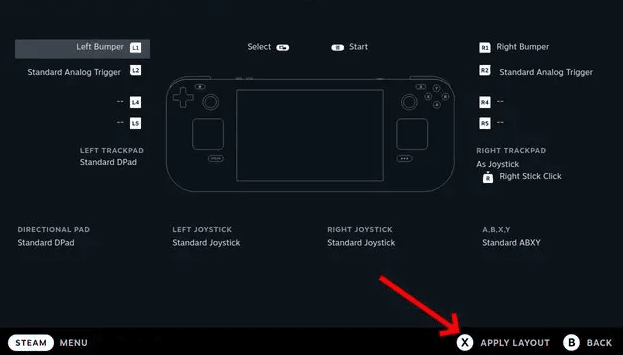
- Save Custom Layouts: Once you’ve perfected your current layout, save it for future use when you open Discord.
Exploring Community Controller Layouts
The nice thing about installing Discord on your Steam Deck is that you can explore different community layouts that others have made specifically for the Discord app. This might help you save time while finding a layout that is comfortable and easy to use.
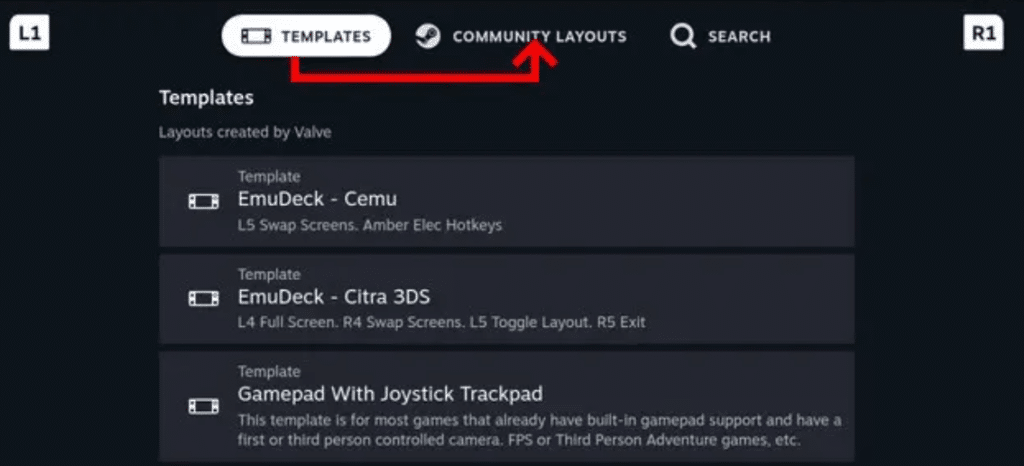
- Go to “Controller Layout” in Steam. This allows you to select or customize button mappings.
- Select “Community Layouts”. Here, you can see if others have already created optimized Discord setups.
- Test different configurations to see what feels most comfortable.
Conclusion
As you can see, installing Discord on Steam Deck is pretty straightforward. Plus, a few extra steps to adjust trackpad behavior and a few other settings can help you use the app on Steam Deck easier.
If you have any trouble, comment below and let me know!