If you’ve purchased an SSD upgrade for the Steam Deck, this tutorial guide will show you exactly how to replace the Steam Deck hard drive
Click here to read about and buy the best compatible Steam Deck SSDs.
If you need more help, comment down at the bottom of this Valve Steam Deck SSD upgrade guide and I’ll do my best to assist!
Tools Required to Access the Steam Deck Internal SSD
Before you begin, make sure that you have these tools handy in order to access the rear panel:
- 9.5 mm Philips screwdriver
- 5.8 mm Philips screwdriver
- 3.4 mm Philips screwdriver
- 3.7 mm Philips screwdriver
- A small pick or knife to pry apart the Deck’s front and back panels
- A piece of tweezers
- Aluminum foil tape if you rip the default one you’ll remove with your tweezers
- A USB-C Stick or USB-A stick with Steam Deck docking station (to reinstall Steam OS)
Other than these items, you’ll also want your new solid-state hard drive ready to go.
How to Upgrade the Steam Deck SSD (Step by Step)
Before you begin, power down your Steam Deck completely and remove your MicroSD card if you have one installed in the device.
It’s also a good idea to lessen the power draw in your device by draining the Deck’s battery down as low as possible. Release the static electricity from your body by grounding yourself and the Steam Deck.
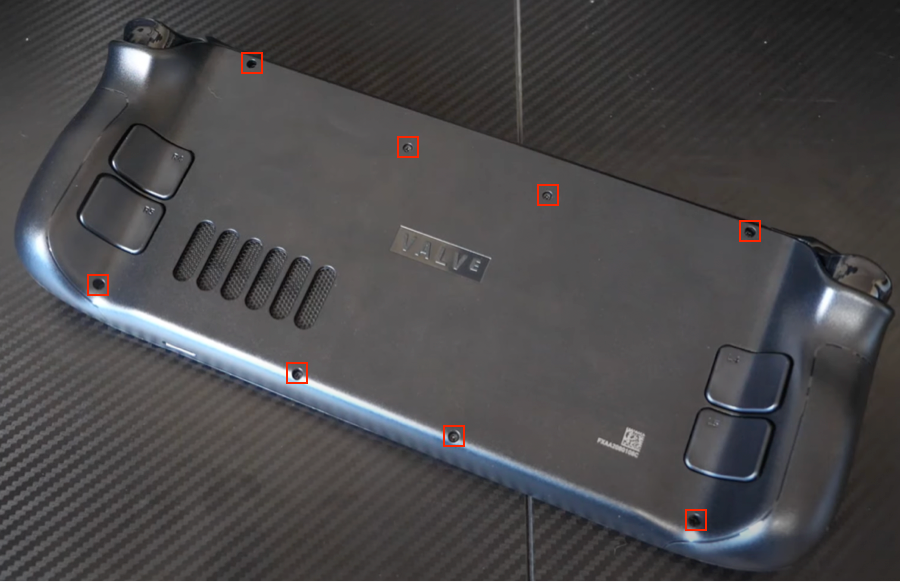
Remove Rear Cover Screws
First, you’ll need to unscrew the eight screws in the back of the panel, 4 x 9.5 mm and 4 x 5.8 mm. Put these somewhere safe and make sure you remember where they go.
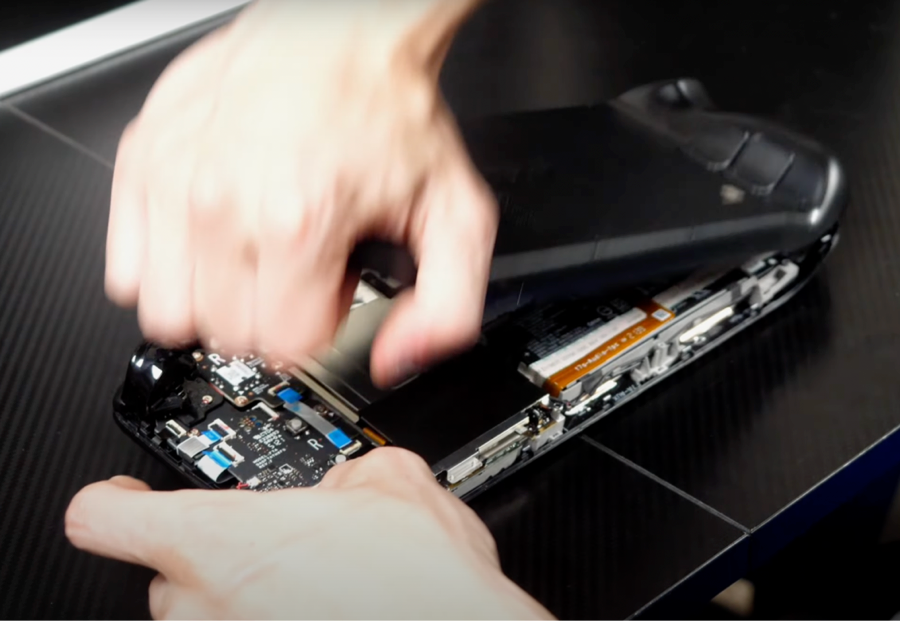
Remove the Rear Panel
Using a guitar pick, tweezers, or a plastic knife, carefully pry up the back panel from the front panel. You will hear a click when it comes loose from the locking clips that hold it together. You want to be careful not to damage the circuit board and you don’t want to use a metal pry because it can damage the case.
Once you hear your click, you can use your hands to pry open the back panel and remove it.
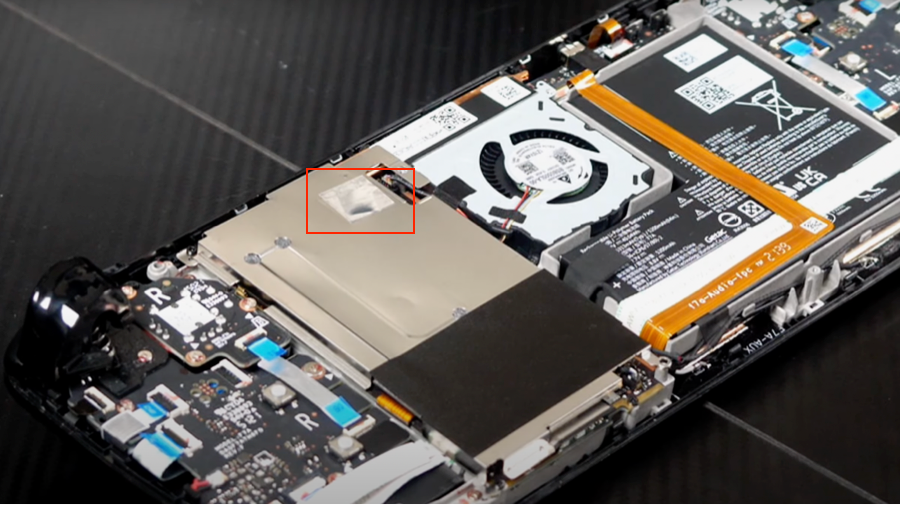
Locate Hidden Shield Screw
At the bottom of the Deck is a piece of aluminum tape covering a hidden screw. Use a piece of tweezers to remove this tape.
If you are careful, you can reuse this tape later. If you aren’t, you’ll want to replace it with your own piece.
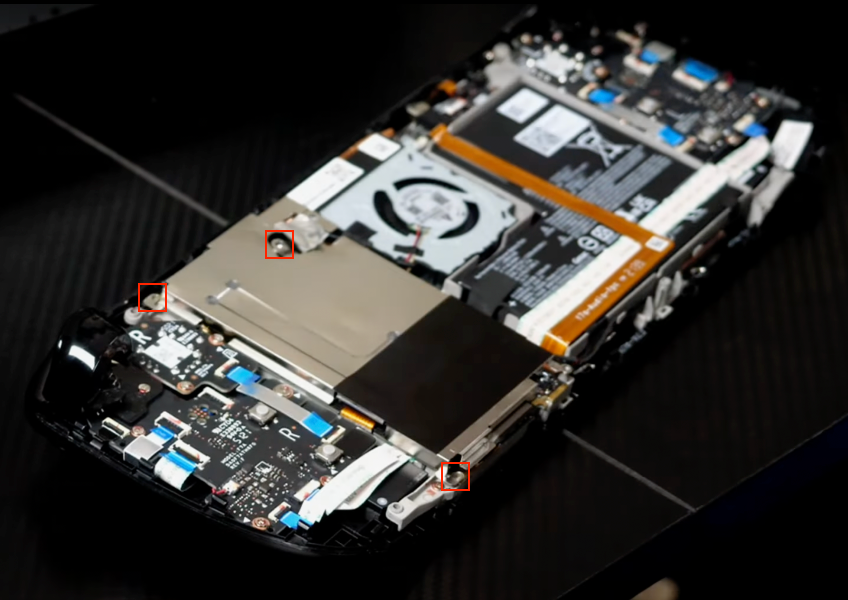
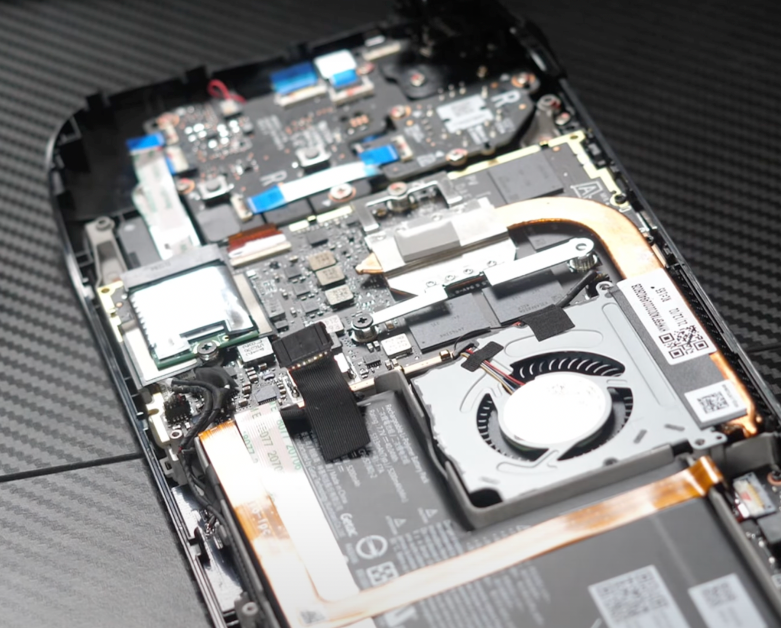
Remove Board Shield
Next, you need to remove the heat shield which is a metal plate that covers up the internal storage. You’ll remove the one 3.4 mm screw that you just uncovered and two 3.7 mm screws on the top left and bottom left corners of the shield.
When you are done, carefully remove the shield and set it aside.
Disconnect the Battery
Grip the battery ribbon cable with both hands and evenly pull it away to disconnect the battery from the motherboard. After you do this, click the power button a few times to dissipate any remaining voltage in your components.
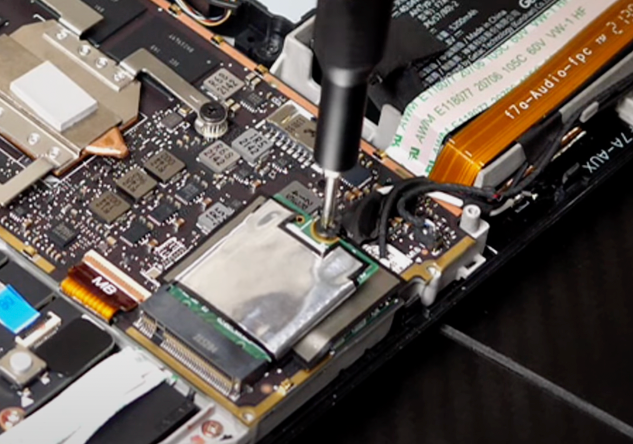
Remove the Solid-State Drive
Finally, remove the default SSD by unscrewing the single 3.4 mm screw holding it in place. Once the screw is removed, your Deck SSD will pop up into a 30 degree angle. You can grip the onboard storage with two fingers and pull it straight back on the same angle to remove it.
Remove ESD Shielding
Electrostatic Discharge Shielding is wrapped around your SSD to make sure that static electricity stays away from the drive. Use your tweezers to remove this shielding. You will install it back in the same way on your new replacement SSD drive.
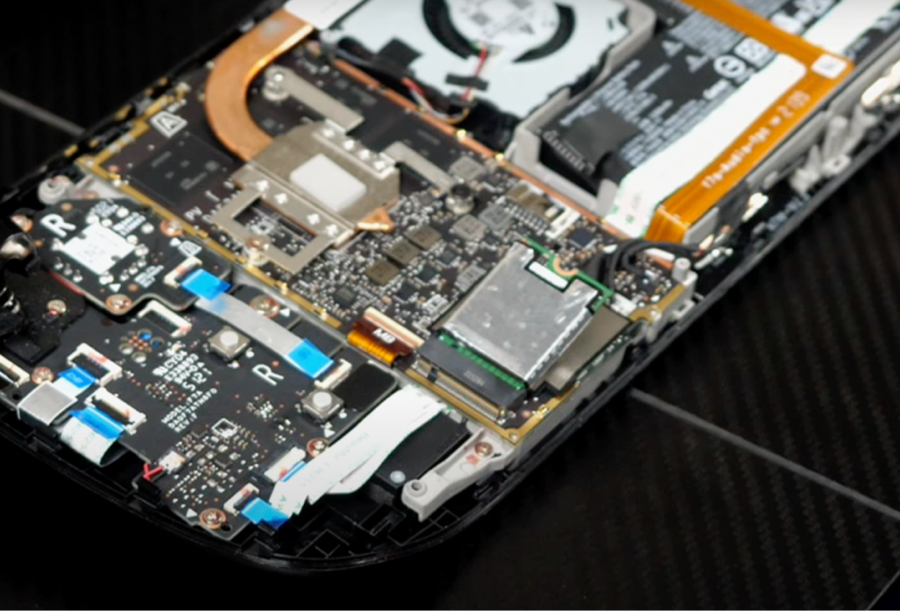
Install Your New Hard Drive
Install your new Steam deck SSD by sliding it back into the slot on the same angle as you removed the other one. Push it in until you hear a slight click. Then, press the drive down and install the 3.4 mm screw you removed before.
Put Back Together Your Steam Deck
Following the above instructions in reverse, you have to put your Deck back together:
- Reconnect the battery ribbon cable.
- Reinstall the board shield (three screws)
- Replace your aluminum tape over the hidden screw
- Put the rear cover back on
- Screw the rear and front covers together (eight screws)
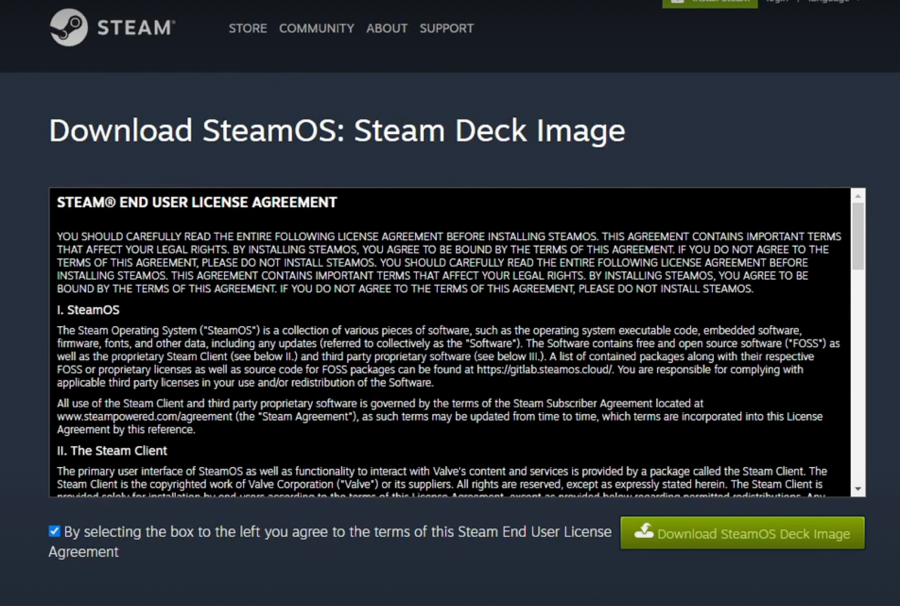
Download Steam OS and Rufus
Next, you’ll need to download the Steam OS firmware and operating system from this official Steam page.
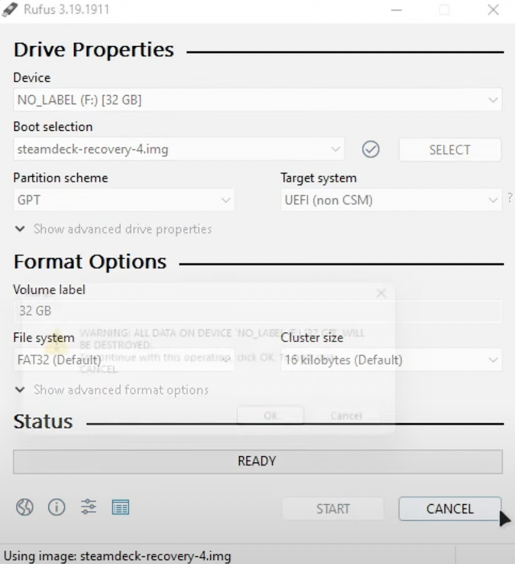
Install Rufus and Create Your Bootable Drive
At the same time, you’ll want to download and install Rufus to your laptop.
Rufus will allow you to create a bootable drive out of your Steam operating system. You will use this drive to reinstall the OS. Plug a USB stick into your computer and use Rufus to turn it into a bootable drive.
Re Image Steam Deck
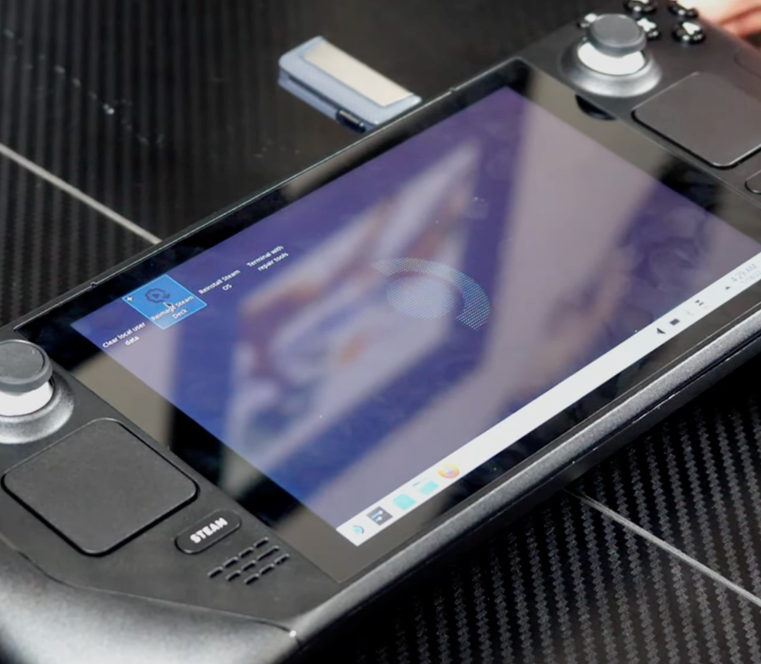
Plug your USB drive into your Deck. Press power and the minus volume button at the same time. When the Valve logo appears on the screen, let go of the power button until the Boot manager screen opens up and then take your finger off the volume down button.
From the boot menu, click on your USB drive and follow the instructions on your screen to reinstall Steam OS. When your Steam Deck reboots, it should look like you’ve just received it from factory for the first time.
And that’s it!
Steam Deck SSD Upgrade Lessons Learned
Hardware Insights
The right tools make all the difference! Here is what I learned:
| Tool | Recommendation |
|---|---|
| Screwdriver | Use a Phillips #1, not #0 |
| Prying tool | A guitar pick works great |
| Organization | Use the Steam Deck case to sort screws |
- Screwdriver Size Matters: Despite some suggestions, a Phillips #1 screwdriver is the way to go. It provides better grip and reduces the risk of stripping screws, especially those with loctite.
- Clever Prying: A guitar pick is an excellent tool for safely prying open the plastic clips without damaging the case.
- Stay Organized: Use the Steam Deck case itself as an organizational tool. Place screws on the open half of the case, matching their positions to where they came from on the device.
Handling Delicate Components
- Power Connector Tip: Look for the fabric strap tucked away near the battery. Use tweezers to gently lift it, making disconnection easier and safer.
- EMC Shield: Don’t be too gentle when sliding the tinfoil-like shield onto the new SSD. It may require a bit more force than you’d expect, but it will fit.
Software Surprises
The hardware upgrade went smoothly, but the software setup threw some curveballs:
- Logo Freeze: The device may get stuck on the logo screen. Don’t panic – a few restarts might be necessary.
- Unresponsive Controls: Initially, the buttons and controls may not work. This is normal, as the recovery image doesn’t include all drivers. Use the touchscreen for setup.
- Update Hiccups: The initial Steam update might fail. If this happens:
- Go back to the Wi-Fi screen
- Return to the update screen
- Repeat if necessary
Be prepared for a potentially time-consuming software setup process. The hardware upgrade is just the beginning – getting everything running smoothly might take longer than expected.
Reasons to Perform a Steam Deck SSD Upgrade
Why would you ever want to open up your Steam Deck and replace the internal hard drive with something else? Some of the top reasons are:
- Your existing Steam Deck hard drive is too small.
- The internal hard drive in the Deck has stopped working.
A lot of users have bought the base size of Deck and found that you need more room once you install larger games from your Steam library onto it. You can install a card into the high speed MicroSD slot, but larger main storage space will give you faster read and write speeds.
Whatever the reason is, all of the options above will work great.
If you want to find your own solid-state drive for the steam Deck, there are a few requirements you. must look for. I’ll go over those next!
Steam Deck SSD Requirements
M.2 Connection Type
The M.2 connection type is a specification for internally mounted expansion cards. It supports NVMe as the logical device interface for M.2 PCI Express SSDs. It is required for your Steam Deck SSD.
2230 Physical Size
The 2230 physical size is another important requirement for a Steam Deck SSD upgrade. In deciding to upgrade, the physical size of the SSD makes a huge difference in cost, capability, and compatibility.
The standard physical size for an SSD going into the Deck is M.2 2230 (22mm x 30mm).
Make sure that the SSD you buy is the 2230 size type and not 2242 or any other option.
Single-sided Memory Modules
Memory modules are either double-sided or single-sided memory modules, but double-sided won’t fit into the Steam Deck. For single-sided memory, all the memory is accessed at once by the Deck. It is treated as a single “bank” of memory.
Double-sided memory modules are too high to fit into the Steam Deck enclosure.
NVMe Protocol (optional)
This is an optional requirement because the Steam Deck supports eMMC and NVMe, but the latter is superior, so we recommend you go to that. The NVMe is a new storage access protocol for solid-state devices that offers fast response times and the highest throughput.
The Steam Deck NVMe SSD standard is more future-proof.
Frequently Asked Questions (FAQs)
Can you replace the Steam Deck storage?
Yes, the storage capacity and SSD can be upgraded in the Steam Deck. You just want to make sure that you purchase a compatible M2.2230 solid-state drive which will fit into the existing pin connection.
What do you need to upgrade the Steam Deck with a new SSD?
In order to replace the hard drive in the Steam Deck, you need a collection of Philips screwdrivers ranging from 3.4 mm up to 9.5 mm and some tweezers. It is recommended that you also have a guitar pick or small knife and some aluminum foil tape handy.
Conclusion
As you can see, it’s not all that update to update the SSD on the Steam Deck to a new drive. As long as you buy a drive that is compatible, the whole process can be done in about 20 minutes.
If this is your first time opening up electronics and replacing or upgrading components, you will just want to make sure that you work slow.
If you have any more questions, comment below and I’ll help you out!