The tutorial below will show you how to install Steam VR with step-by-step pictures for each step. It’s intended to help you get started playing PC VR games as quick as possible.
This guide is for:
- New VR headset owners who want to set things up properly before they start playing on their head-mounted display (HMD)
- People interested in VR who want to see how quick it is to get set up and playing
- VR players who need to reinstall Steam VR on their computer
If you have any questions about installing Steam VR and getting started, comment at the bottom of this guide.
Also, check out our comparison guide for the Steam VR vs Oculus vs Viveport platforms
- How to Install Steam VR Step-by-Step
- Go to the Steam Website
- Click on the Green Install Steam Button
- Click on the Blue Install Steam Button
- Run Installer EXE
- Allow App to Make Changes
- Welcome to Steam Setup
- Select Language
- Choose Your Install Folder
- Complete Steam Install
- Create a New Account or Login to Existing
- Enter In Account Credentials
- Complete Computer Authorization
- Enter Code
- Computer Authorization Complete
- Visit the Steam VR Website
- Do You Have Steam?
- Switch Apps
- Install Steam VR
- Steam VR Queued
- Verify Steam VR Download
- Play Steam VR
- Allow Steam VR to Make Changes
- Steam VR First-Time Setup
- Installation Complete
- What is Steam?
- What is Steam VR?
- Minimum System Requirements for Steam VR
- Steam VR Settings
How to Install Steam VR Step-by-Step
The step-by-step instructions below will show you how to install Steam VR on your computer and get started playing VR games on your HMD.
Go to the Steam Website
First, click here to go to the official Steam website.

Click on the Green Install Steam Button
At the top right of the page, click on the Install Steam green button to get started.

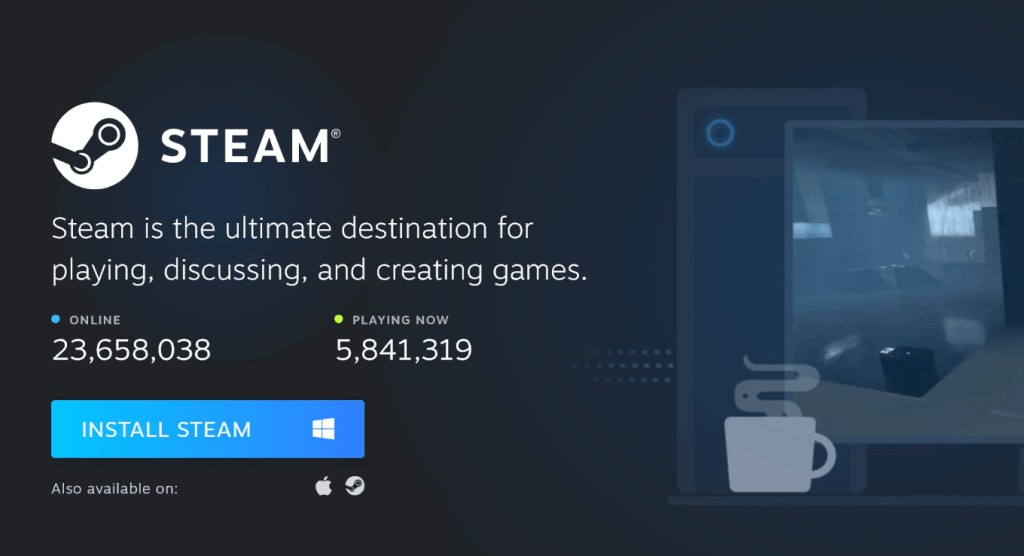
Click on the Blue Install Steam Button
Next, click on the blue Install Steam button. Your operating system will be chosen automatically as the default option, but you can click the smaller icons if this is wrong.
Run Installer EXE
Windows will ask you if you want to save or run the EXE install file. Click on Run and wait for the installer to download.

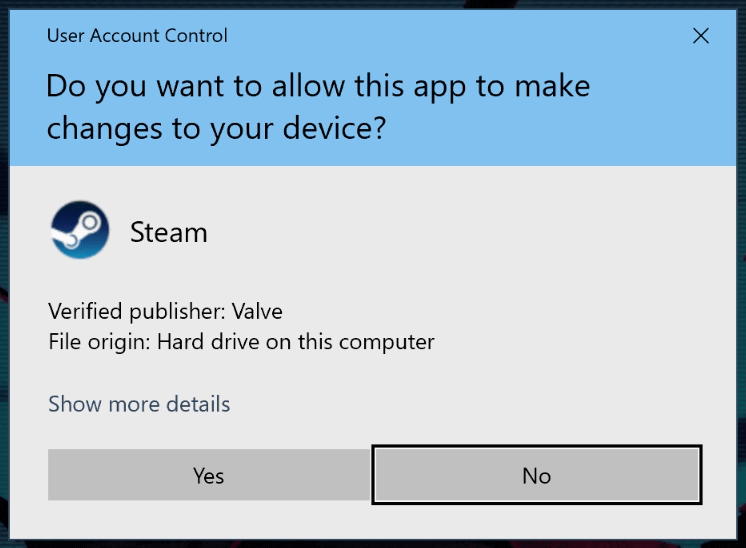
Allow App to Make Changes
When prompted, click the Yes button if you are asked to allow the application to change your computer.
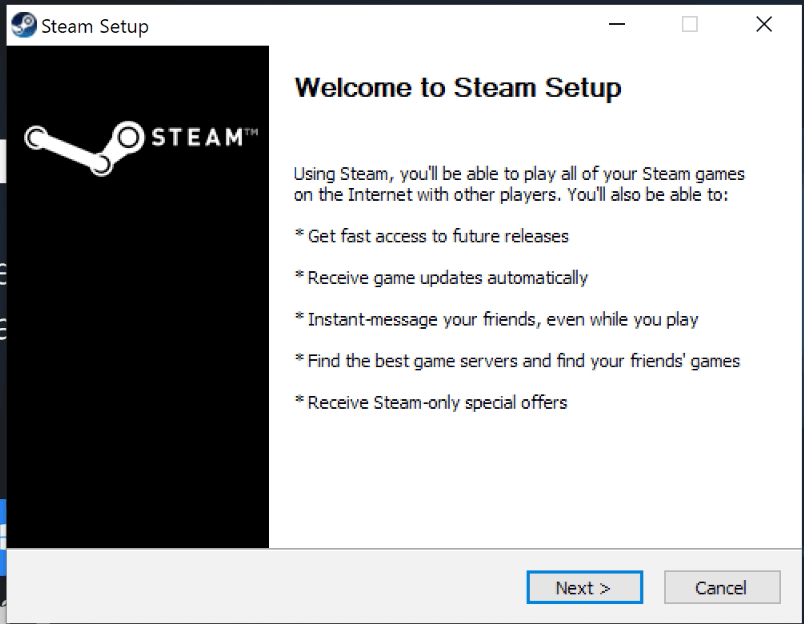
Welcome to Steam Setup
At the welcome screen, click the Next button.
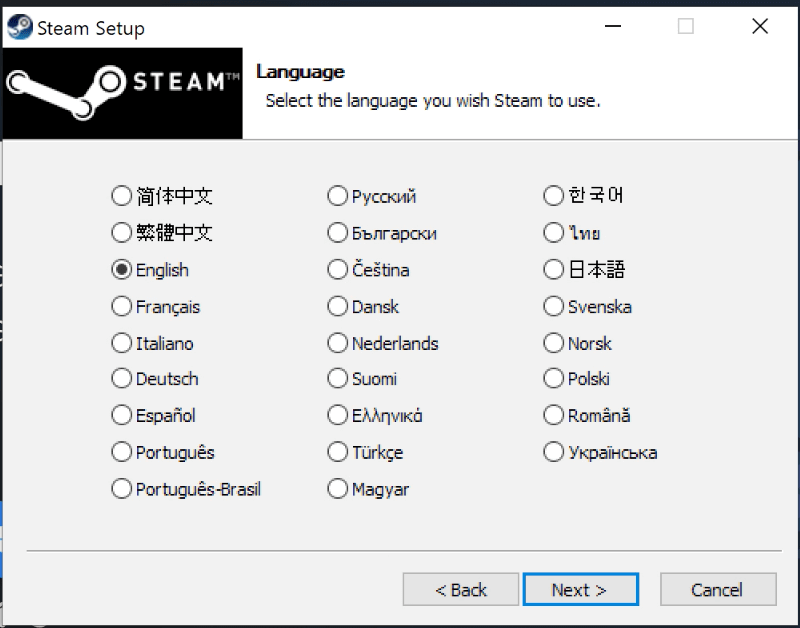
Select Language
Choose your default language for Steam and then click on Next.
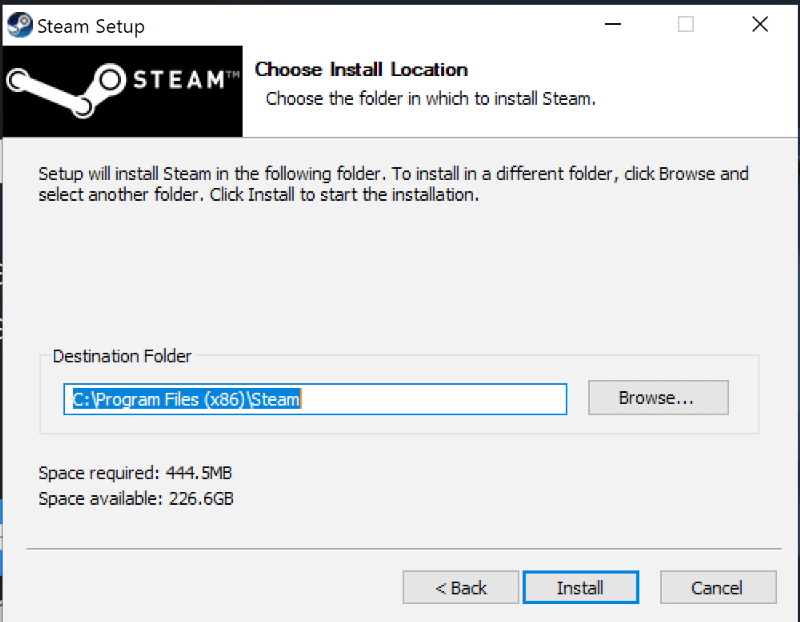
Choose Your Install Folder
Verify your install folder (you should not have to change this) and click Install.
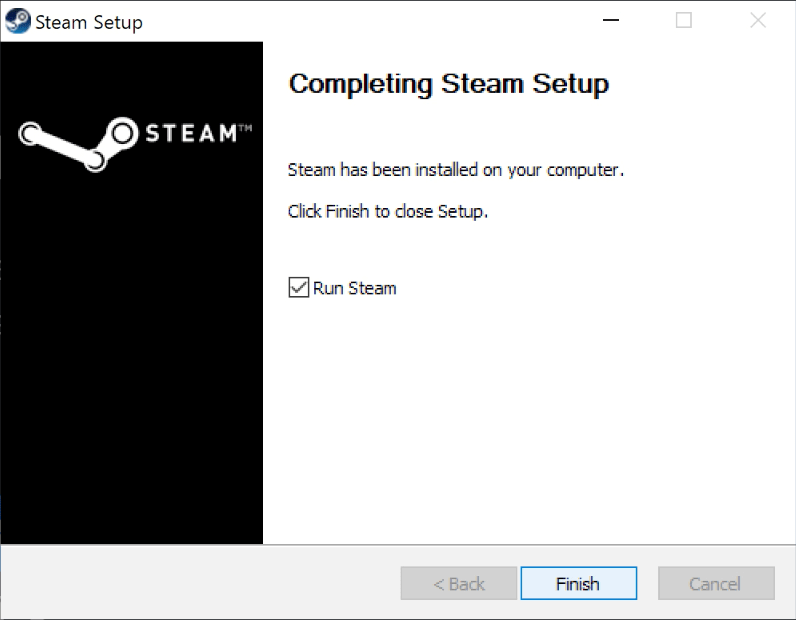
Complete Steam Install
Let Steam install on your computer. Select Run Steam when you are done and then click on Finish.
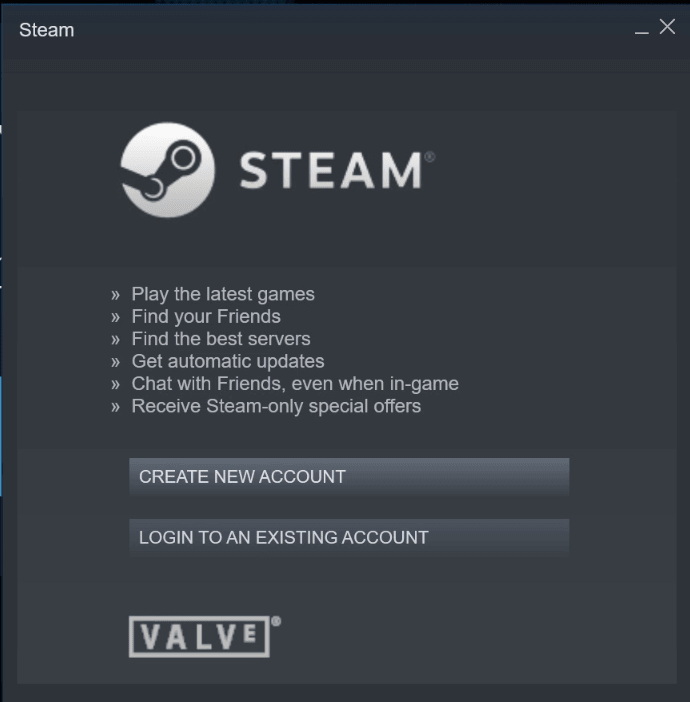
Create a New Account or Login to Existing
You will be asked to create a new account or login to an existing one when the app launches. If you have to create a new Steam account, click that option and follow through the prompts. Then you can come back to this step-by-step tutorial.
If you have an account already, click on LOGIN TO AN EXISTING ACCOUNT.
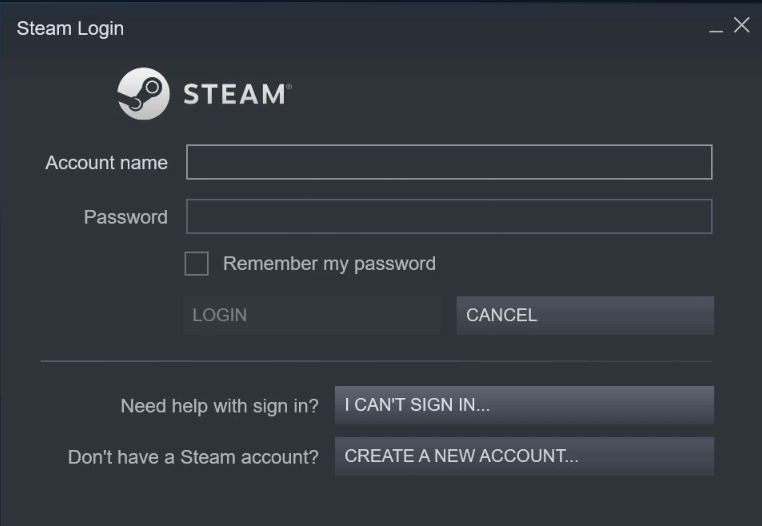
Enter In Account Credentials
Enter in your Account name and Password and then click on Login.
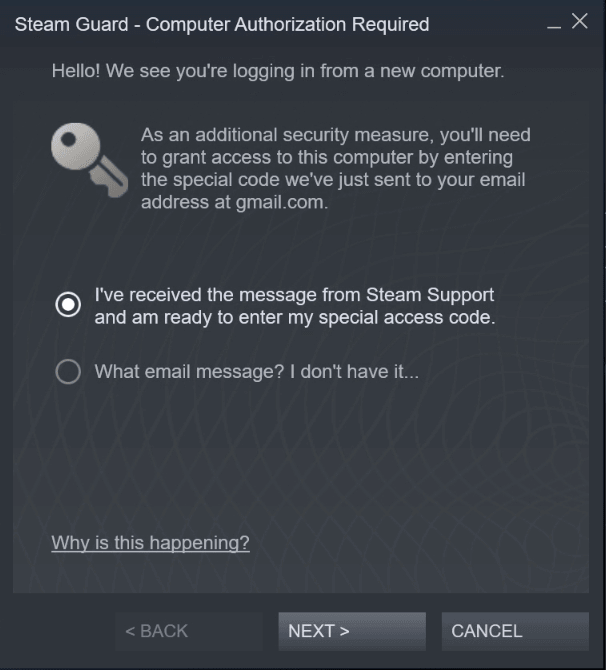
Complete Computer Authorization
If you are logging in from a new computer, you must authorize it for use. Steam will send you a code to your email account. On the authorization screen, select I’ve received the Steam Support message and then click Next.
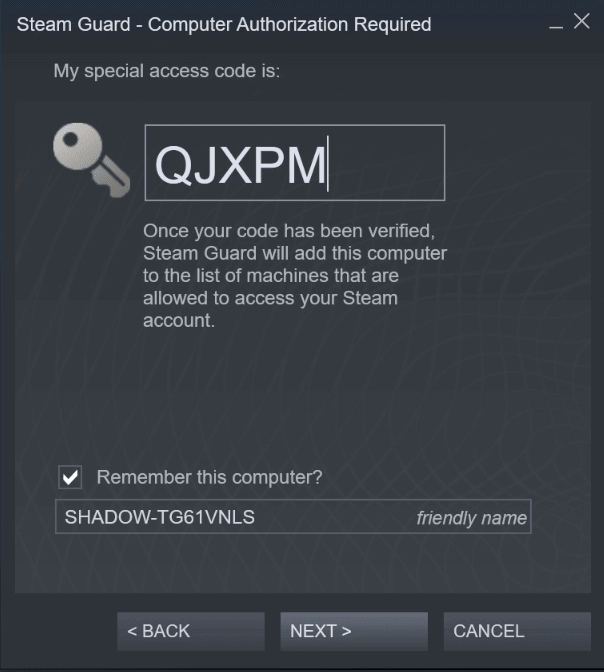
Enter Code
Enter the code you received in your email and then click on Next.
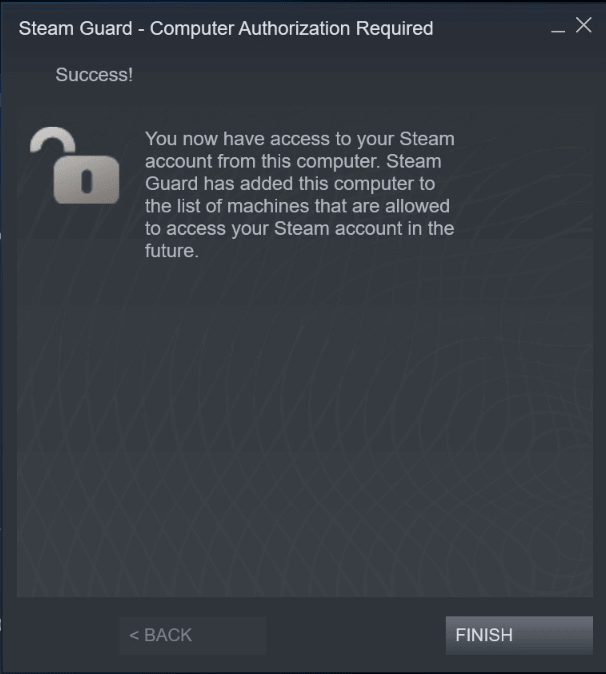
Computer Authorization Complete
Your computer now has access to your account credentials. Click on Finish to close this Window. This is the end of the process of installing Steam on your computer. Now we have to install VR add-on package before you can use your headset on your PC.
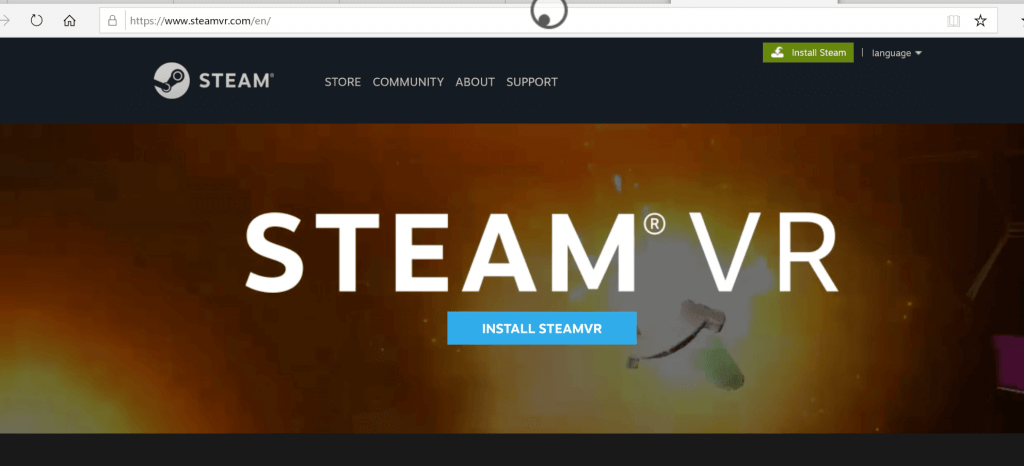
Visit the Steam VR Website
Click here to go to the Steam VR website. Click on Install Steam VR.
Do You Have Steam?
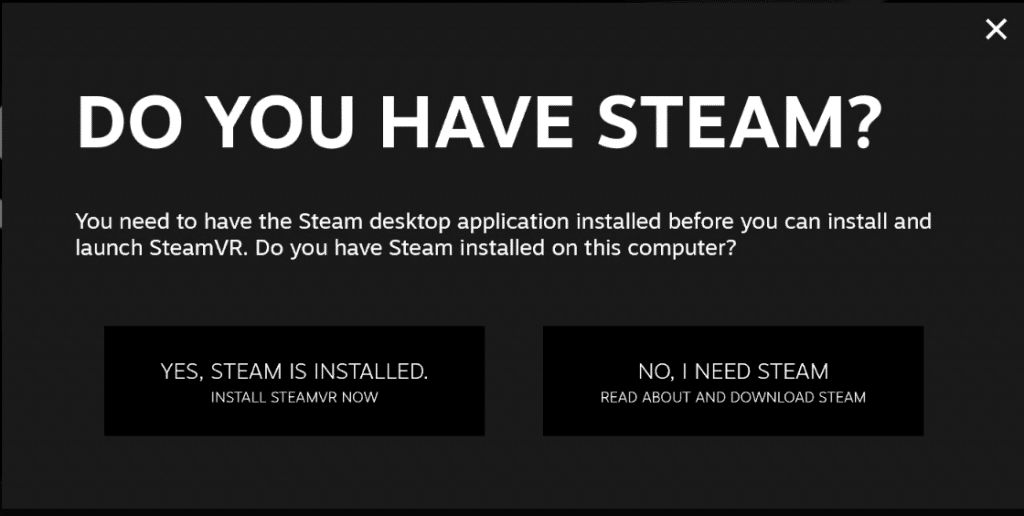
The next page will ask you if you already have Steam installed on your computer. Since we just completed that process, click on Yes, Steam is Installed.
Switch Apps
Windows will now ask you to switch over to the Client Bootstrapper. The Bootstrapper is built-in software that will help you install Steam VR over top of the main platform. It will allow you to switch between PC and VR modes freely. Click on Yes to continue.

Install Steam VR
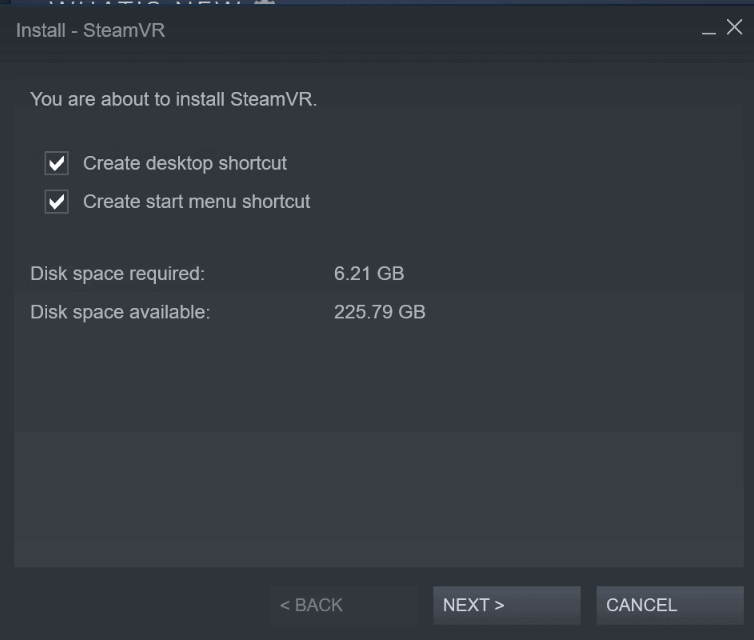
The first prompt to install Steam VR will ask you to verify that you have the disk space required. Click on Next.
Steam VR Queued
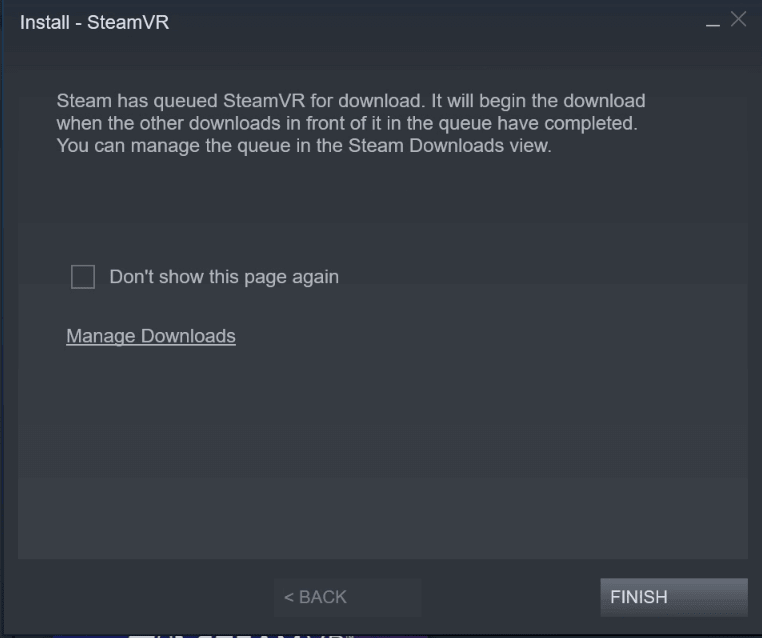
The VR package will be queued for download. You can click on Finish to close this window.
Verify Steam VR Download
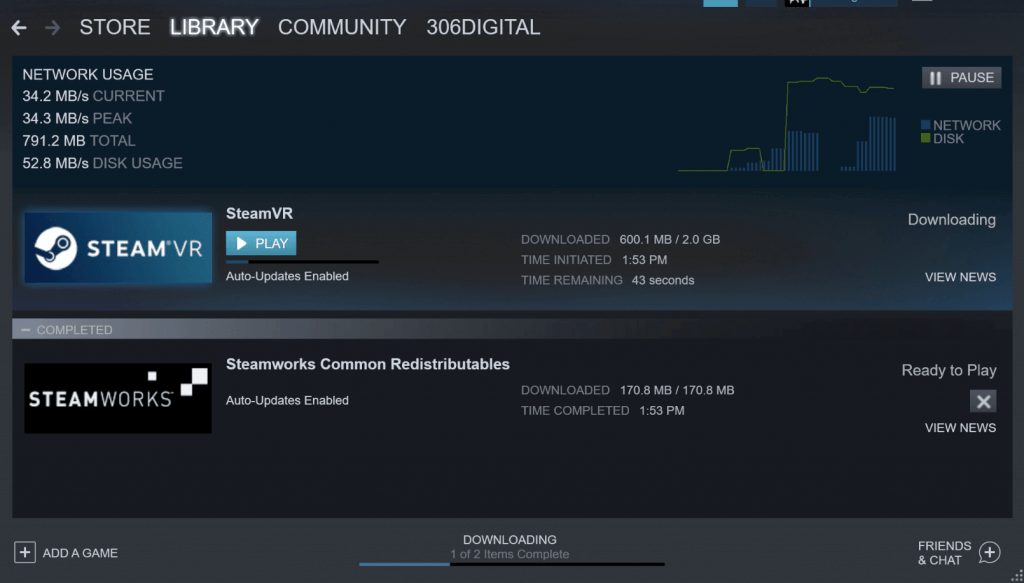
You can verify that Steam VR is downloading by visiting your Library tab. You will see the app in there, either queued or downloading.
Play Steam VR
When your computer downloads Steam VR, click the blue Play button.

Allow Steam VR to Make Changes
Windows will ask you if you want to allow the application to change your computer. Click on Yes.
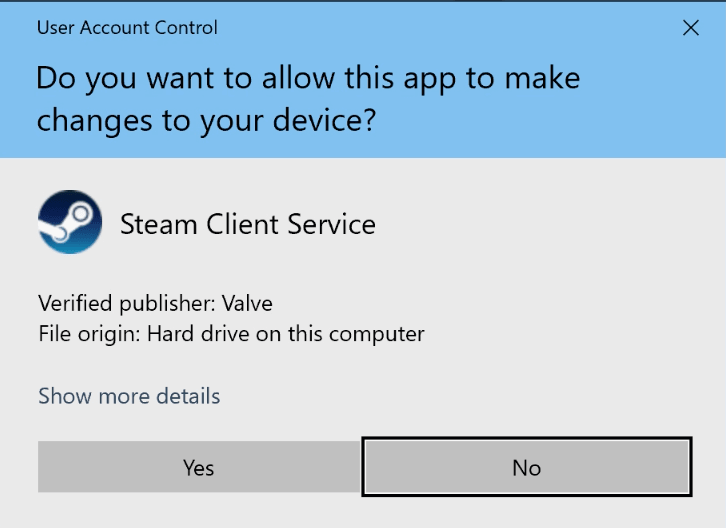
Steam VR First-Time Setup
Steam VR will run through its first-time setup process. You can watch the progress window or leave it be.
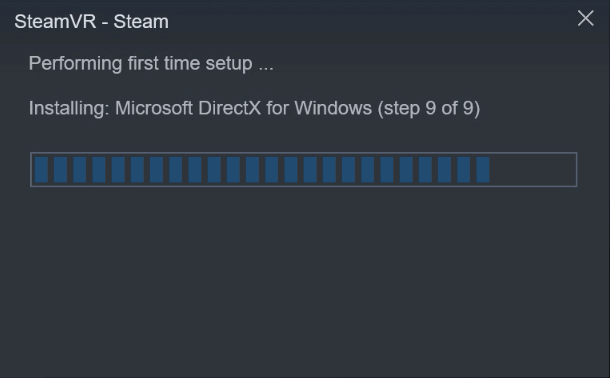
Installation Complete
When Steam VR is being installed, it will show up on the bottom of your regular Steam window. The program will ask you to plug in your VR headset if you haven’t yet.
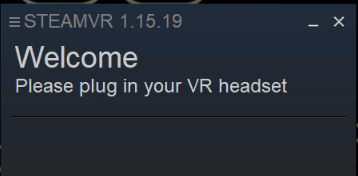
When you plug in your headset, Steam will confirm that everything is connected. VR games will now instantly launch within the headset for you to play!
Click on the hamburger menu (3 horizontal lines) to open the VR settings option. This will allow you to configure your room boundary, VR view, and other software settings.
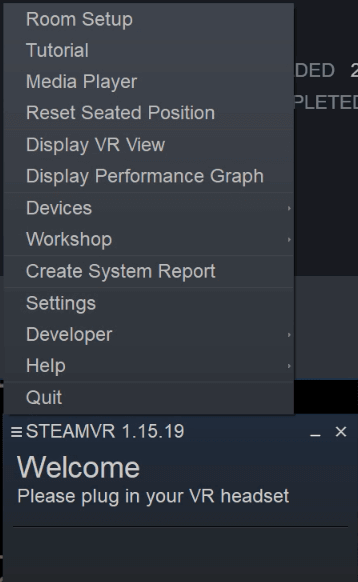
Congratulations! You have now completed the process of installing Steam VR on your computer. You can now go and play PC VR games you have downloaded to your account!
If you are new to this, we’ve outlined the regular platform and the VR add-on in a little more detail below.
What is Steam?
Steam is the largest gaming platform and distribution network in the world. Similar to the app stores by Apple and Google, it allows game developers to distribute their games easily to users. It also provides features for automatic game updates and other developer-friendly analytics and distribution tools.
The world’s biggest PC games are available on the platform. Users can leave reviews and ratings for everything they buy. In addition, game add-ons and modifications are also supported and found in the app store.
What is Steam VR?
Steam VR is a snap-on application that enables the connection of VR headsets. It includes configuration software that maps VR hardware, controllers, and tracking.
Steam VR has both generic configuration for VR and direct support for all major VR headset HMDs:
- Valve Index
- Oculus Rift S
- HTC Vive (Pro, XR Elite, etc)
- Meta Quest (through Oculus Link)
Minimum System Requirements for Steam VR
In order to run Steam VR, make sure you computer has these specs or better:
- OS: Windows 7 SP1, Windows 8.1 or later, Windows 10
- Processor: Intel Core i5-4590/AMD FX 8350 equivalent or better
- Memory: 4 GB RAM
- Graphics: NVIDIA GeForce GTX 970, AMD Radeon R9 290 equivalent or better (recommended GTX 1060 or AMD Radeon 480)
- Network: Broadband Internet connection
- VR Support: SteamVR
- Additional Notes: 1x USB 2.0 or newer, HDMI 1.4, DisplayPort 1.2 or newer
Steam VR Settings
Once you have successfully installed SteamVR, you should understand the various settings to get the best possible VR experience. When you open SteamVR, click on the hamburger menu (3 horizontal lines) to access these options:
General: This section allows you to opt in or out of the SteamVR beta, check for updates, and choose your startup and shutdown preferences. You can also toggle notifications, adjust performance settings, and enable supersampling here.
Audio: The Audio settings are where you can manage your input and output devices for VR. For instance, you may want your audio to switch to your VR headset when SteamVR is active and switch back to your regular speakers when you exit.
Video: Here, you can adjust the resolution of your VR headset. This setting can greatly impact performance, so you may need to tweak it depending on your system’s capabilities. You can also enable per-application video settings, allowing you to customize resolution settings for each game individually.
USB: The USB section displays the status of your USB devices. It can be useful for troubleshooting issues with VR hardware.
Camera: If your VR headset has a built-in camera (like the HTC Vive), you can enable it here. This can help see your real-world environment without removing your headset.
Chaperone: The Chaperone system warns you if you’re about to bump into something in the real world. Here, you can adjust the style and colors of your boundary and set the boundary’s transparency and activation distance.
Controllers: In this section, you can adjust settings for your VR controllers, including button mappings, calibration, and more. You can also view the battery levels of your controllers.
Bluetooth: If your VR system uses Bluetooth (like the Vive’s tracking base stations), you can manage those devices here.
As you saw above, you install Steam VR alongside the regular store to enable VR mode and capabilities. The whole process only takes five or ten minutes, and then you are good to play.
If you have any other questions, make sure to comment below!

![How to Install Steam VR on a VR Headset [Tutorial] how to install steam vr tutorial](https://arvrtips.com/wp-content/uploads/2021/02/how-to-install-steam-vr-tutorial-300x225.jpg)
