Shadow is a remote gaming PC service that gives you a virtual PC that can run all of the latest games. In this guide, we’ll show you how to setup Shadow PC with the Meta Quest so that you can have a fully-usable gaming PC for virtual reality games.
This guide has been updated for 2024 to cover changes in Shadow PC’s services! Connecting to your Shadow cloud PC from the Meta Quest is now easier.
With Shadow PC, you pay a monthly fee for the service. This way, you don’t have to spend hundreds of dollars on a pre-made full gaming PC. Or money building your own VR-ready PC. It’s a revolutionary new service that has gathered a lot of attention.
With a Meta Quest and the Virtual Desktop application, you can play all PCVR games on your Quest VR headset.
What is Shadow PC?

Shadow PC is a remote gaming PC service that gives you virtual access to a full computer setup in the cloud. The specs of the PC are equivalent to a high-end gaming PC.
Shadow is a popular option for people to get a gaming PC without buying all of the components.
Specifically with the Meta Quest, users can use Virtual Desktop to stream PC VR games remotely to their Quest headset. With our Virtual Desktop setup guide, you can play games with minimal latency and it will feel just like you have a PC in your home.
Features
Shadow PC comes with a ton of really nice features that are catered for virtual reality game players:
- Support for Meta Quest and SteamVR: Shadow PC supports Meta Quest 1 or 2 headsets and allows users to run SteamVR games, providing a wireless and cloud-powered VR experience at a lower cost.
- Revamped Subscription Plans: Shadow PC offers three subscription plans to suit different performance needs and budgets. Users can choose from Discovery, Boost, and Power plans, each with varying GPU, CPU, RAM, and storage levels.
- Cloud-Based Gaming: Shadow PC provides a cloud-based gaming experience, enabling users to play various games from various platforms. It even offers a dedicated Game Store with discounted game purchases.
- Early Access to Shadow VR App: The Shadow VR app is available in Early Access, allowing users to install and enjoy VR gaming with the power of Shadow, offering a unique and innovative VR experience.
Shadow PC Specs
Three different subscription plans are available to rent for Shadow PC Gaming:
- Discovery
- Boost
- Power
Each plan comes with specific specs, with the more expensive plans offering more performance. All three plans include Windows 10 Home, with the Power plan offering a possible upgrade to Windows 11. Each plan also features up to 5 TB+ HDD and 1 GB/s down Bandwidth.
Discovery
- GPU = NVIDIA GTX 1080
- CPU = Intel Xeon 3.4 GHz – 4 vCores
- RAM = 6 GB
- Storage = 256 GB
Boost
- GPU = NVIDIA GTX 1080
- CPU = Intel Xeon 3.4 GHz – 8 vCores
- RAM = 12 GB
- Storage = 512 GB
Power
- GPU = NVIDIA RTX 3070 Ti
- CPU = AMD EPYC 3.7 GHz – 8 vCores
- RAM = 28 GB
- Storage = 512 GB
Price
- The Discovery plan is $9.99 for the first month, excluding taxes ($19.99/month after that).
- The Boost plan is $19.99 for the first month, excluding taxes ($29.99/month after that).
- The Power plan is $34.99 for the first month, excluding taxes ($49.99/month after that).
Price
The price of Shadow PC is $29.99 per month. Extra storage can also be rented for $2.99 for 256 GB.
Requirements
Here are the requirements for using the Shadow VR cloud PC:
- A Meta Quest 1 or 2 headset or any other compatible VR headset
- 5GHz WiFi internet connection
- A stable internet connection with a minimum download speed of 50 MB/s
- An active Shadow account subscribed to the appropriate plan of your choosing.
- SteamVR is installed on your Shadow account.
- Shadow VR app from SideQuest
Below, we will show you how to install and use the new Shadow VR app from SideQuest.
Shadow PC Referral Code
The Shadow PC referral code system works as follows:
- Obtaining Referral Code: Once you sign up for an account and select a plan, you can get your unique referral code from your account page on the Shadow website.
- Referral Code Benefits: With your referral code, your friends can save $5 on their first bill, and you save $1 every month, so they remain active subscribers.
- Usage of Referral Code: Share your referral code with your friends. When they use your code to subscribe to Shadow, they will receive a discount on their first bill, and you will receive monthly savings as long as they remain active subscribers.
Your friends benefit from discounts on their Shadow PC subscriptions using the referral code. This is a win-win for everyone, so spread the word!
Shadow PC App on SideQuest VR
The Shadow PC app on SideQuest VR allows users to play PCVR games from SteamVR on a Meta Quest virtual reality headset, eliminating the need for a VR-ready PC.
Here are the key details you need to know about the Shadow PC app on SideQuest VR:
- The app is compatible with Meta Quest 1 or 2 headsets and controllers.
- Users need a stable internet connection with a download speed of at least 50Mbps, a ping speed of less than 20ms, 5Ghz WiFi, and a Steam account.
- Users can install the Shadow VR from SideQuest on their Meta Quest and download Steam and SteamVR on their Shadow PC.
- The Shadow VR app allows users to start streaming Steam VR and their game library, stream the Shadow desktop and a virtual keyboard, view settings specific to the Shadow VR app, and stop streaming Shadow.
- Users can provide feedback through the SideQuest app or the Shadow Discord server.
- App updates are available via SideQuest, and users receive notifications when updates are available.
The Shadow PC app through SideQuest allows for a convenient way to enjoy VR gaming on the Meta Quest headset, and it continues to evolve through updates and user feedback.
App Shortcuts
- Holding the Option button (left controller) will bring you back to the Shadow launcher.
- Pressing the Oculus button (right controller) four times will hard exit out of a stuck screen and save you from having to do a complete restart on your VR headset.
How to Setup Shadow PC With the Oculus Quest
Prepare Shadow for VR
To use Shadow VR gaming, you first must have Steam and SteamVR installed on your Shadow account. If you don’t have SteamVR installed, Shadow VR will not launch.
Open Steam and login with your username and password. You can sign up for free on their website if you don’t have an account. Check the Remember Me box to save your login and have it sign you in automatically for next time.
Download SteamVR from the Steam store and install it.
Change Shadow Settings
As Shadow VR requires a stable internet connection, below are some steps to get the most optimal settings:
- Open the Shadow launcher on your PC.
- Click the gear icon (settings).
- Click Streaming on the left menu.
- Choose Auto Detect under Maximum Bit Rate.
- Check the box beside where it says, “adapt max bit rate to network conditions.” This ensures that Shadow changes the bit rate to run smoothly, depending on your internet connection.
Set Your Meta Quest to Developer Mode
The Shadow VR app is unavailable on the Meta store, so you must set your Meta Quest headset into Developer Mode to use third-party apps.
Download the Shadow VR App from SideQuest

- Plug your Meta Quest or other compatible VR headset into your PC.
- Head to the SideQuest store and search for Shadow VR.
- Click the “Sideload Now” button to download the Shadow VR app directly to your headset.
- Accept all of the prompts that appear during the installation and setup.
Start Shadow VR
- Select the Apps icon and click the drop-down menu in the top-right corner.
- Select Unknown Sources.
- Search for Shadow VR and select it.
- The Shadow VR app will start and proceed to the home screen.
Alternative Method: Virtual Desktop with Shadow PC
If the direct Shadow PC app for the Oculus Quest does not work, or you prefer Virtual Desktop, here are instructions to help you get up and started.
First, down and install the Virtual Desktop app on your Oculus Quest. Use the Oculus app on your phone or on your headset to download Virtual Desktop from the Oculus Store onto your Oculus Quest VR headset.

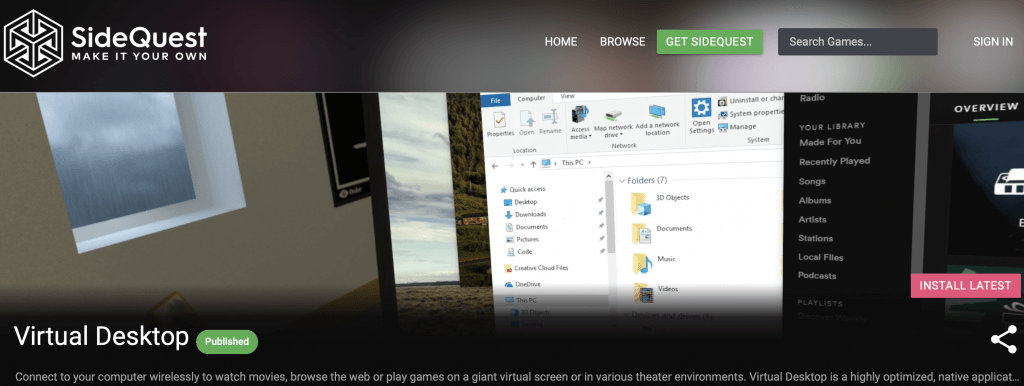
Next, install the Virtual Desktop Mod from SideQuest. The SideQuest version of Virtual Desktop provides additional features that aren’t found on the one in the Oculus Store. Notably, you can’t wirelessly stream PC-VR games without the SIdeQuest version of the app.
Once you have the original version of VD installed from the Oculus Store, click here to visit the SideQuest version of Virtual Desktop. Click on Install Latest and let SideQuest install VD on your Quest.

Lastly, you need to download Streamer App on Shadow PC. On your Shadow PC, you have to download and install the Streamer app that works with Virtual Desktop. Go to the official Virtual Desktop website and click on Download Streamer App.

Once it is installed, you should quickly configure the Streamer app on your Shadow PC. Launch the Streamer application in Shadow PC. In the settings, make these changes:
- Change the codec to H.264
- Uncheck the option to Automatically Adjust Bitrate
As well in your Oculus Quest headset, you should configure Virtual Desktop to optimize streaming and completely setup Shadow PC. Launch the Virtual Desktop settings and make the following changes:
- Disable Sliced Encoding
- Set Video Frame Rate to High
- Set Video Bitrate Limit to Low
You should now be able to wirelessly place any VR game in your Oculus Quest headset. You’ve setup Shadow PC and it will handle all game processing remotely in the cloud. Your Quest VR headset will render the game in the virtual desktop app. It will feel like you are playing a VR game the same as on the Quest natively.
Shadow PC Tips and Help
Still having trouble to setup Shadow PC in tip top shape? Below are some helpful hints on how to setup Shadow PC the best.
Shut down Shadow PC when you are done
When you are done playing, shut down Shadow PC through the Windows start menu. This will give you computer a break and will launch it into memory from scratch the next time you want to play. This way, there won’t be processes left running in the background and taking up cache space the next time you play.
Connecting USB Devices
You can connect USB devices such as a keyboard, mouse, or game controller to your Shadow PC! Just plug the device into a USB slot on your real computer and then check Shadow’s controller tab to make sure it was detected. This will also work with microphones and webcams too.
Select the right bandwidth
If you are having trouble choosing the right bandwidth, run this Speedtest first. Then, set a bandwidth of 10-15 mb/s lower than your current download speed for the best experience. This way, you won’t be throttling or maxing out your connection.
You can also enable “Adapt max bit rate to network conditions” in your Shadow’s settings so that your Shadow can automatically adjust your bandwidth consumption for you!
Keep your GPU up to date
Like a real computer, it is important to keep your Nvidia GPU drivers up to date. If you don’t want to do this manually, you can setup Shadow PC to update your drivers automatically.
To keep your GPU driver up to date, enable “Keep my Shadow’s graphics drivers updated” on the Quick Menu.
Are you having any trouble setting up Shadow PC? Comment below, and we will help you out the best we can! Once you are up and running, you will see how convenient and awesome this service is for Oculus Quest 2 users who don’t want to pay for a full gaming PC setup.


