In this guide, we take a look how to install Unity Hub and setup a project for the first time. This is the perfect starting point if you want to start programming and development in Unity.
Find out what Unity Hub is and how to set it up so that you can start developing VR programs in Unity today.
This is the second tutorial in our Unity XR development series. Check out the first tutorial below:
- What is Unity Hub?
- How to Install Unity Hub and Setup Your First Project
- Download Unity Hub
- Download the latest version of Unity
- Select the Latest Version of Unity
- Install Android Build Support
- Accept the Terms
- Create a new Unity Project
- Unity Project Setup
- Custom Unity Project Windows
- Create a New Scene
- Install VR Packages
- Select Your VR Devices (XR Plugin Management Method)
- Select Your VR Devices (Legacy Method)
- Video Tutorial
- Unity Project Windows
This is an introduction tutorial guide that we’ve partnered with Valem on. Valem is a Unity expert on Youtube and his tutorials have helped thousands of new Unity developers out. Take a look at our VR development section to learn how to make a game in VR!
Check out Valem’s channel, discord, and patreon below!
What is Unity Hub?
Unity Hub is a gateway application to everything related to development in Unity. With the single application, you can:
- Manage your Unity account
- Create projects
- Install different versions of Unity
- View documentation
- Create project templates to make make setting up new applications quicker
Unity Hub is designed to streamline your development in Unity and you should get used to managing your products in it. People who are used to using the regular Unity editor without the Hub can continue to do so if they wish. However, there is no Unity Hub vs Unity alternatives because they are both the same in the end.
How to Install Unity Hub and Setup Your First Project
Use the steps below to download Unity and get it setup for developing virtual reality games.
Download Unity Hub

First, go to the Unity 3D download page and click on the green Unity Hub button. This is a gateway application that lets you install the latest version of Unity, different templates and assets all from a single spot.
After the Unity Hub installer finishes downloading, click on it and follow the prompts to install Unity Hub on your computer.
Download the latest version of Unity

Launch the Hub for the first time and click on the Installs tab. Click on Add and select the latest version and then select Next.
Select the Latest Version of Unity
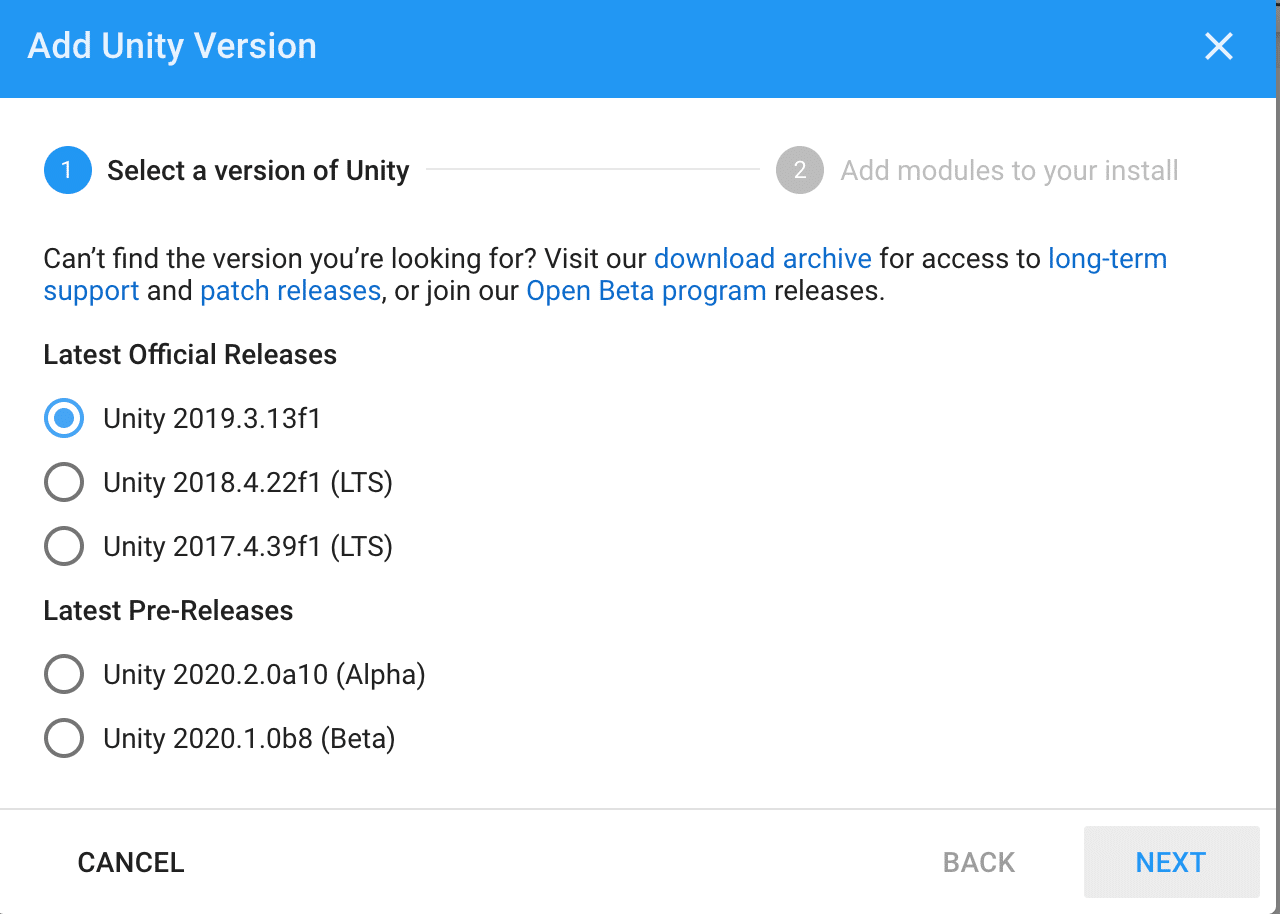
Select the latest official release of Unity to download and then click on Next.
Install Android Build Support

Next, you’ll have to choose the modules you want to install. If you plan on developing for the Oculus Quest or Oculus Go, make sure you select “Android Build Support”, “Android SDK & NDK Tools”, and “OpenJDK”. When you are done, click Next.
Accept the Terms

Accept the terms and agreement and then click Done.
Create a new Unity Project
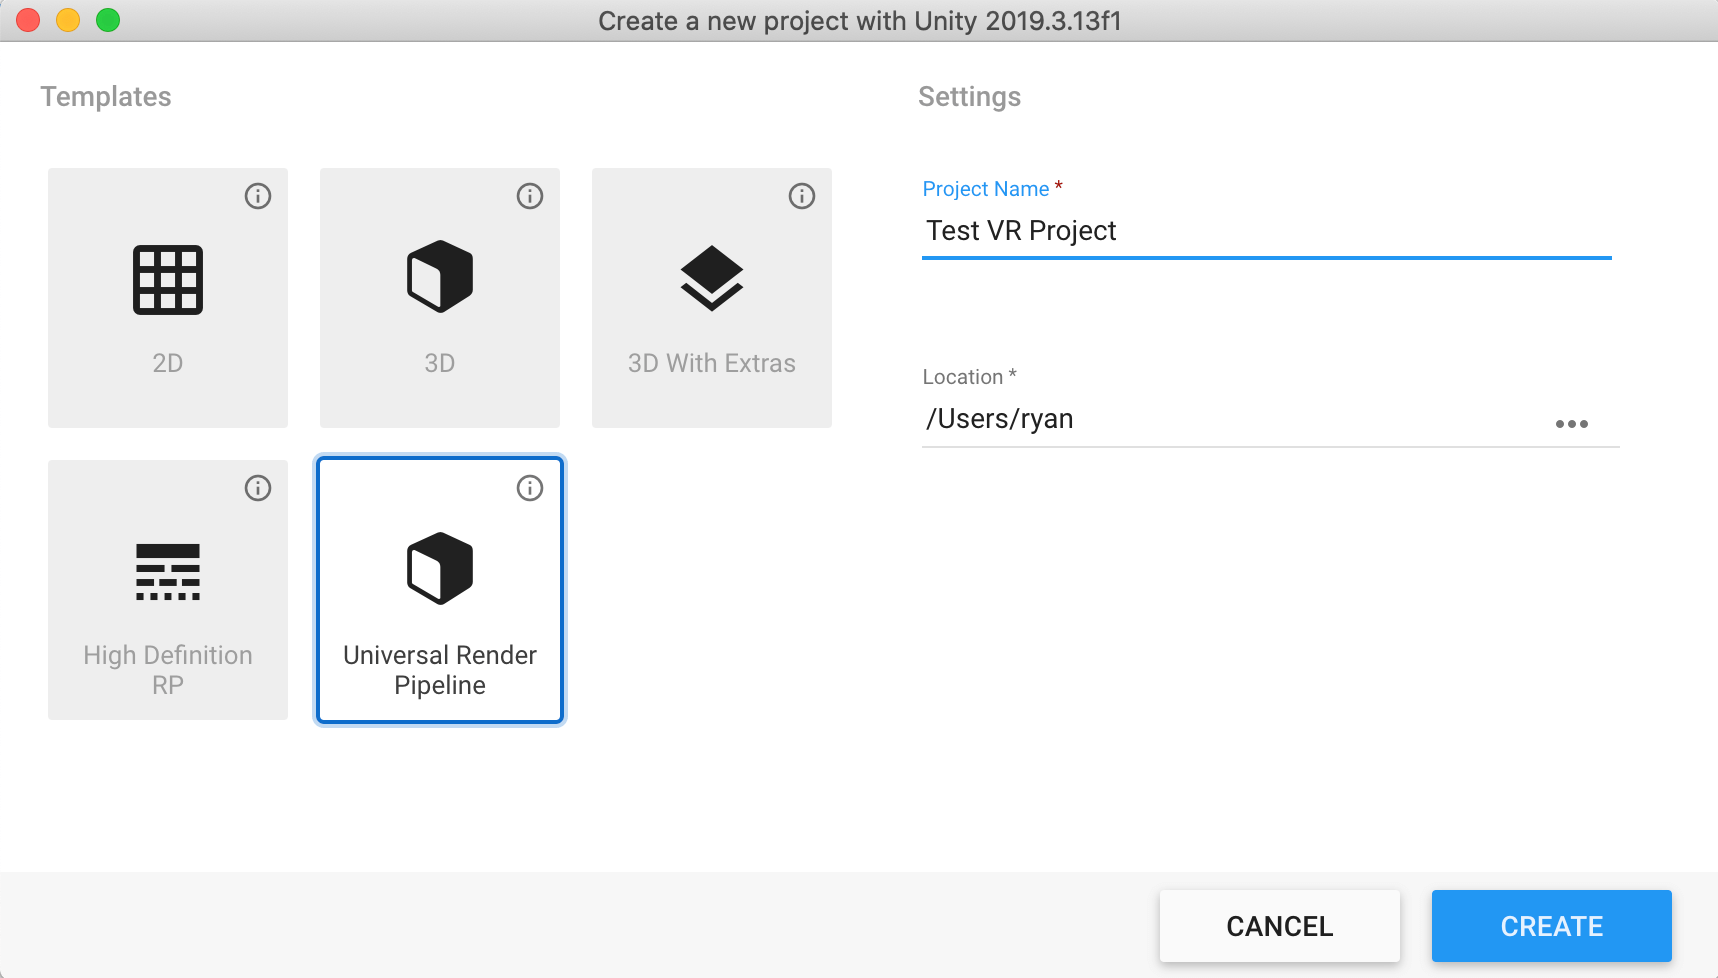
Next, create a new project by going to the “Projects” tab in the Unity Hub. Click the blue dropdown arrow beside “New” and select the latest version you just downloaded.
Name your project and note the folder where it is being stored. Make sure you select the “Universal Render Pipeline” template and then click on “Create”.
While your project is being setup in Unity, make sure your VR headset is working, connected to your computer, and setup to accept unknown sources.
Unity Project Setup
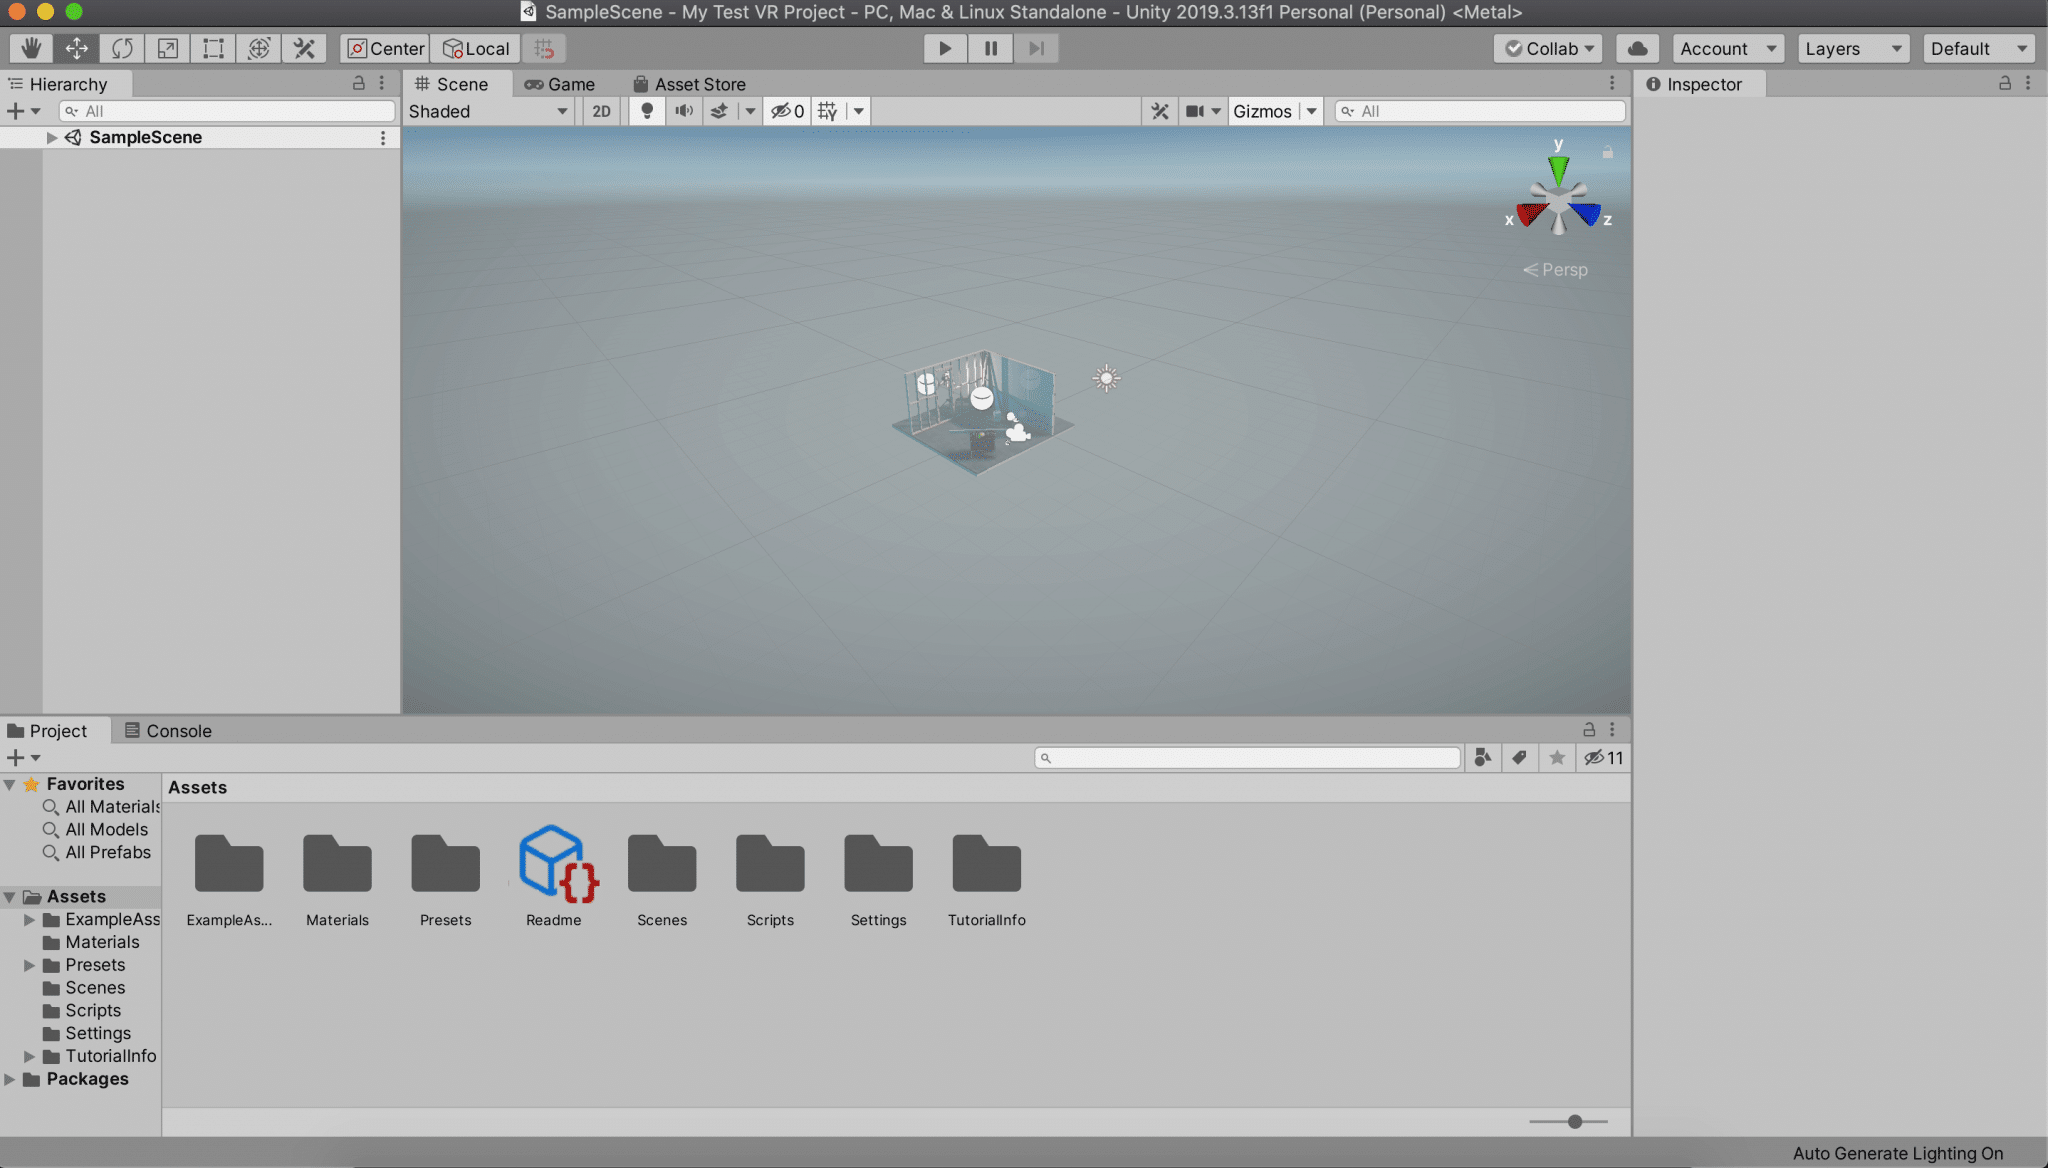
After Unity is done loading up your project, the Unity game engine will be loaded on your screen! There are a few different windows that load up with Unity. We explain what each of these are down below underneath the tutorial guide.
Custom Unity Project Windows
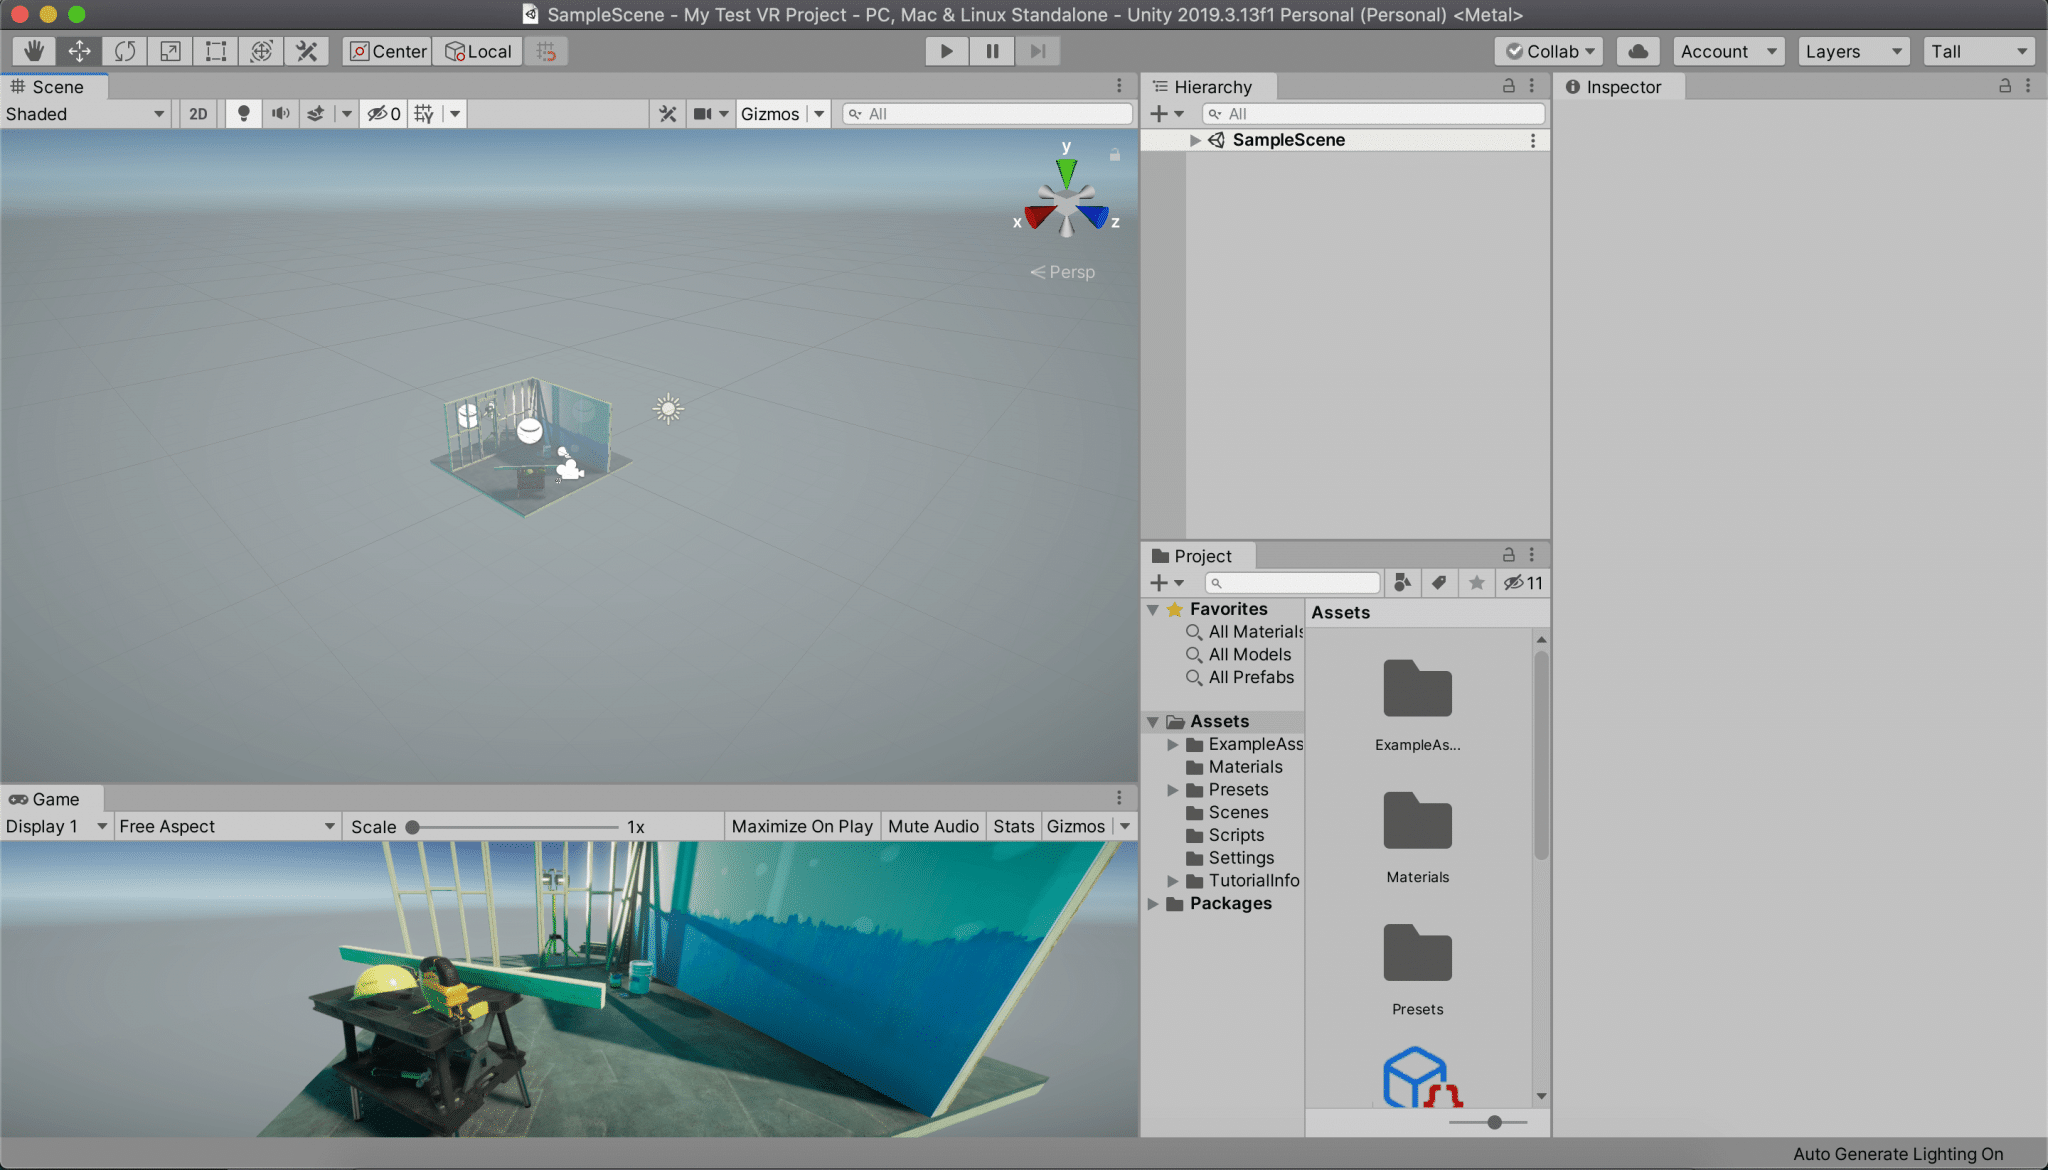
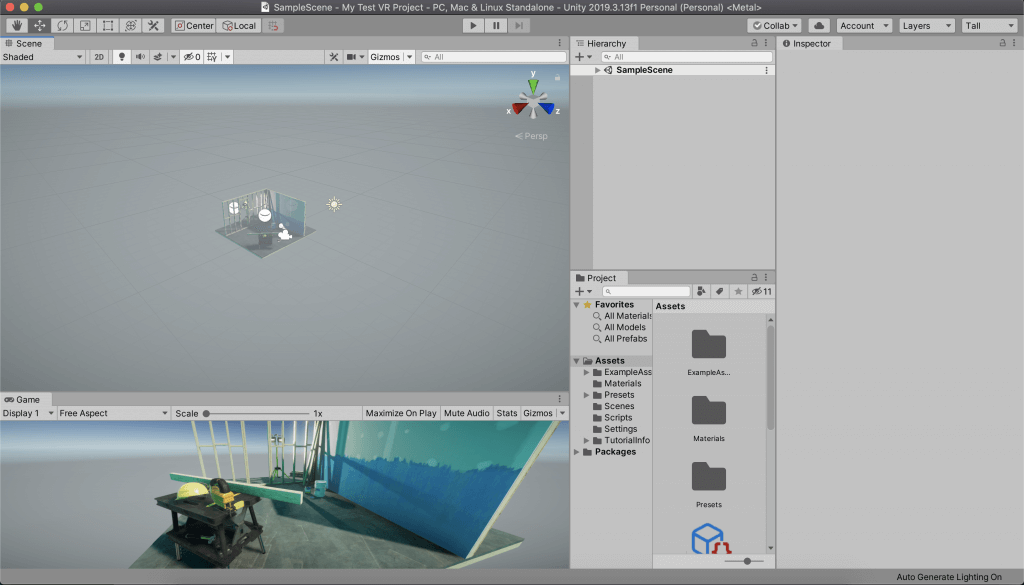
Use the Layout button in the top right corner to play around with different styles that you like your windows to be in while you work!
One popular way to arrange your Unity windows is to select the Tall layout and then drag the Game tab (top left) down to the bottom left of the screen. If you like this way, your windows will look like the windows above.
Create a New Scene
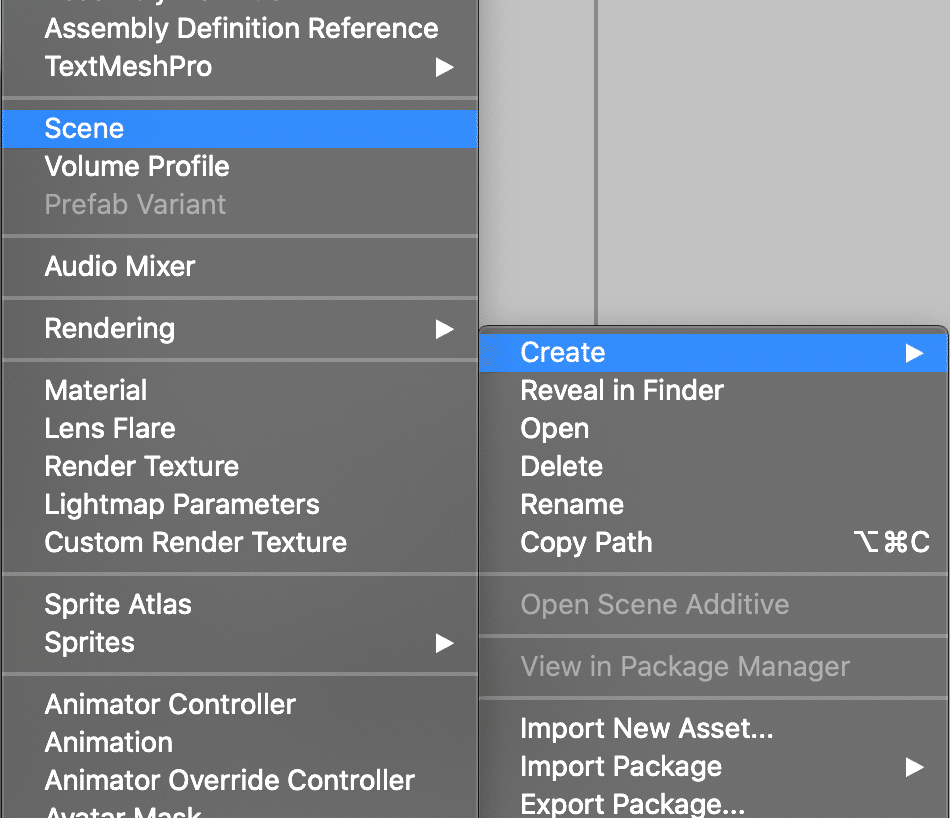
In the Project Window, click on the Scenes folder under assets. You’ll see the SampleScene which opens by default. Right click on an empty space in the Scenes folder and go to Create > Scene. A new scene will be created. Call it VR Bowling (or whatever you want).
Double click your new scene to open it and you’ll see your Scene and Game windows update.
Install VR Packages

To setup Unity for VR, go to Window > Package Manager. At the top in the Advanced menu, click on it and make sure that Show Preview Packages is checked.
Next, scroll down to XR Interaction Toolkit and click on it and then click on Install in the bottom right corner.
Select Your VR Devices (XR Plugin Management Method)

The instructions in this step are only if you do NOT want to develop for HTC Vive headsets. If you do, see the next step below.
Navigate to Edit > Project Settings and click on XR Plugin Management. On the right window, click on Install XR Plugin Management and wait for it to install.
When it’s done, you can select all of the PC-VR and standalone VR devices you want to be compatible with and Unity will install the needed assets.
Select Your VR Devices (Legacy Method)
If you want to develop for HTC Vive VR headsets, then you must use this Legacy Method because HTC does not support the new XR Plugin Management method below.
Navigate to Edit > Project Settings and click on Players. Scroll down to XR Settings and click on Virtual Reality Supported and then use the + button to add OpenVR (HTC) and Oculus. Click on the Android symbol and click on Virtual Reality Supported and add Oculus here too if you plan on developing for the Oculus Quest.
And with that, you’ve successfully installed Unity, setup your first project, and setup Unity for VR! In the next tutorial, we’ll go over some of the basics on how to create your first VR game.
Keep watch of our home page because we will be posting a ton of Unity development tutorials for those who want to make a VR game in Unity.
Comment down at the bottom if you have any issues or questions you want us to answer.
Video Tutorial
This video is based on Valem’s introduction to Unity video starting at 2:55 here:
Unity Project Windows
When you load up a project, Unity is split into a selection of different views. Here is a summary of each window that you’ll see.
Scene View
The scene window is a global view into the game or application you are creating in Unity. In the scene view, you can see all of the game objects in your world, how they are positioned, how the lighting looks, and more.
Game View
The game view is rendered from your player’s camera. It’s a representation of what the player will see when they are in the game. It’s a closer look at your game world.
Hierarchy View
The hierarchy view shows all of the objects that you currently have loaded into your scene. This is where you can edit and manipulate specific objects in your game view.
Project View
The project windows shows all of the files currently in your project. This is how you can switch between different scene, asset, and program files easily.
Inspector View
The inspector window shows you specific information about whatever game object you have selected. This is where you can edit the scrips, sounds, position and details about each object in your scene.
The more you develop in Unity, the more familiar you will become with each window!
In our next guide, we will teach you how to create a full VR game in Unity!