If you ever wanted to create your own 3D videos to upload to Youtube or playback later on the Meta Quest or Apple Vision Pro, this tutorial guide will show you how. You can record 3D videos on Meta Quest 3 using the outward-facing camera.
Using this method, you can create 3D videos without any other hardware. Check out our tutorial below, along with some key tips and tricks you need to know.
Key Takeaways
Recording 3D videos on Meta Quest 3 requires only the VR headset, a USB-C cable, access to a PC or Mac, and basic knowledge of command line codes.
To get maximum quality, there are a few hidden camera features that you need to unlock using specific command line codes on the Meta Quest.
Recording 3D video is seamless and easy, and playback/editing can be done using third-party software and tools.
Requirements
Before recording immersive 3D videos on Meta Quest 3, there are a few prerequisites to ensure a smooth process.
These include:
Meta Quest VR Headset
USB-C cable (included with the Meta Quest)
Access to a PC or Mac.
Installation of ADB (Android Platform Tool) and SideQuest (for PC users)
SideQuest installation for Mac users
Basic knowledge of command line codes
Patience and creativity!

How to Setup Your Meta Quest for 3D Video Recording
It’s essential to set up your device correctly. Follow these detailed steps to set up your Meta Quest for 3D video recording:
Enable Developer Mode
Enabling Developer Mode on your Meta Quest 3 is the first crucial step. This mode unlocks advanced features, allowing you to access the full potential of your device.
To enable Developer mode:
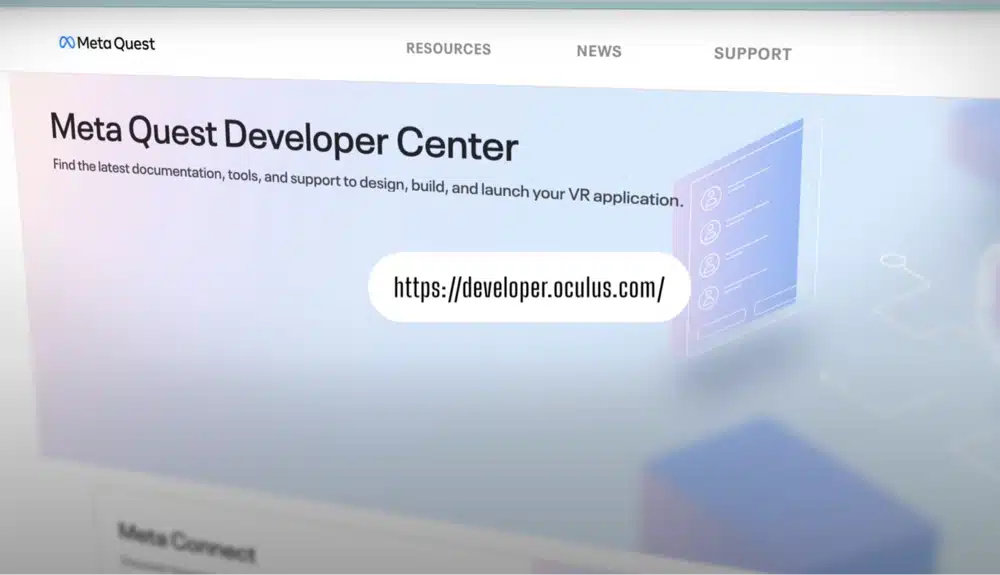
Go to the Developer Signup URL: Visit the provided URL to sign up as a Meta Developer.
Sign Up and complete the developer signup process, ensuring you use accurate information.
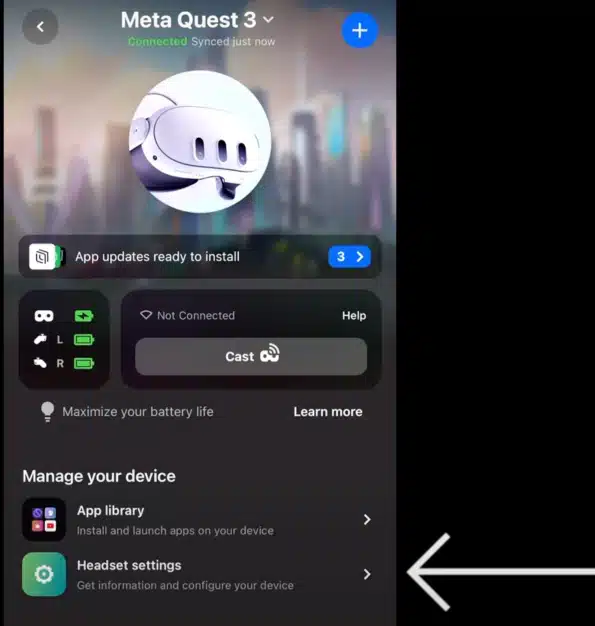
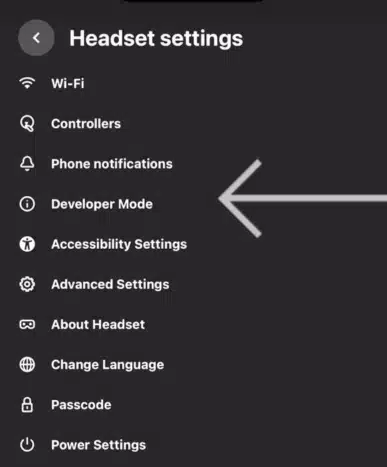
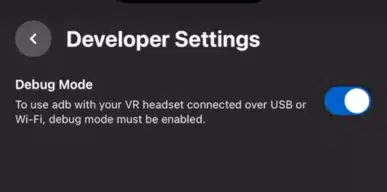
Once signed up, navigate to your Meta Quest mobile app. Find your Quest 3 under devices, go to Headset settings, and enable Developer Mode.
Developer Mode grants you access to powerful features, including the ability to use SideQuest and unleash the hidden camera capabilities of your Meta Quest 3.
Connect to Your PC or Mac
Connecting your Meta Quest 3 to your computer is essential for the next steps. Follow these instructions based on your operating system.
For PC Users:
1. Install ADB and SideQuest: Install ADB (Android Platform Tool) and SideQuest on your PC.
2. Connect Your Quest 3: Use the provided USB-C cable to connect your Meta Quest 3 to your PC.
3. Launch SideQuest: Open SideQuest and follow the on-screen instructions to enable the connection.
For Mac Users:
1. Install SideQuest: Download and install SideQuest on your Mac.
2. Connect Your Quest 3: Use the provided USB-C cable to connect your Meta Quest 3 to your Mac.
3. Enable Connection: Follow the on-screen instructions in SideQuest to enable the connection.
Your Meta Quest 3 is now successfully connected to your computer, paving the way for the next steps.
Unlock Hidden Features
Next, you have to enable a few hidden camera controls on your Meta Quest 3 by entering command line codes.
Open Terminal (Mac) or Command Prompt (PC): Launch Terminal on your Mac or Command Prompt on your PC.
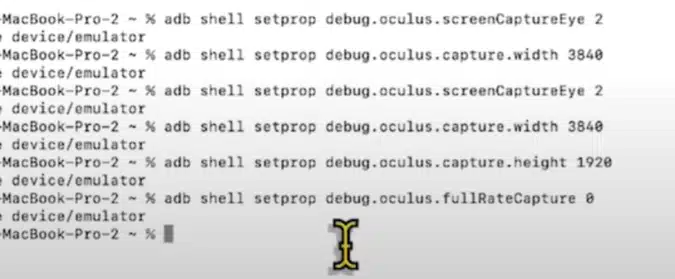
Enter Command Lines: Copy and paste the provided command lines individually to enable features like left and right eye capture, set resolution to 4K, adjust frame rate, and optimize video bitrate.
Here are the command line codes to enter:
adb shell stepprop debug.oculus.screenCaptureEye 2
adb shell stepprop debug.oculus.capturr.width 3840
adb shell stepprop debug.oculus.capture.height 1920
adb shell stepprop debug.oculus.fullRateCapture 0
adb shell stepprop debug.oculus.capture.bitrate 40000000
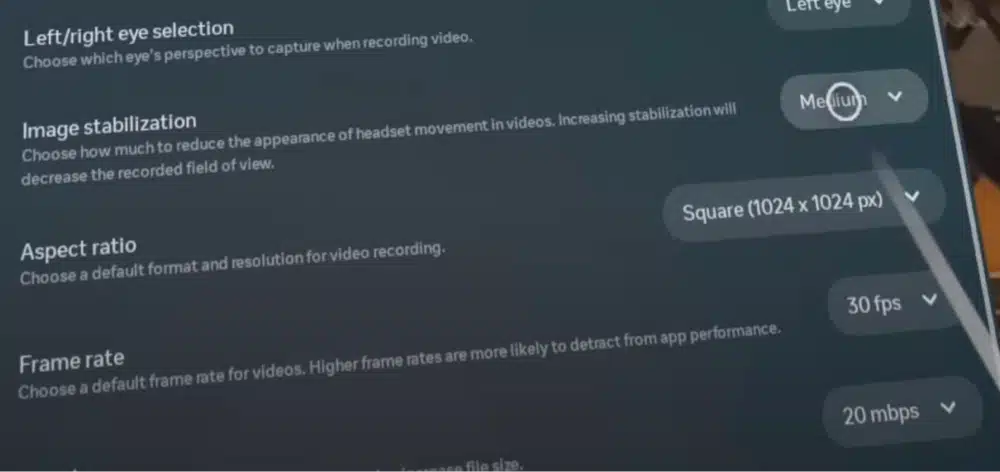
Enable Image Stabilization
Enhance the quality of your 3D videos by enabling image stabilization within your Meta Quest 3 settings.
You have successfully set up your Meta Quest 3 for 3D video recording by enabling Developer Mode, connecting to your computer, and unlocking hidden features.
You’re now ready to capture immersive 3D content with your Meta Quest 3.
How to Record 3D Videos on Meta Quest 3
Now that your Meta Quest 3 is set up for 3D video recording, let’s explore the step-by-step process to capture immersive content.
Start Recording
Initiating the recording process on your Meta Quest 3 is straightforward, requiring a combination of buttons.
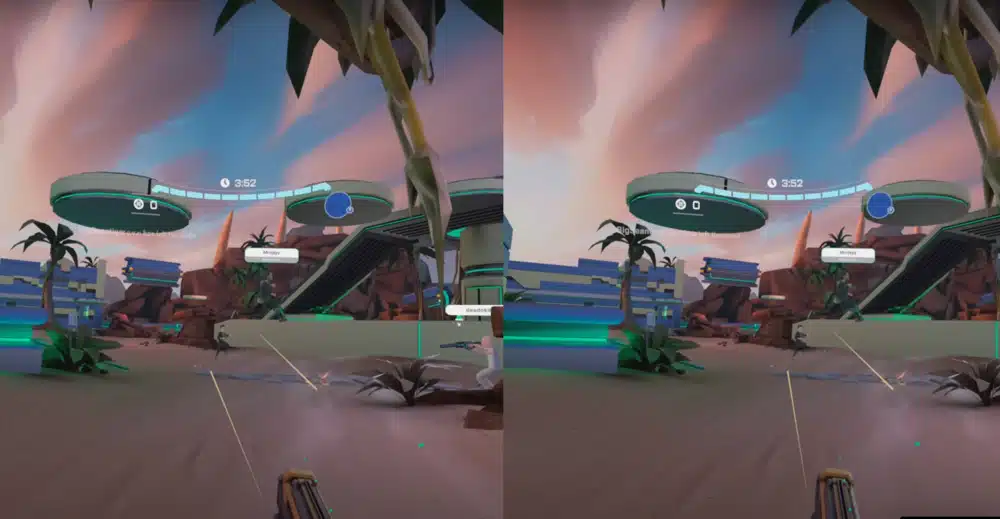
Hold Down the Meta Button and Trigger Button: Simultaneously press and hold the Meta Button and Trigger Button on your Meta Quest 3 controller for approximately 2 seconds to start recording.
This simple shortcut activates the 3D video recording feature, and you’re now ready to capture your immersive experiences.
Playback and Editing
After recording your 3D videos, the following steps involve playback and potential editing.
Use a Third-Party Player: View your recorded 3D videos using a third-party player like Skybox VR on your Meta Quest 3.
Edit on Your Computer: Transfer the recorded videos to your computer and use your preferred video editing software (e.g., DaVinci Resolve, Premiere, or FCP) to make necessary edits.
These steps allow you to review your recordings and adjust as needed, ensuring your 3D videos meet your creative vision.
Sideload Your Videos
The last step is to sideload your edited 3D videos onto your Meta Quest 3. Mac users, especially those with M1, M2, or M3 chips, may face challenges and are recommended to use SideQuest.
Sideloaded videos bring your edited content back onto your Meta Quest 3, allowing you to enjoy your immersive creations directly on the device.
Now, you can share your captivating 3D content with others and explore the full potential of your VR experiences.
3D Video Recording Tips
Enhance your 3D video recording experience on the Meta Quest 3 with these valuable tips:
Camera Stabilization
Proper camera stabilization is crucial for creating professional-looking 3D videos that are enjoyable and immersive.
Enable Image Stabilization: Within your Meta Quest 3 settings, activate image stabilization to ensure smooth and comfortable viewing experiences for your audience.
Keep Your Camera Level: Avoid tilting your head excessively during recording to prevent motion sickness in VR.
Experiment with Editing Software
Try different video editing software such as DaVinci Resolve, Premiere, or FCP to find the platform that best suits your preferences and creative needs. Experimenting with various editing tools allows you to enhance the visual appeal of your 3D videos, adding a professional touch to your content.
Inject 3D Metadata
Injecting metadata is crucial for sharing your 3D videos on platforms like YouTube VR, Meta Quest TV, or Skybox VR Player without any compatibility issues.
Using FFMPEG to inject 3D metadata into your videos during the editing process. This ensures compatibility on various platforms, providing a seamless viewing experience.
Meta Quest 3 vs iPhone 15 Pro Spatial Video
The iPhone 15 has some good spatial video recording capabilities itself.
When considering 3D video capabilities, the Meta Quest 3 and iPhone 15 Pro Spatial Video present unique advantages and limitations.
Let’s look into the pros and cons of each to help you make an informed decision based on your preferences and requirements.
Meta Quest 3 Pros
Higher Resolution and Frame Rate Settings: The Meta Quest 3 allows for superior video quality with customizable settings, offering higher resolutions and frame rates for a more immersive experience.
3D Metadata Injection: The Meta Quest 3 supports the injection of 3D metadata during the editing process, ensuring compatibility across various platforms.
Meta Quest 3 Cons
Advanced Setup: Setting up the Meta Quest 3 for 3D video recording involves advanced techniques, including command line codes, which might be challenging for users seeking a more straightforward process.
Limited Native Playback Options: To view recorded 3D videos natively, you need third-party players like Skybox VR, as the Meta Quest 3 lacks built-in support.
iPhone 15 Pro Spatial Video Pros
Simpler Setup: The iPhone 15 Pro Spatial Video feature offers a straightforward setup, especially with the latest iOS updates, making it accessible if you prefer a hassle-free experience.
Direct Integration with Apple Ecosystem: Apple users benefit from seamless integration with the Apple ecosystem, enhancing the overall user experience.
iPhone 15 Pro Spatial Video Cons
Limited Resolution and Compression: The iPhone 15 Pro Spatial videos are limited to 1080P resolution and compressed HEVC format, potentially sacrificing some video quality.
Lack of Manual Camera Settings: The iPhone 15 Pro Spatial Video lacks manual camera settings, restricting customization options if you want control over your recordings.
The choice ultimately depends on your preferences, technical comfort, and desired level of control over your 3D video recording experience.
Conclusion
Recording 3D videos on Meta Quest 3 is an accessible yet advanced venture, offering a unique opportunity to create immersive content. This guide has walked you through the essential steps, from the basic setup with your Meta Quest VR headset to unlocking advanced features through command line codes.
By following these instructions, you can easily capture high-quality 3D content, enhancing your VR experiences. Whether you’re a seasoned videographer or a VR enthusiast, the Meta Quest 3 provides a versatile platform to explore the exciting world of 3D video recording.
Dive in and start creating content that stands out in the ever-growing realm of virtual reality.