If you have a new Vive Flow and are wondering how to connect the HTC Vive Flow to SteamVR, you’ve come to the right place.
In this article, we’ll go over the following:
- What is the HTC Vive Flow?
- Is it possible to connect the HTC Vive Flow to SteamVR?
- Why do you want to connect the HTC Vive Flow to SteamVR?
- How to Connect the HTC Vive Flow to SteamVR using Riftcat
SteamVR supports a lot of VR headsets, but does it support the HTC Vive Flow yet? Let’s find out!
But first, let me briefly introduce the headset.
Must-read: 10 BEST Steam Games for the HTC Vive Flow in 2022
What is the HTC Vive Flow?
![How to Connect the HTC Vive Flow to SteamVR [Step-by-Step]](https://arvrtips.com/wp-content/uploads/2021/10/htv-vive-flow-promo-shot-1024x576.jpeg)
The HTC Vive Flow is the newest entrant in HTC’s VR suite of products. It is an extremely lightweight pair of “immersive VR glasses made for wellness and mindful productivity.”
The Vive Flow is dedicated for people who:
- who live in shared spaces and can’t accommodate a big screen
- who travel often and want to keep themselves entertained on the go
- for working professionals and parents to “wind down with ASMR sceneries and sounds and sink into a soothing sensation of VR
The device is also one of the lightest VR headsets on the market. Being able to play real VR games on the headset would be a big perk that would entice a lot of new buyers.
Some of the other key features of the HTC Vive Flow are as follows:
- Immersive spatial audio
- Dual hinge folding
- Seamless phone pairing
- Adjustable diopter lenses
- Miracast compatibility
- Vive Sync support
The Vive Flow pairs with your smartphone to run VR content. You can cast the contents of your phone screen to VR with MiraCast.
However, the Vive Flow doesn’t come with controllers. Instead, it uses your smartphone to navigate the menu and control the Vive Flow. You simply point your phone towards the screen and swipe up or down to scroll through the menus.
Must-read: HTC Vive Flow: Everything You Need to Know
Now, let’s find out if you can connect the HTC Vive Flow to SteamVR.
Is it possible to connect the HTC Vive Flow to SteamVR?
As per the information available on the official SteamVR website, SteamVR supports the following VR headsets:
- Valve Index
- HTC Vive
- Oculus Rift
- Windows Mixed Reality
Other popular VR headsets like the Samsung Odyssey, Acer AH101, HP Reverb, and Varjo VR-1 and VR-2 also work with Steam as they are Windows Mixed Reality headsets.
But does the HTC Vive Flow connect to SteamVR? At the time of writing this article, official VR support for the HTC Vive Flow isn’t yet available on SteamVR.
But, we’ve got a workaround on how you connect the HTC Vive Flow to SteamVR.
Why should you connect the HTC Vive Flow to SteamVR?
Before jumping to the procedure to connect the HTC Vive Flow to SteamVR, let’s dig into the advantages of connecting your Flow to SteamVR.
First, SteamVR has a huge library of VR games for every VR headset. No matter what headset you use or will use in the future, you can rest assured that SteamVR has got your back with its amazing collection of games.
If you’ve been sidestepping SteamVR lately, it’s time you invest some of your software budget into the platform.
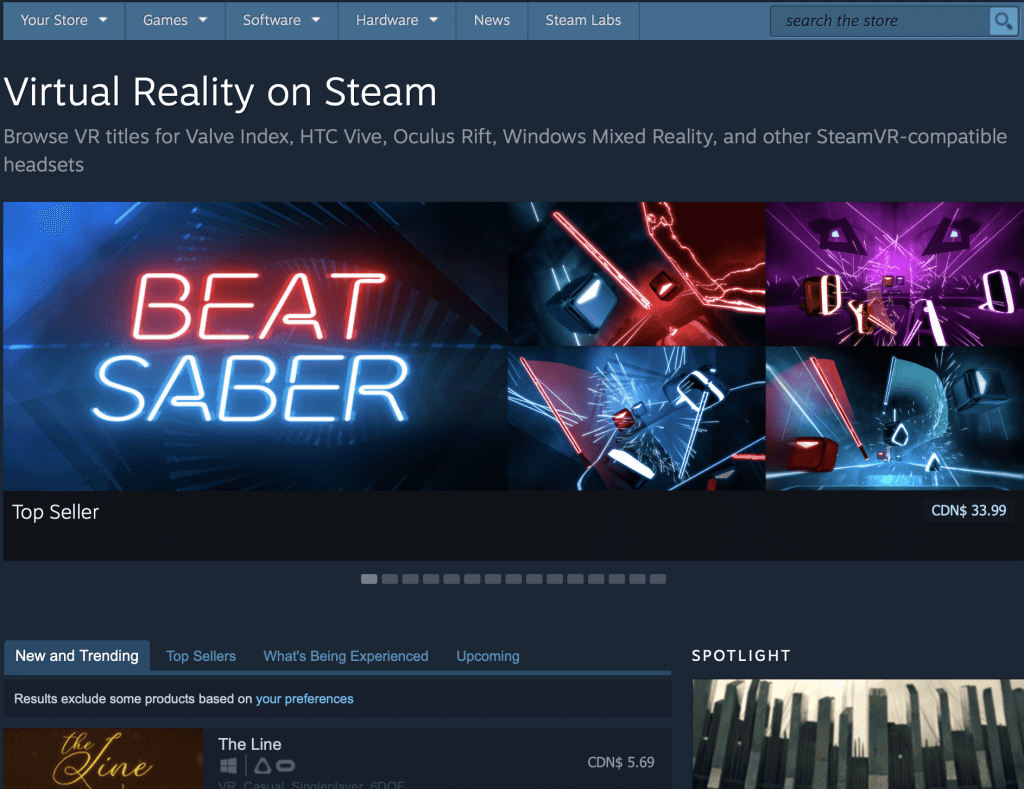
Another reason to use SteamVR with the HTC Vive Flow is to access the SteamVR exclusives. SteamVR offers a lot of top-class VR games available only on Steam: Blade and Sorcery, Beat Saber, Half-Life: Alyx, and Boneworks, just to name a few.
How to Connect the HTC Vive Flow to SteamVR using Riftcat
Riftcat is software that makes your computer think that your mobile phone is a PC VR headset. Using Riftcat, you can connect your HTC Vive Flow to SteamVR.
Minimum requirements to use Riftcat
Riftcat supports any standalone VR headset compatible with leading mobile VR SDKs. Some of the renowned standalone VR headsets Riftcat supports are:
- Oculus Quest
- Oculus Go
- HTC Vive Focus
- Samsung Gear VR
- Google Daydream View
Tabled below are the minimum and recommended PC and mobile requirements for using Riftcat.
| Specification | Minimum requirements | Recommended requirements |
| OS | Windows 8.1 | Windows 10 |
| Processor | i5-2500 or greater | I5-4590 or greater |
| RAM | 4GB | 8GB |
| Graphics card | NVidia GeForce GTX 650 or greater with NVENC support / AMD Radeon 7750 or greater with VCE 1.0+ support | NVidia GeForce GTX 970 or greater with NVENC support / AMD Radeon 290 or greater with VCE 1.0+ support |
| Android version | Android 5.0 and greater / iOS 12.1 and greater | Android 5.0 and greater / iOS 12.1 and greater with gyroscope |
| Connectivity | 2.4GHz WiFi router or USB 2.0 cable | 5GHz WiFi router or USB 2.0 cable |
The guide below explains the step-by-step procedure for connecting the HTC Vive Flow to SteamVR. Follow along and get connected to SteamVR right away.
Install the Riftcat application
Step 1:
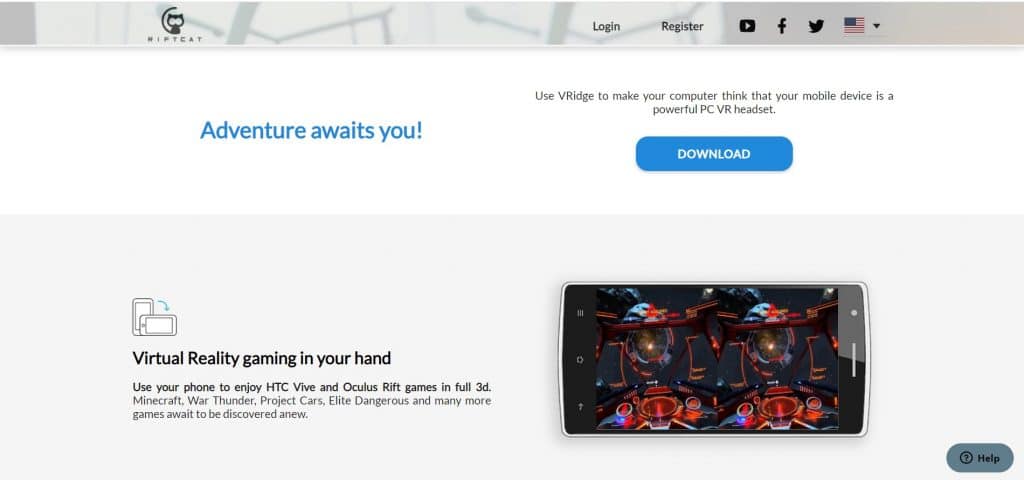
To begin with, you need to install the Riftcat client VRidge on your PC. Go to the official VRidge page and click on the Download button.
Step 2:
Once the installation is complete, click on the downloaded file and run the Riftcat installer. Read the terms and conditions of using Riftcat, and if acceptable, click on Accept to continue with the installation.

Step 3:
In the next prompt, click on the Install button.
![How to Connect the HTC Vive Flow to SteamVR [Step-by-Step]](https://arvrtips.com/wp-content/uploads/2022/01/install-riftcat-to-connect-the-htc-vive-flow-to-steamvr.png)
Step 4:
Finally, click on the Start Riftcat button, then the I Accept button in the next prompt. You will see the loading screen, and Riftcat will open on your computer.
![How to Connect the HTC Vive Flow to SteamVR [Step-by-Step]](https://arvrtips.com/wp-content/uploads/2022/01/start-riftcat-vr.png)
Establish a connection between Riftcat and the HTC Vive Flow
There are two ways to connect the HTC Vive Flow with Riftcat.
- Using WiFi
- Using USB
Go with the WIFI option to connect the HTC Vive Flow to SteamVR. The Vive Flow is a standalone VR headset, and it makes total sense to cut the cord and immerse oneself in the virtual reality world without disturbances.
Keep in mind that you can connect the headset with a USB Type-C cable. I’ll go over the methods to cover both options.
Note: Set up the Vive Flow on your mobile, and be sure to connect to the same network. Also, check that the HTC Vive Flow and the PC are connected to the same WiFi network. And did I mention powering on the Vive Flow?
Using WiFi
Step 1:
Install the VRidge app on your phone.
Step 2:
Launch the app and log in to your VRidge account. If you don’t have an account yet, create one.
Step 3:
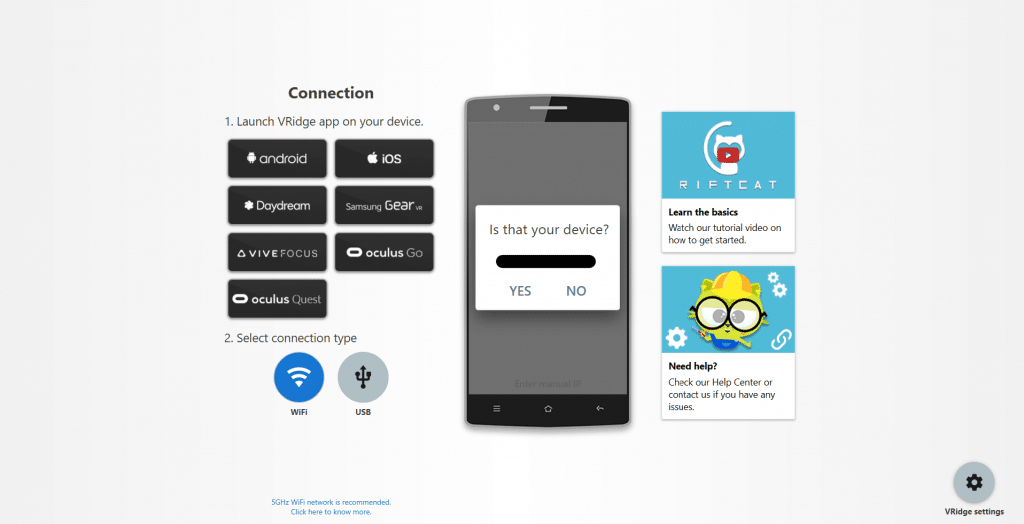
Now, confirm your device and click on the WiFi option on the Riftcat home screen.
Step 4:
On your PC, you will get a Network notification. Click on Yes or No as per your preference.
Step 5:
In the next prompt, Riftcat will ask you to confirm your device. Check your device name and hit Yes. This will connect VRidge to Riftcat.
Step 6:
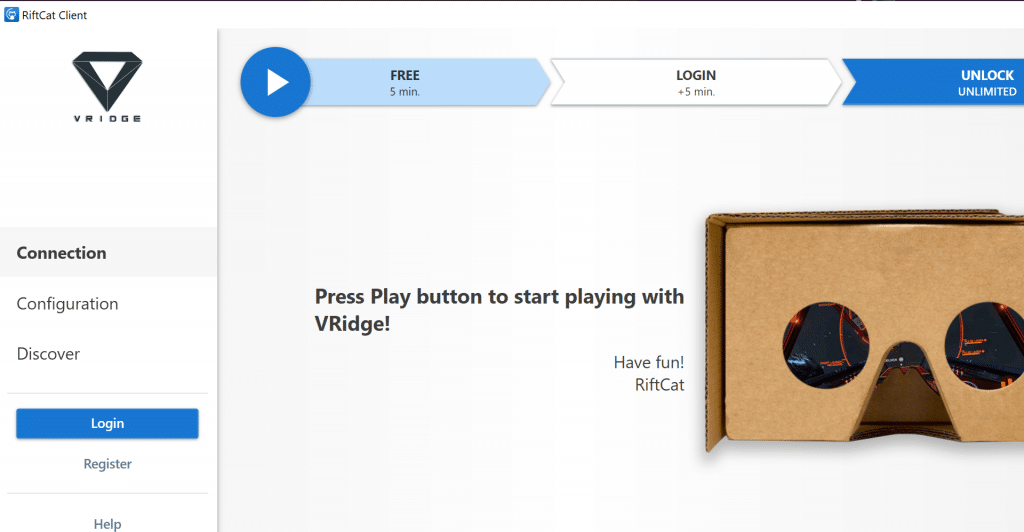
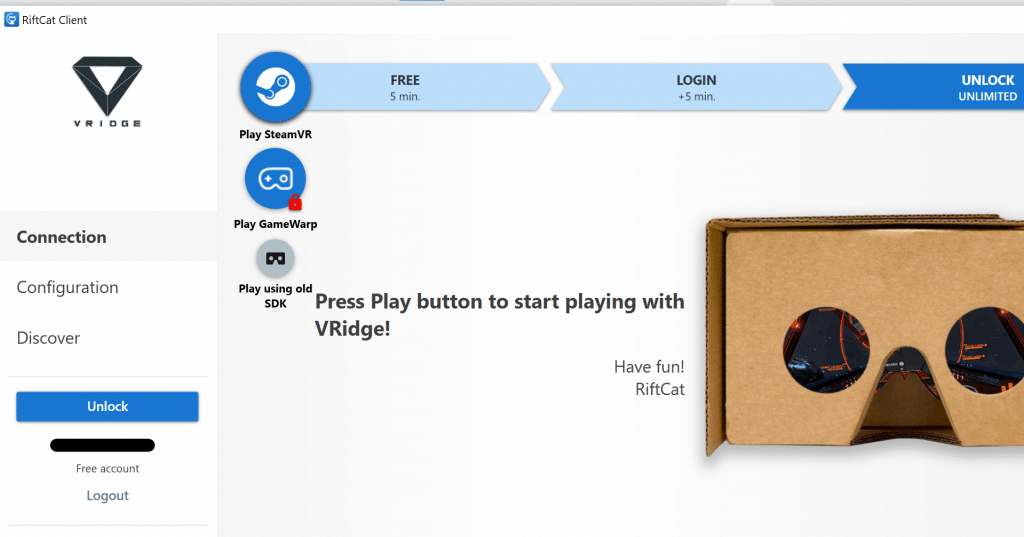
Once connected, select the account type you want to use. Here, you can opt for a free trial (for 5 minutes of VR streaming), or logging in to your Riftcat account for another 5 minutes of VR use, or you can also opt for their paid plan for unlimited VR time.
Enter your login credentials if you already have an account, or register for a new account from the same prompt.
Step 7:
Click on the play button on the top left and wait for SteamVR to be ready. You can change the quality of your stream in the prompt that appears after clicking on the Play button. Also, you can enable audio streaming by turning the toggle on.
Step 8:
Once SteamVR is ready, you will see the SteamVR home screen on your Vive Flow and VRidge app.
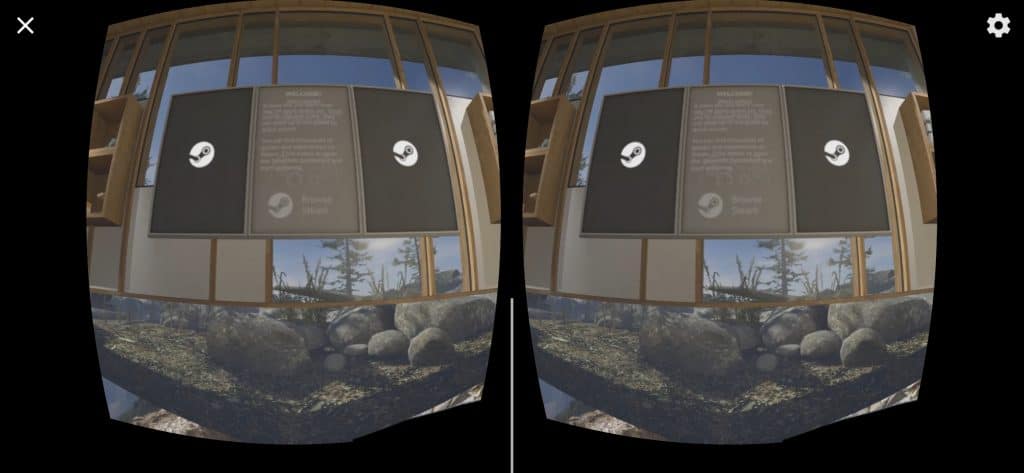
That is all! When the SteamVR home screen appears on the Vive Flow, you can use your phone as the pointer and controller. Watch the below video to understand how to use a smartphone as a VR controller for the HTC Vive Flow.
Step 9:
Before you get going with VR games on SteamVR, complete your VR room setup.
On the SteamVR prompt in the Riftcat, click on the arrow near the SteamVR option.
Step 10:
Select “Run Room Setup”
Step 11:
Choose either Set up for Room-Scale or Set up for Standing Only based on your preference. If you have limited space to walk around, choose the latter. You can play standing and seated VR experiences when opting for Standing Only set up.
On the contrary, if you have at least 2m x 1.5m or 6.5ft x 5ft play space, go for the Room-Scale set up. It lets you play room-scale, standing, and seated VR experiences.
Step 12:
In the Establish tracking prompt, click Next
Step 13:
This step requires you to calibrate your play space. To do so, stand in the middle of the cleared area wearing the Vive Flow while facing the default direction you would like to face in VR.
Once done, click on the Calibrate Center button or tap the trigger button on your mobile and wait until the calibration completes. Click Next when the calibration completes.
Step 14:
Now, you are required to calibrate the floor. Simply place the headset on a flat stable surface and click the Calibrate Floor button. Now, measure the vertical distance between the headset and the floor and enter the value in cm or inches in the space provided.
If you place the headset on your head, enter your height. If you place the headset on the floor, enter 0 in the space provided.
Step 15:
Click on the Calibrate Floor option and wait until the calibration completes. Click Next.
Step 16:
The setup will be completed. Finally, click Done to finish the setup.
The SteamVR home screen will load again and you can start playing your favorite SteamVR games on the Vive Flow.
Step 17:
To play a game in SteamVR on the Vive Flow, simply navigate to the SteamVR library, as you usually would with your mobile controller. Select the game you want to play and select the Play in VR option.
Voila! You can now see your favorite SteamVR game on your HTC Vive Flow.
Riftcat Wireless Drawbacks
Although connecting the HTC Vive Flow to SteamVR using WiFi looks a lot cooler, it has some drawbacks.
Drawbacks
- The quality of the video stream might not be as good as with a USB connection. It is recommended that you use a 5 GHz wireless connection, which will have less interference from other devices in your home compared to 2.4 GHz.
- The resolution could be better as it gives the Vive 1.0 vibes all over again.
Using USB
The USB method is similar to setting up Vive Flow to SteamVR over WiFi. All you need to do while setting up VRidge is to turn off the mobile network and WiFi and connect the computer and the phone with a USB cable.
Here’s how to connect the HTC Vive Flow to SteamVR using USB.
Step 1:
Connect the USB-A end of the USB Type-C cable to the computer and the USB-C end to the phone
Step 2:
Go to the Settings app on your phone and select Connection & Sharing > Portable hotspot > USB tethering (turn the toggle on for USB tethering)
Step 3:
Now, go back to the VRidge app and turn off the mobile network and WiFi or simply turn on the Airplane mode on your mobile.
From this step onward, follow the same steps as in the WiFi method from steps 3 to 16. The stream quality is comparatively better in the USB tethering method.
You might also like: Oculus Quest 2 vs HTC Vive Pro 2: Which Headset is Better?
Play your favorite SteamVR games on the Vive Flow
That is pretty much everything you needed to know about connecting the HTC Vive Flow to SteamVR, of course using Riftcat. Connecting Vive Flow to SteamVR isn’t that straightforward. However, with software like Riftcat Vridge, it is possible to get the most out of the Flow and SteamVR.
Still Confused?
Still confused at how to connect the HTC Vive Flow to SteamVR or how to use Riftcat? Check out the official videos below for more information.
Were you able to successfully connect your HTC Vive Flow to SteamVR? What are your thoughts on Riftcat? Let us know in the comments section down below.

![How to Connect the HTC Vive Flow to SteamVR [Step-by-Step] connect the htc vive flow to steamvr](https://arvrtips.com/wp-content/uploads/2022/01/connect-the-vive-flow-to-steamvr-300x225.jpeg)

When I install the VRidge app on my phone, which is connected to the Flow, and connect the VRidge app to my PC, all I get in the end is my phone being connected to SteamVR. I never managed to connect the Flow to SteamVR and I’m not really sure on how to achieve this without installing VRidge on the Flow and so far I didn’t find an APK that is working on the Flow.
Any help would be greatly appreciated.