This guide shows you how to setup your Unity camera for VR games so that your game moves live when you rotate your head in your VR headset. We’ll show you how to have the Unity camera follow the player in first person.
This first person camera is a staple in all virtual reality games!
You’ll learn about a few key Unity development concepts such as:
- How to add game objects in Unity
- How to create a VR rig
- What the tracked pose driver is and how to assign it
- How to make and test your first person camera out
This is the third tutorial in our Unity XR development series. Check out the previous tutorials here:
This is an Unity tutorial guide that we’ve partnered with Valem on. Valem is a Unity expert on Youtube and his tutorials have helped thousands of new Unity developers out. Take a look at our VR development section to learn how to make a game in VR!
Check out Valem’s channel, discord, and patreon below!
How to Setup Your Unity Camera For VR Games
Open up Unity. You can start with your own Project or else follow our last tutorial linked above and we will continue from there.
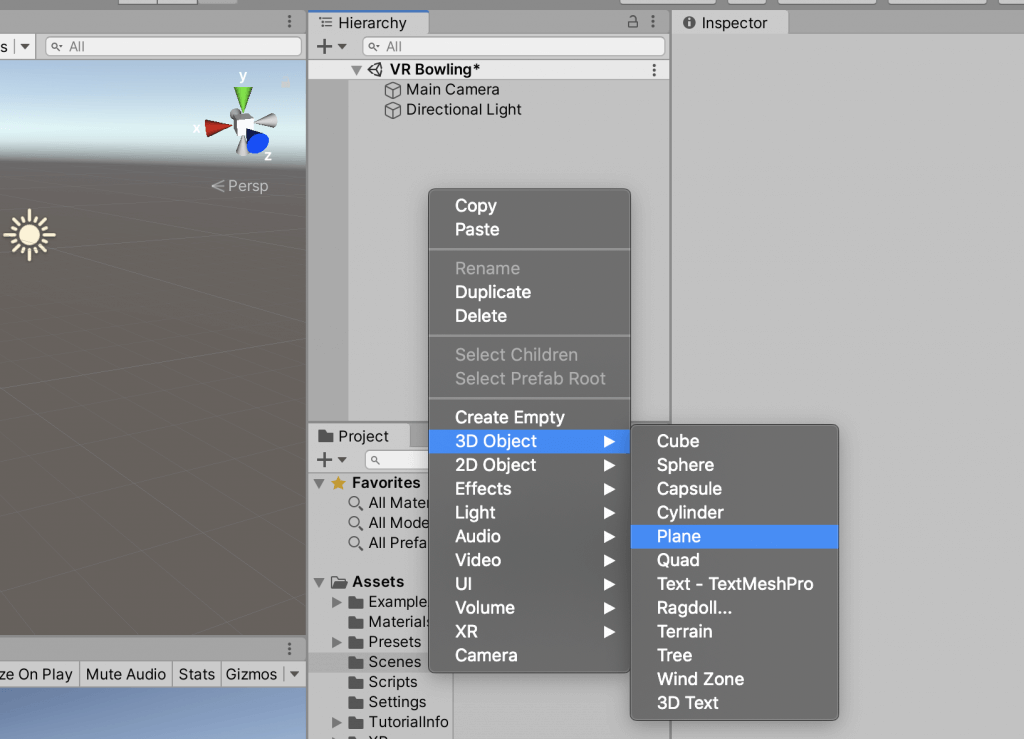
The first thing we need to do is create the ground area for our scene. To do this, right click in the blank space inside of the Hierarchy window and click 3D Object > Plane.
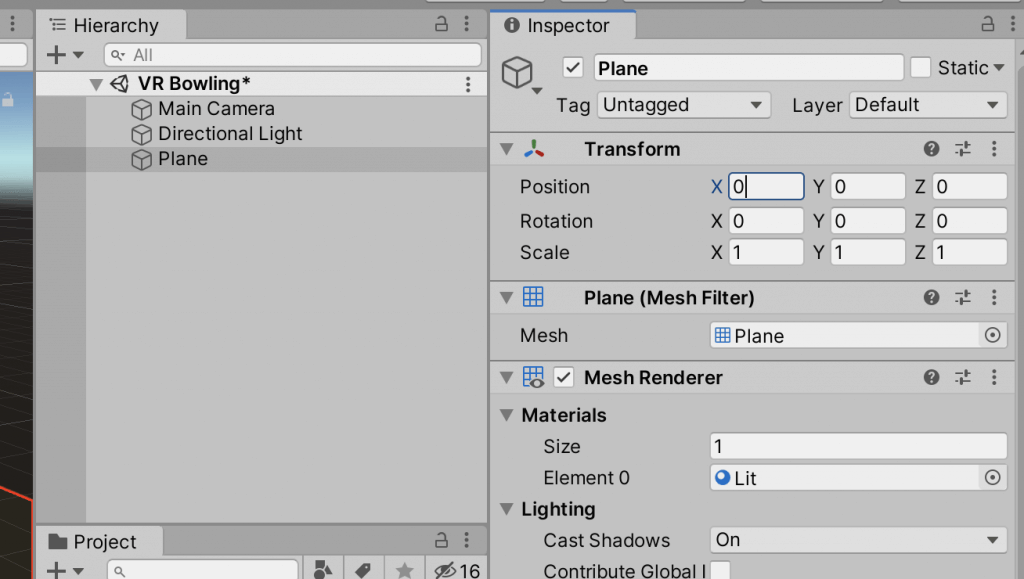
Set the position of your plane in the Inspector window to be 0, 0, and 0 for the X, Y, and Z planes.
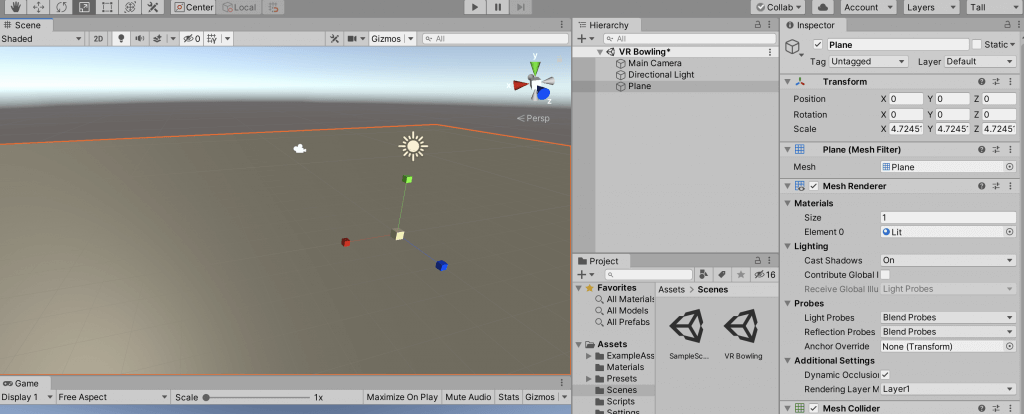
Click on your plane in the Scene window and then press R on your keyboard to change the size of the plane. Click the grey square in the middle of the plane that appears and drag it upward to increase the scale to around 5 (you can verify in the Inspector window).
Next, we are going to change our plane to be black. To do this, right click on Assets in the Project window and click on Create > Material. Name your material “black” and then click on the Base Map color in the Inspector window and change the color to black.
Finally, drag your Black material file in the Project window over top of your plan to apply that material. If you’ve done this all correctly, your plane will be black like in the picture above.
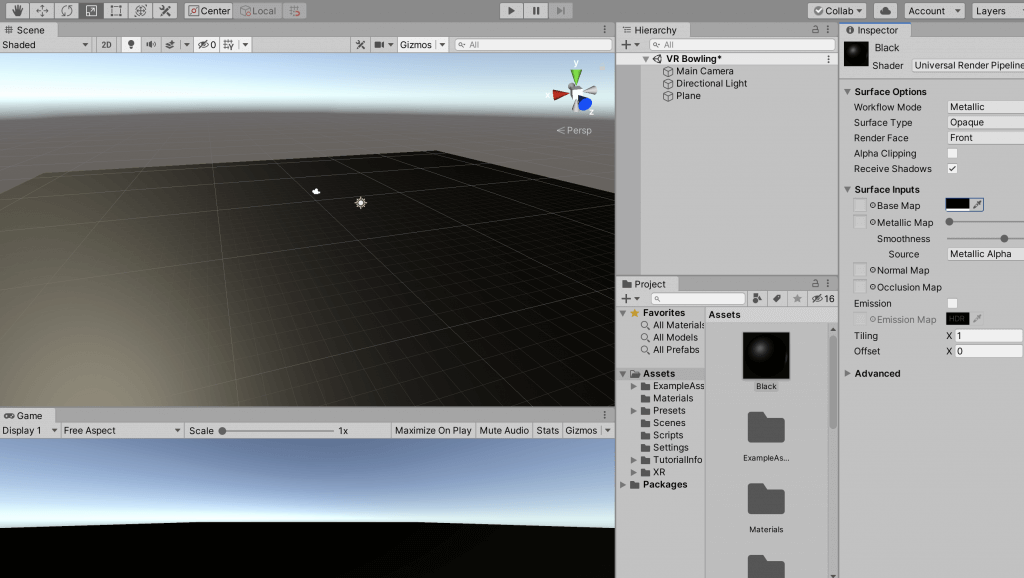
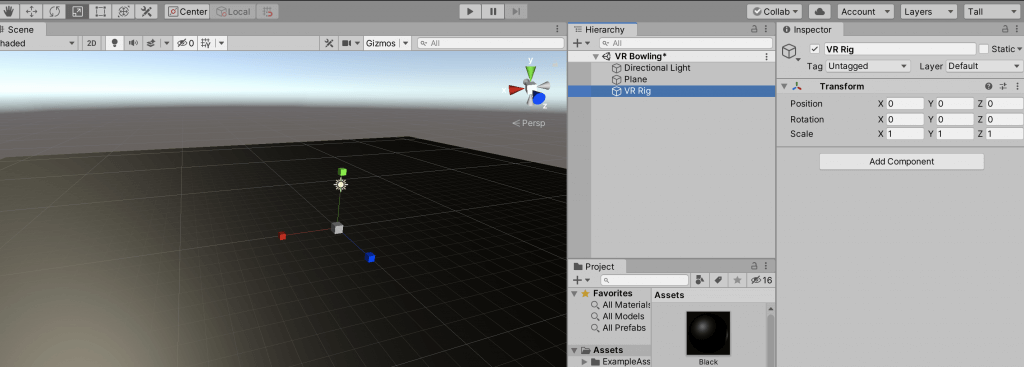
To create the player camera, first delete the default one by right clicking on Main Camera in the Hierarchy window and selecting Delete. Right click on the empty space in the Hierarchy window and select Create Empty. Rename your GameObject to VR Rig and set it’s position in the Inspector window to be 0, 0, and 0.
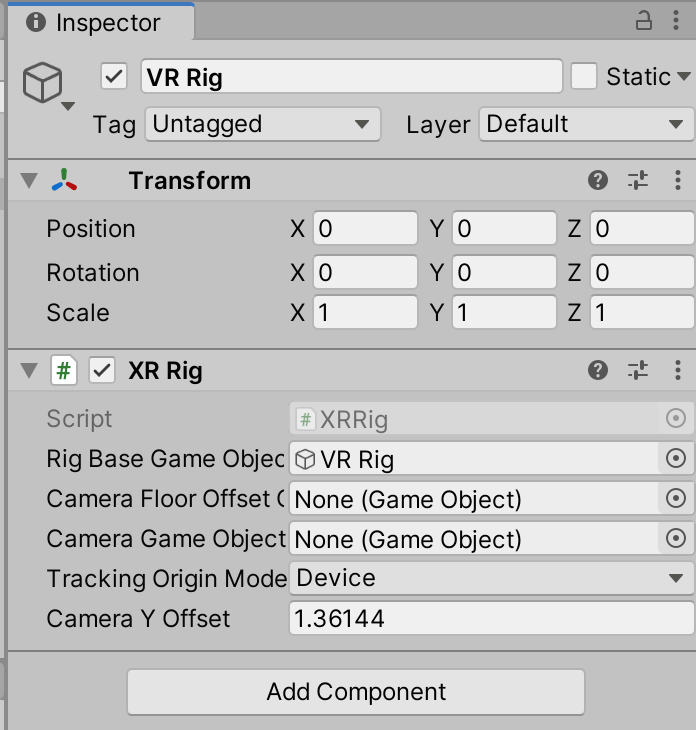
Click on Add Component in the Inspector window and search for XR Rig and click on the search result of the same name. The XR Rig will be added to the Inspector details of our GameObject, but the Camera Floor Offset and Camera Game Object are blank so we have to add those next.
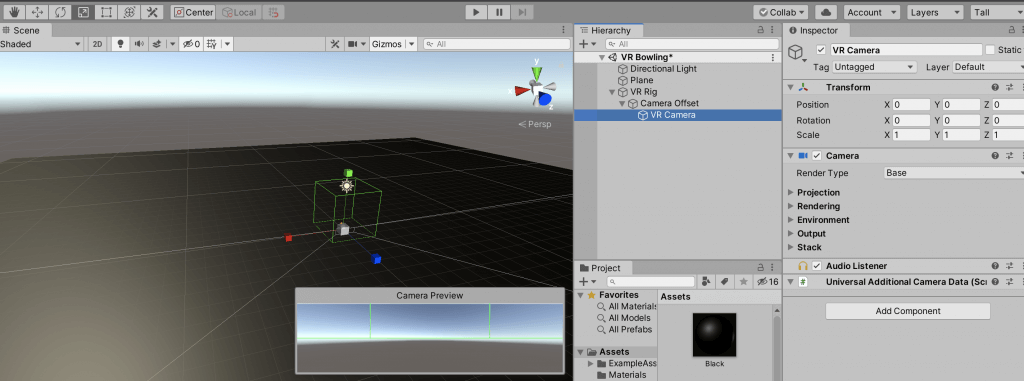
Right click on your VR Rig GameObject and select Create Empty which will create a new objected NESTED UNDERNEATH your VR Rig. Make sure the position is 0, 0, and 0 and rename the object to be Camera Offset.
Right click on this Camera Offset object and select Camera and rename this third object to be VR Camera. This camera will be the player’s eyes and will need to rotate and move with the player wearing the headset.
To set up the camera with the player, you need to click to select your VR Camera and then click Add Component in the Inspector window. Search for Tracked Pose Driver and click on it. Notice that under Device, you can have this camera track the VR Device (headset), controller, or remote. Keep it set to VR Device and change the Pose Source to Center Eye.
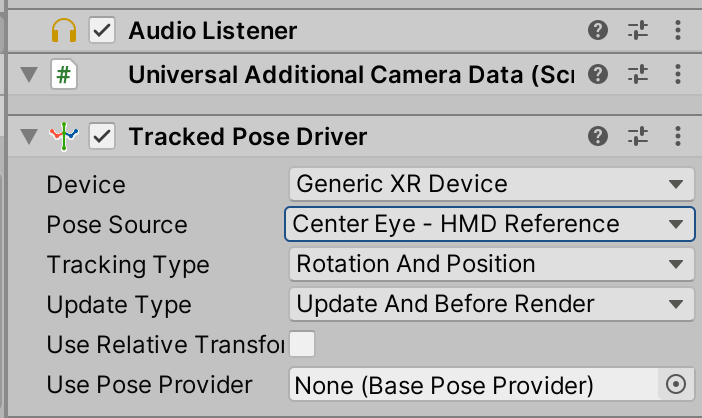
Next, we have to assign our camera offset and VR Camera into the VR Rig’s Inspector setting. Click on VR Rig in the Hierarchy window. Then, drag the Camera Offset object nested underneath it on top of Camera Floor Offset and drag the VR Camera on top of Camera Game Object.
Make sure it looks like the screenshot below.
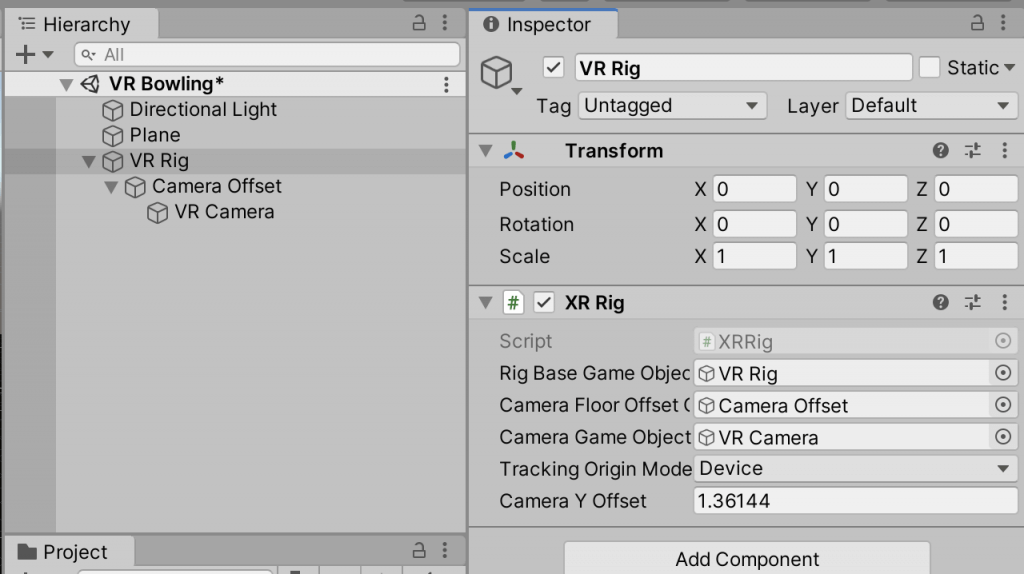
If you have your VR headset attached to your computer, you should be able to press the play button at the top of Unity to test your VR game! When you move your head in your VR headset, you should see the Game window move automatically too!
Lastly, you’ll notice that your VR camera is at the floor level. To fix this and bring up your height to a natural level, change the Tracking Origin Mode of your VR Rig game object to be Floor.
![How to Setup Your Unity Camera for VR Games [TUTORIAL]](https://arvrtips.com/wp-content/uploads/2020/05/tracking-origin-mode-1024x620.png)
Cool, hey!
You’ve just setup your Unity camera with your VR headset. Next, we can setup our VR controllers and then start to add real objects and interaction to our VR game.
Video Tutorial
If you want to see the video tutorial for setting up your Unity camera for VR games, click on the play button below! The video should start at 10 minutes.
Underneath the video, we summarize some key concepts from this Unity tutorial.
Key Concepts in This Tutorial
XR Rig, Camera Offset, and Camera Game Object
The camera GameObject for a mixed reality game needs to be setup as a VR rig type. A VR rig must have an assigned camera floor offset and camera object.
The camera floor offset assigns the ground floor position of our game. We’ve assigned it to the plane we created at 0, 0, and 0 so that the camera’s floor matches the game’s plane.
The camera object is the movable player camera. In virtual reality, this is most often the VR headset position since everything takes place in first person. The tracked pose driver makes it easy to assign our camera game object to the connected VR headset.
If you have any other Unity camera tips for VR development, comment below and we’ll add your tips into this tutorial.

![How to Setup Your Unity Camera for VR Games [TUTORIAL] unity camera setup for vr games](https://arvrtips.com/wp-content/uploads/2020/05/unity-camera-setup-300x225.png)
