This is the ultimate Apple Vision Pro unboxing and setup guide to show you how to get started using your new headset. Below, I’ll go over:
Everything included in the Vision Pro box by default
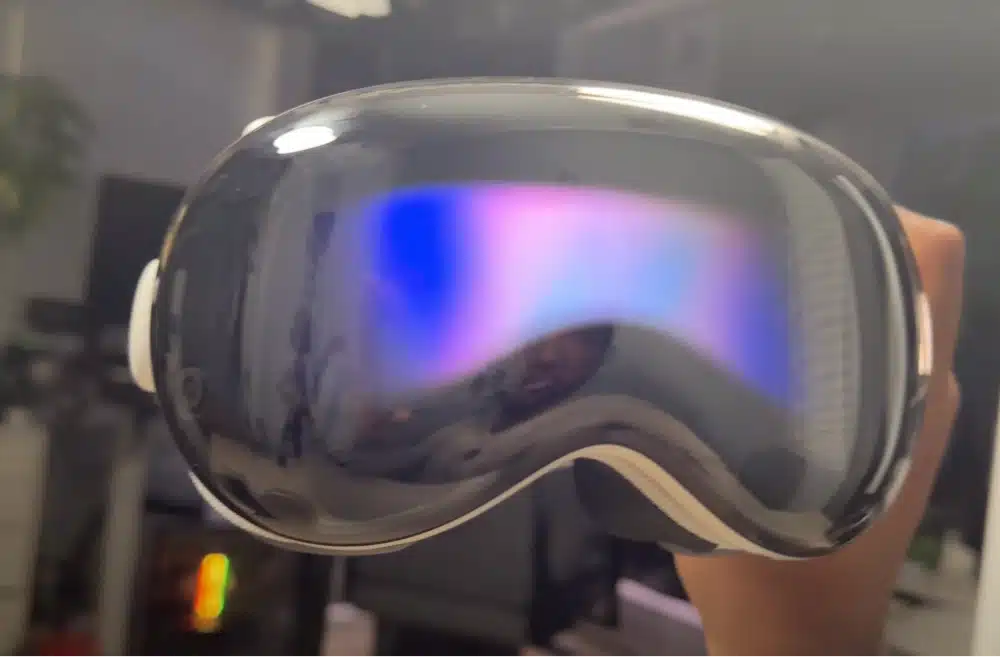
How to get started unboxing and setting up your Vision Pro.
Things to do after setup is complete
This guide is for new Apple Vision Pro owners who want a guide to follow along to, or prospective Vision Pro owners who want a better idea of what they are getting themselves into.
If you have any Apple Vision Pro tips to share, let us know by commenting at the bottom of this guide.
What’s Included in the Apple Vision Pro Box?
The Apple Vision Pro box includes:
Vision Pro Carrying Case: This is the default soft shell that the Apple Vision Pro comes in. You can also store your headset in the case to ensure it remains secure and free from scratches.
Polishing Cloth: Branded with Vision Pro, the cloth is designed for cleaning and maintaining the lenses on the device, providing a clear and immersive visual experience.
Light Seal Cushion: Designed to prevent external light from interfering with your mixed reality experience, the cushion creates a snugger fit between the Vision Pro and your face.
Vision Pro Book: This book is a detailed guide with information about components, battery usage, and instructions for getting started with the Vision Pro headset.
Solo Strap and Dual Loop Strap Bands: These bands offer customization options for a secure, comfortable fit around the head. You can choose between different styles for a personalized experience.
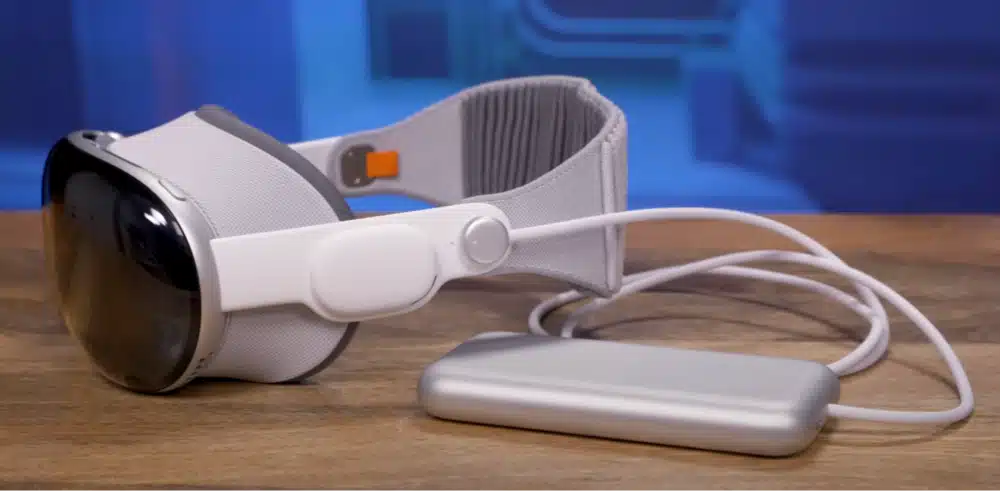
Battery with Tethering Cord: The battery sits in your pocket or belt loop while you play and the cord connects up to your headset.
AC Adapter (30W USB-C): Provides a power source for charging the battery, ensuring the headset is ready for use whenever needed.
Vision Pro Travel Case: A protective and portable case designed for on-the-go use, including an accessory pouch for additional items and an instruction manual for organized packing.
I like that Apple has included a travel case with the device. They are showing that the Vision Pro can be and should be moved around with and that you can travel with it freely.
Click here to buy your Apple Vision Pro.

Apple Vision Pro Unboxing Tutorial
Unboxing the Apple Vision Pro is an exciting journey. Here’s a step-by-step guide I created from my experience opening up the Apple Vision Pro and getting starte to help you navigate through the process:
Open Up the Box
Begin by removing the white cover of the Vision Pro box. Uncover the pull tab, resembling the experience of unboxing a game console.
Reveal the Display Case and Accessories
Lift the box to reveal a display case with a cozy cover. You will find the accessories listed above inside the box inside the display case. Carefully take them out and put them to the side to reveal the Vision Pro headset.
The Battery and Adapter
Discover the battery necessary for the Vision Pro, which is connected to a tethering cord. Beside the battery will be the 30W USB-C AC adapter.
The Vision Pro Travel Case
Locate the Vision Pro travel case, a puffy and winter coat-like case. Find an accessory pouch and an instruction manual for organized packing inside the case.

Preparing for Setup
After exploring the accessories, you can set up your Apple Vision Pro. Before you start, ensure the battery is connected to the Vision Pro and charged.
How to Setup the Apple Vision Pro
After you complete your Apple Vision Pro unboxing, you can set it up for the first time.
Power the Vision Pro On
Press and hold the power button on the Apple Vision Pro to initiate the setup process. As you do this, an Apple logo will appear, signaling the device is powering up.
Adjust the Head Strap
Once powered on, tighten the strap for a secure fit. The strap adjustment ensures the Vision Pro sits comfortably on your head, providing an optimal viewing experience.
Click here to read our guide on how to make the Apple Vision Pro fit better.
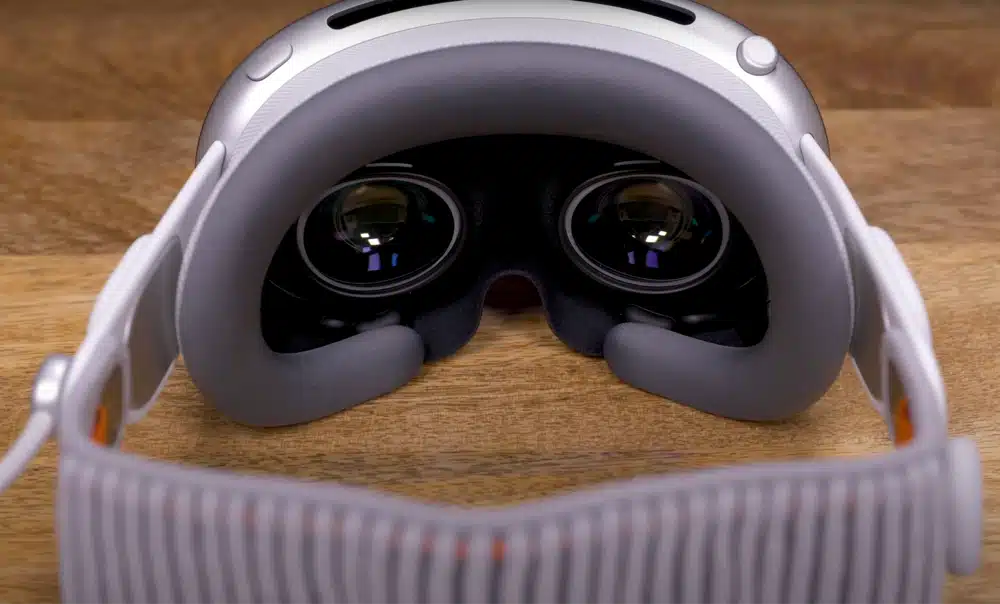
Set your IPD with the Digital Crown
Utilize the Digital Crown, a familiar feature from Apple Watches, to align the lenses to your inter-pupillary distance (IPD). Press and hold the Digital Crown to adjust the lenses until they match the distance between your eyes. When you do this, the display will be clear.
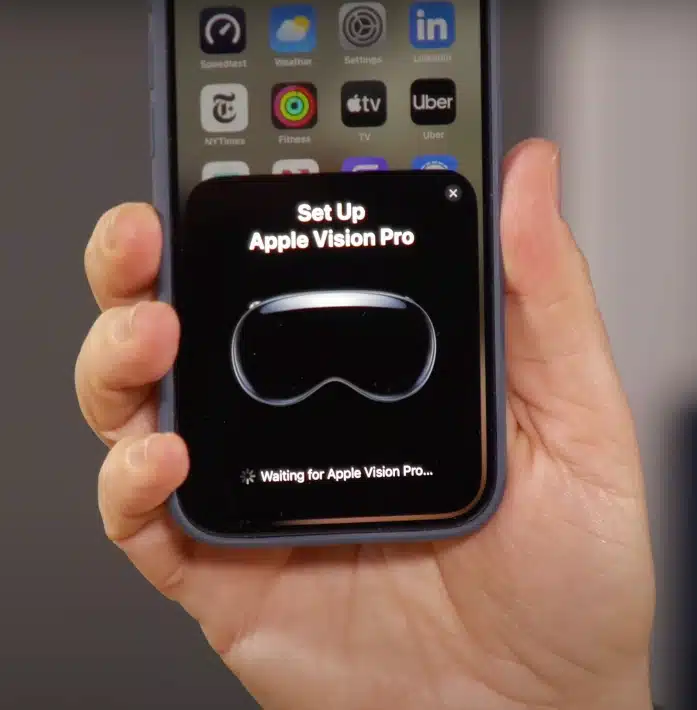
Pair with Your iPhone or iPad
Following the on-screen instructions, bring your iPhone or iPad near the Vision Pro to establish a connection. Use the QR code displayed on the Vision Pro to pair the devices seamlessly.
This connection enables a range of functionalities between your Apple devices and the Vision Pro.
Customize the Fit with Bands
Experiment with the various bands provided, including the Solo strap and Dual Loop strap, to find the most comfortable and secure fit. The customizable bands ensure the Vision Pro stays in place during your augmented reality experiences.
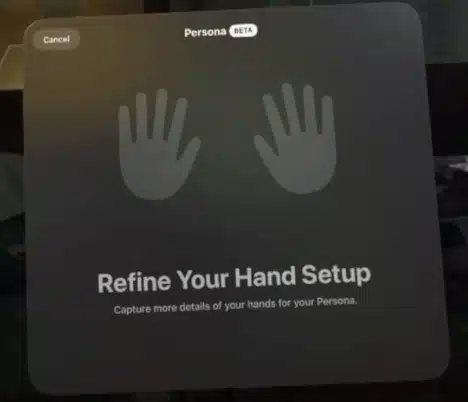
Hand Tracking Calibration
Engage in hand tracking calibration by following the on-screen instructions. Hold your hands out as directed to allow the Vision Pro to accurately capture and track their movements.
This step enhances the immersive nature of mixed reality experiences.
Eye Tracking Calibration
Calibrate the eye tracking feature by looking at and tapping colored dots as prompted. This ensures precise eye tracking, allowing the Vision Pro to respond accurately to your gaze during augmented reality interactions.
Create Your Vision Pro Persona
Next, you will be asked to create a Persona for your Apple Vision Pro. This is a digital representation of you that is used in FaceTime and other voice call apps.
Follow our guide on how to create your Apple Vision Pro persona correctly.
Navigating the Vision Pro Interface
Explore the Vision Pro interface, learning to move and resize windows by looking at specific elements on the screen.
Familiarize yourself with the intuitive controls that allow you to interact seamlessly with the device.
Using Voice Commands
To enable voice-to-text functionality, utilize the built-in voice commands by looking at specific elements, such as the microphone symbol.
Finalizing Setup
After completing all the calibration and customization steps, you’ll be prompted to use the Vision Pro again. Once done, press the Digital Crown to open the home screen.
Your Apple Vision Pro setup is complete, and you are now ready to explore the endless possibilities of augmented reality. If you have any trouble, employees at the Apple Store have been trained to help you setup and start using your Vision Pro correctly.
What’s Next?
After you get through the initial setup, there are a bunch of different things you can do:
Downloading games and apps – at launch, over 700 apps were available natively for the Vision Pro, with thousands of other apps containing flatscreen support.
Watching movies – Many movies and videos in the iTunes library have been updated with 3D spatial audio and video support on the Vision Pro.
Swap to your dual loop band or other Apple Vision Pro accessories you might have.
Facetime family and friends to show off your Persona