The Meta Quest Link feature lets the Meta Quest function as a PC VR headset. You can play Steam VR and Oculus Rift S games on your Quest headset. In this guide, I will show you how to setup Meta Quest Link with the Meta Quest step by step.
Oculus Link has been renamed to Meta Quest Link and they are the exact same thing. This guide works on all Meta Quest headsets.
I’ll also go over the advantages of connecting your Meta Quest VR headset to your PC
I review all those details and other Meta Quest Link tips and tricks below.
If you have trouble setting up Meta Quest Link, comment at the bottom of this guide, and I can help you.
If you want to use Meta Quest Link without a wired connection, Meta also has Air Link, a wireless Virtual Desktop alternative. Click here to read that tutorial guide after this one (it will open in a new tab).
RELATED: Click here to check out the best Meta Quest games.
Quick Start Guide: Set Up Meta Quest Link in 5 Minutes
Before you begin, ensure you have:
- A VR-ready PC with Windows 10/11
- Meta Quest headset
- USB-C cable (either the official Link cable or a compatible USB 2.0/3.0 cable)
- Download Software
- Visit meta.com/quest/setup
- Download and install Oculus PC software
- Connect Hardware
- Turn on your Meta Quest
- Connect USB-C cable to both your Quest and PC
- Put on your headset
- Enable Link
- In PC app: Select Devices → Meta Quest
- In headset: Accept the prompt to Enable Link
- Choose your game storage location when prompted
That’s it! You’re ready to play PC VR games on your Quest.
Pro Tip: For best performance, use a USB 3.0 port and cable to enable higher refresh rates (up to 90Hz vs 72Hz on USB 2.0).
Meta Quest Link Requirements
A VR-ready PC
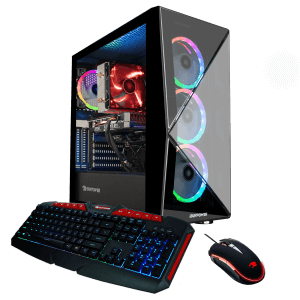
Not all PCs are compatible with the Meta Quest Link, even if they are “VR Ready” PCs. To connect your Meta Quest headset to your PC, you’ll need the following computer specs:
- Windows 10
- At least 8 GB of RAM
- A spare USB 3.0 port
- A CPU for VR that is equivalent to or greater than the Intel i5-4590 or AMD Ryzen 5 1500X
- A graphics card for VR great than the NVidia GeForce 1080.
Check out this list of gaming PCs for VR here. Any of these can run Meta Quest Link and any PC VR games you want!
Meta Quest Link Cable
The original requirement for the Meta Quest Link cable was a USB 3.0 one that met the following requirements:
- Length: 5-Meter Headset Cable
- Type: Full-featured USB active optical cable. USB 3.2 Gen 1 Type-C.
- Signal Requirements: USB 3.2 Gen 1 Signaling 5 Gbps USB 2
- Infrared Signal Loss Tolerances: <500mV VBUS @ 3000mA; <250mV GND @ 3000mA
- Power Supply: 3A
- Bandwidth: 5 Gbps
- Support for SuperSpeed USB ports
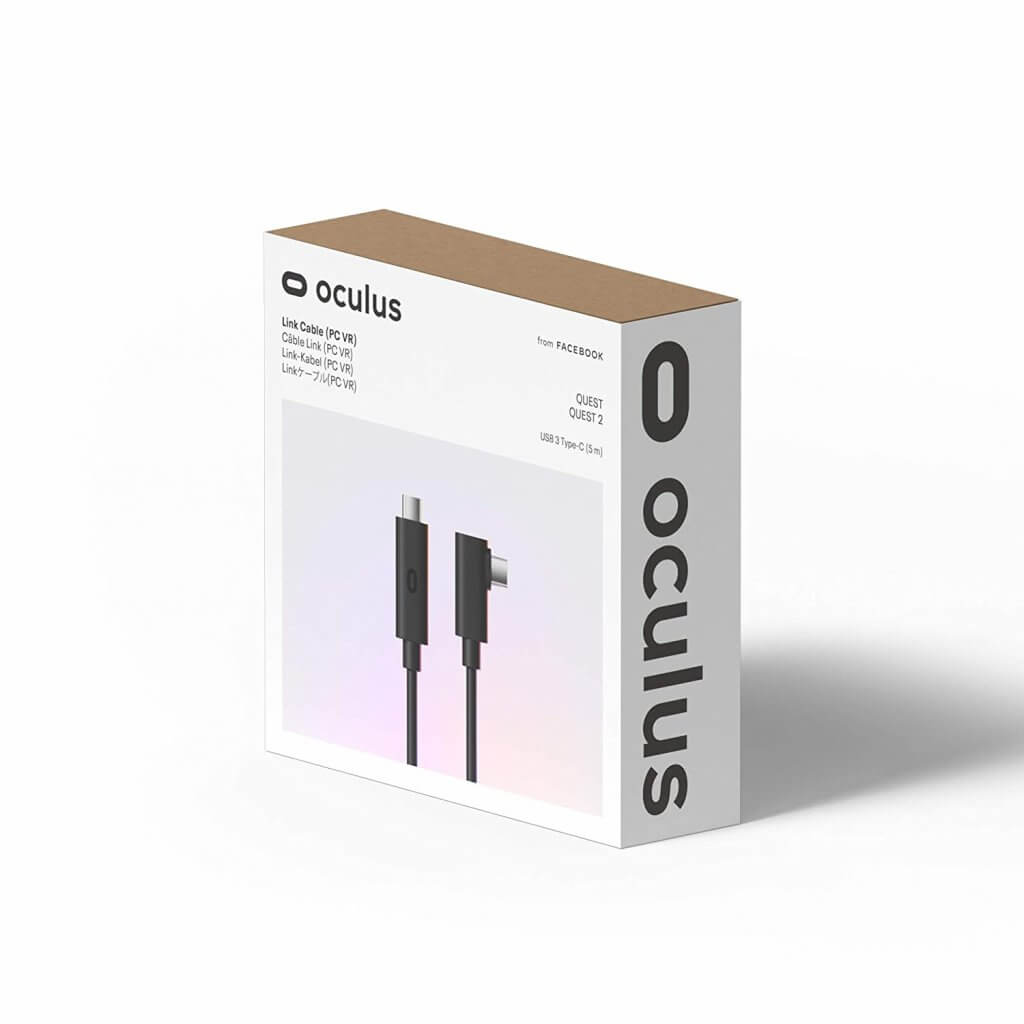
Meta sells an official Meta Quest Link cable on its website so that there is no confusion.
If your Oculus PC software is up to date, it now allows Meta Quest Link to work with USB 2.0 cables. This includes the charging cable that comes with the Quest. That means you don’t have to buy any additional hardware to make this work – other than the gaming PC!
A recent update by Meta now allows a USB-C to USB-C or USB-C to USB-A 2.0 cable. The C-to-C version is what comes with the Meta Quest 1 for charging.
The Meta Quest only comes with a 1-meter charging cable, so it cannot be used for Link play.
You can buy the official and third-party Meta Quest Link cable directly from Amazon below.
[amazon box=”B081SHD773″]
[amazon box=”B087NKYVL9″]
Click here to check out 25 other top Meta Quest 2 accessories.
Oculus Home
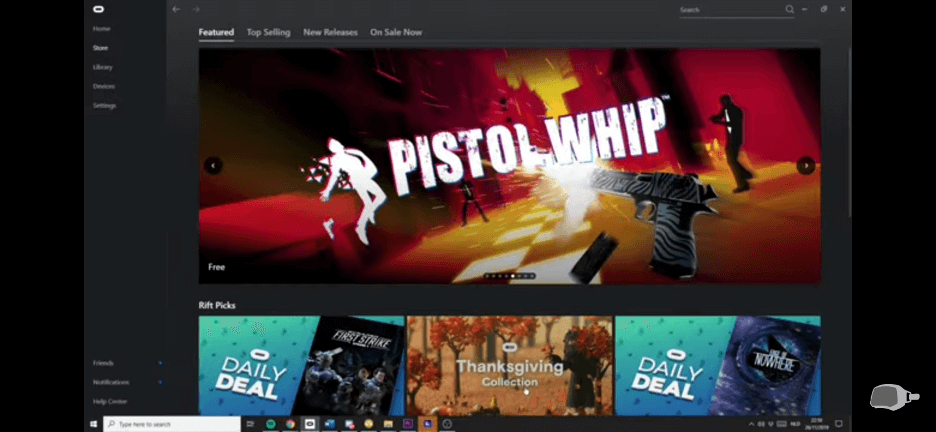
Oculus Home is the PC software that lets you search, download, and play PC VR games. It’s also required to complete the Meta Quest Link setup on your Meta Quest.
You can also play Steam VR games on your Meta Quest, which can be set up after you have Link ready to go. Once everything is set up, you can play Oculus Rift S games on your Meta Quest using your computer. You can also download new games to your Home via the Meta app on your phone.
11.0 Firmware
Your Meta Quest firmware must be on version 11.0 or higher to support and setup Meta Quest Link. Since the firmware version is up to version 70 or higher, this shouldn’t be a problem for most players. If you don’t like to update your firmware, you’ll want to ensure before you follow the Meta Quest Link setup below.
You can set up Meta Quest Link with your Meta Quest if you meet the minimum requirements! Quest 2 owners will be good to go right out of the box.
Let’s show you how to set things up.
Under our setup guide, learn more about the Meta Quest Link cable and check out common troubleshooting questions and answers.
What is Meta Quest Link?
Users love the Meta Quest headset because it is completely wireless. It runs off of an internal processor and you can take it on the go wherever you want.
However, the internal Snapdragon processor is not nearly as strong as a VR gaming PC. Tests show that Quest 1 is almost 5 times less powerful than a typical gaming PC, and Quest 2 is 50% less powerful.
Setting up Meta Quest Link allows you to run all of those awesome PC virtual reality games again. You use your Quest display and controllers, but the games are powered by your PC.
Plus, the selection of VR games available for PC in the Oculus Home store or Steam VR is far greater than the Quest. So by setting up Meta Quest Link, you’ve just multiplied the number of games to check out. Like Roblox VR or any of the awesome multiplayer VR games we’ve featured before.
Click here to see PCVR game deals such as Skyrim VR, No Man’s Sky, and more.
With the basics out of the way, let’s show you how to setup Meta Quest Link.
How To Setup Meta Quest Link With The Meta Quest
In this guide, we’ll show you how to setup Meta Quest Link with the Meta Quest so that you can connect your Quest to your PC and play PCVR games on the headset.
Total Time: 10 minutes
Download and Install Oculus Home
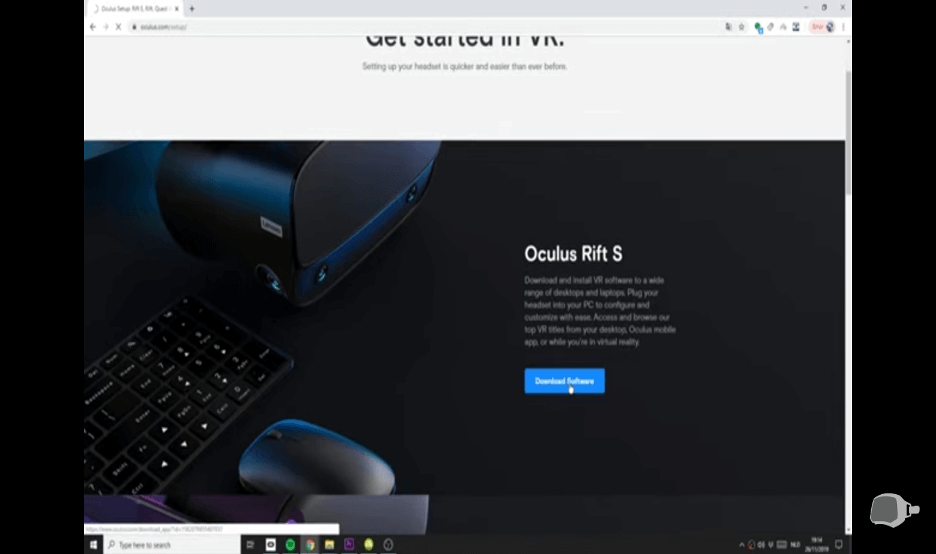
The first step is to download and install the Oculus desktop software from Meta. Visit the Meta official website at https://www.meta.com/ca/quest/setup/, and click on the Download Software button. After downloading the Meta Quest Link software, install the software on your PC like any other program.
Go to the Devices Page
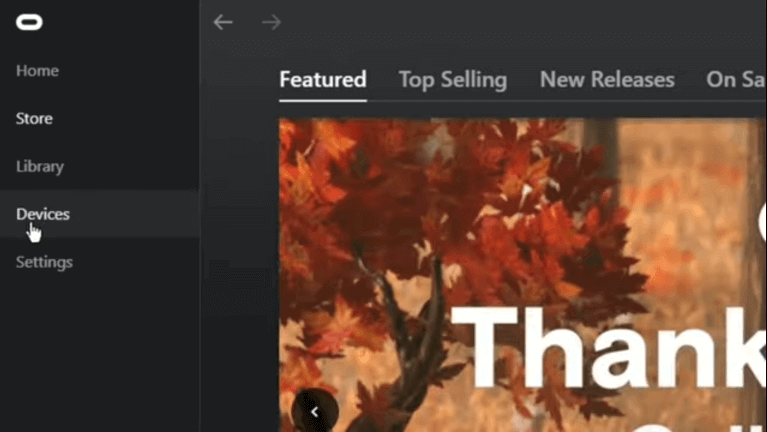
Launch the Oculus desktop app and setup your account if you don’t have one yet. Then, select Devices from the left had side menu.
Select the Meta Quest
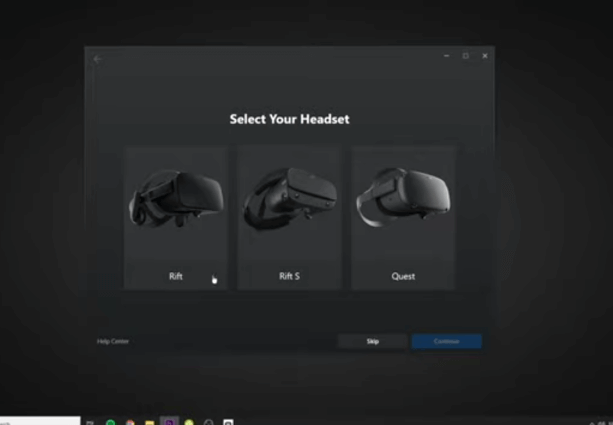
Select your Quest VR headset from the list of headsets displayed on your PC and continue.
Connect Your Meta Quest to Your PC and Enable Link
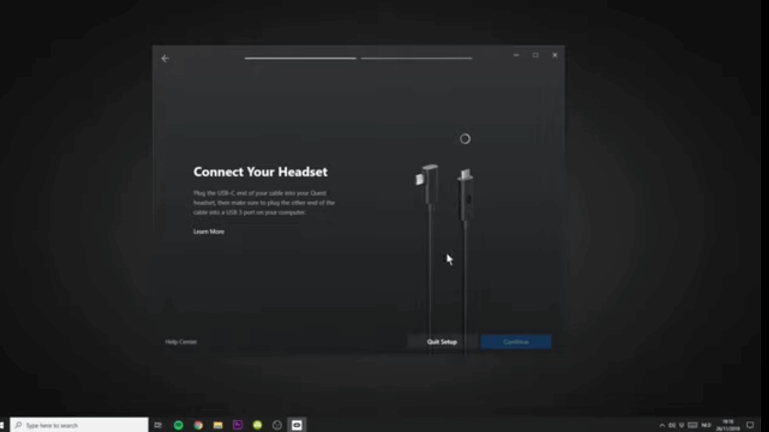
After selecting Quest, the next thing is to connect your Quest to your PC. First, turn on your Meta Quest. Then, plug one side of your USB-C cable into your headset and the other end into a USB port on your PC.
Conformation of Connection
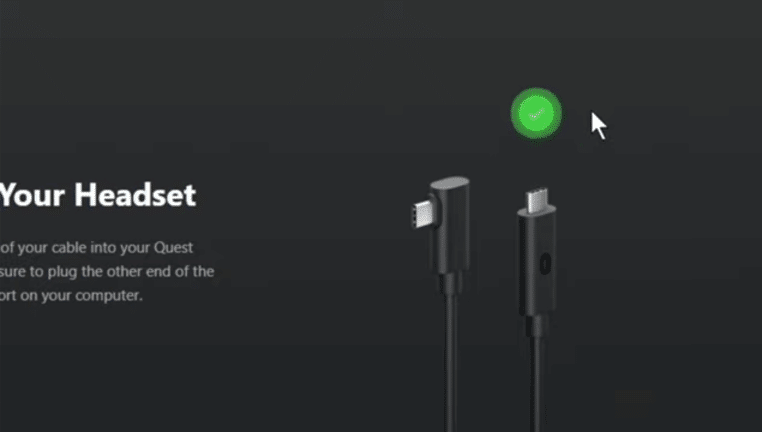
Once the headset is connected, Oculus Home will give you a green light – showing you that your headset is connected.
Confirm that Meta Quest Link is Enabled
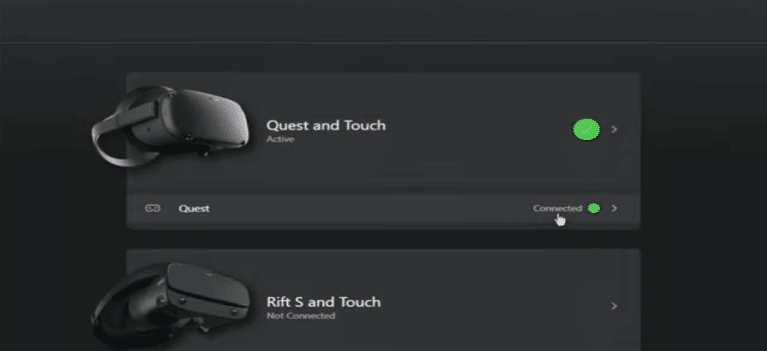
Put on your Meta Quest to confirm whether Meta Quest Link has been enabled.
Set the VR Download Directory
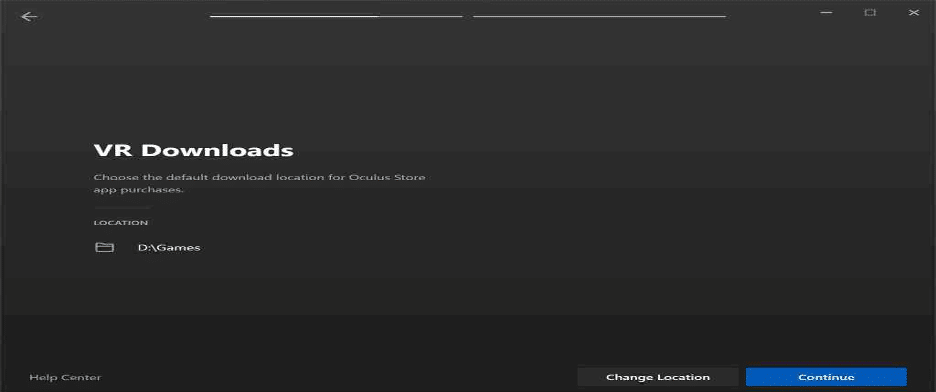
Lastly, Oculus Home on your PC will ask you where to set your default content directory. Since some PCVR games are large, don’t set this to your main system disk if possible.
And that’s it! You’ve setup Meta Quest Link with the Meta Quest and are ready to start playing PCVR games through your Quest VR headset. You can check out and download games to your PC via your computer or the Oculus app.
Below is some extra information for you to check out about the Meta Quest Link cable. Underneath that, I have some troubleshooting tips and help.
USB 2.0 vs 3.0
The obvious question is whether you have any performance drop when you use a USB 2.0 cable for Meta Quest Link instead of a 3.0. Data transfer in a USB cable is dependent on two main factors:
Speed
USB 2.0 supports a maximum transfer speed of 480mbps, while USB 3.0 supports 5gbps. While this sounds like a large difference, Meta Quest only requires a recommended 150mbps of data transfer.
So for the speed at which data transmits to and from the gaming PC to the VR headsets, either standard is fine.
Duplex
USB 2.0 cables are half duplex. Data can only ever transmit in one direction at a time. This means from the host (gaming PC) to the slave (Meta Quest) or vice versa. Each side must wait until they’ve received data before sending data in return.
This sounds complicated, but it happens millions of times per second.
USB 3.0 cables are full duplex. This means that your gaming PC and Meta Quest can transmit data to each other simultaneously.
Meta Quest Link 3.0 cables use full duplex communications. This means that data is sent from your headset controller to the PC while your PCVR video is fed to the headset simultaneously. Since 2.0 cables can’t do this, you can expect additional latency while playing.
Meta Quest Link 3.0 cables use full duplex communications. This means that data is sent from your headset controller to the PC while your PCVR video is fed to the headset simultaneously. Since 2.0 cables can’t do this, you can expect some additional latency while playing.
Windows 11 Support
Meta Quest Link has some issues with the Windows 11 operating system, and it might give you trouble getting things set up. Here are my top tips to make sure that Quest Link works with Windows 11:
- If possible, use the official Oculus Link cable. If you don’t have that, make sure your Link cable is USB 3.0.
- Reinstall the Link driver by going to this folder on your computer and running the executable: c:\Program Files\Oculus\Support\oculus-drivers\oculus-driver.exe.
- Make sure you have version #42 of the Meta operating system at minimum.
- Reinstall the Oculus Home PC app.
Meta Quest Link Performance Optimization
Optimizing Graphics Settings in the Oculus PC App
I’ve found that the default Link settings aren’t always ideal for the best performance. In the Oculus PC app, click “Devices” and select your Quest headset to access graphics settings. You can adjust the refresh rate between 72Hz, 80Hz, and 90Hz – I recommend starting at 80Hz for a good balance of smoothness and performance.
The render resolution slider directly impacts visual quality and performance. I set mine to 1.2x for my RTX 3080, but you’ll want to lower this on less powerful GPUs. My testing shows that going above 1.5x rarely provides noticeable benefits but tanks performance.
Advanced Performance Tweaking with Oculus Debug Tool
The Oculus Debug Tool gives you deeper control over Link’s performance. You’ll find it in: C:\Program Files\Oculus\Support\oculus-diagnostics\OculusDebugTool.exe
Here are the key settings I adjust:
- Encode Bitrate (Mbps): I set this between 250-350 for best quality
- Distortion Curvature: Lower values reduce GPU load
- Link Sharpening: Enable this for crisper visuals
Hardware-Specific Performance Recommendations
Your PC’s specs determine the optimal Link settings. Based on my testing:
RTX 3060/2070 or Similar:
- Resolution: 1.0x
- Refresh Rate: 72Hz or 80Hz
- Bitrate: 200Mbps
RTX 3070/3080 or Better:
- Resolution: 1.2-1.5x
- Refresh Rate: 90Hz
- Bitrate: 350Mbps
Frame Rate Targets and Performance Monitoring
I aim to maintain consistent frame rates matching my refresh rate setting. Using the Performance HUD (enabled in Debug Tool), I watch for frame drops. A steady 72fps feels much better than unstable 90fps performance.
ASW (Asynchronous Space Warp) kicks in automatically when you can’t hit target frame rates. You’ll notice this as slight visual artifacts, especially during fast movement. If you see frequent ASW activation, lower your settings until performance improves.
Testing Your Link Performance
I use Beat Saber as my go-to performance test since it’s sensitive to latency. Load up a fast song and watch for any tracking lag or stutters. If you notice issues, gradually reduce settings until gameplay feels smooth and responsive.
The Oculus Mirror tool lets you monitor what’s being sent to your headset. This helps identify if performance problems are from your PC or the Link connection itself.
Meta Quest Link Tips
Optimize Meta Quest Link with these tips and tricks to let you play games with less latency and buffer.
Use USB 3.0
I just went through all the reasons that USB 3.0 is better. Another tip for using it is that USB 3.0 will enable 80 Hz and 90 Hz refresh rates. On USB 2.0, you will be forced to a maximum of 72 Hz.
You also need to ensure that you are plugging into a USB 3.0 port on your computer, or else your cable will be for nothing.
Use a new Nvidia RTX Graphic Card
Your video signal through the Meta Quest Link cable is compressed by your graphics card in your PC. Nvidia RTX cards (30-series in 2020 and 40-series in 2022) have better video encoding features than AMD or older Nvidia cards. To make your framerate smoother, check out our new Nvidia RTX GPU guide here and pick one up today.
Keep Your PC Cool
High temperatures can impact Link performance and encoding quality. I recommend:
- Using monitoring software to check GPU and CPU temperatures
- Ensuring proper case airflow with intake and exhaust fans
- Cleaning dust from components regularly
Disable Power Saving Features
Windows power management can interfere with Link performance. Go to Windows power settings and set your plan to “High Performance”. This prevents your USB ports and GPU from entering lower power states during VR use.
Close Background Apps
Other programs running on your PC can impact Link latency. Before starting VR, I close:
- Web browsers with multiple tabs
- Game launchers and overlays
- Video streaming apps
These optimizations help me get the smoothest possible experience when using Meta Quest Link for PC VR gaming. Let me know in the comments if you have other tips to share!
Let us know if you have any other ways to set up Meta Quest Link the best.
Meta Quest Link Alternatives
Virtual Desktop
The main alternative to Meta Quest Link is Virtual Desktop. VD for the Meta Quest has an extra mod via SideQuest that lets you play PCVR games wirelessly on your Quest.
To get setup, you simply have to install Virtual Desktop, the VD mod from SideQuest, and configure a wireless network connection from your computer to your Quest. If you set things up right, you can play wirelessly with little or no latency. Even the Meta touch controllers work seamlessly with VD too.
I have a full setup guide for Virtual Desktop on the Meta Quest, which goes through everything!
Air Link
Air Link is Oculus’ official wireless driver to play PCVR games on your Meta Quest. Like Virtual Desktop, it doesn’t use any cables at all. Air Link runs on your home wi-fi connection, so you’ll want to buy a dedicated Meta Quest router.
Click here for our complete guide on how to setup Air Link.
Steam Link
Steam Link is a Valve app that let’s you wirelessly connect to the Steam library on your computer. It is another alternative to Virtual Desktop and Air Link that launched in early 2024.
Steam Link has one advantage in that it gives proprietary access to Steam without needing to send data through a compatibility layer like in Virtual Desktop or Air Link. Check out our Steam Link guide for more information.
Network Setup Guide for Meta Quest Link
Optimizing Your Network for Meta Quest Link Performance
I’ve found that a properly configured network makes a huge difference in Meta Quest Link performance. Let me share my tested settings that give the smoothest experience.
Router Selection and Placement
For the best Meta Quest Link experience, I recommend using a WiFi 6 router with at least 1200 Mbps speeds. My top picks are the ASUS RT-AX82U or TP-Link Archer AX6000.
Place your router in the same room as your VR play space. I noticed much better performance when my router had direct line of sight to my Quest headset.
Optimal Router Settings
Here are the key settings I use on my router for Meta Quest Link:
- Set channel width to 80 MHz for 5 GHz band
- Enable QoS and prioritize VR traffic
- Use a fixed channel (avoid “auto” channel selection)
- Disable band steering
Testing Your Network Performance
You can check your connection quality right in the Quest settings. Look for:
- Latency under 50ms
- Bitrate of at least 100 Mbps
- No frame drops in the performance overlay
Reducing Network Interference
I’ve found these tips help minimize connection issues:
- Keep other wireless devices off the 5 GHz network while using Link
- Disable nearby Bluetooth devices
- Keep your Quest and PC on the same network subnet
Dedicated VR Network Setup
For the absolute best performance, I set up a separate SSID just for VR. This keeps other devices from interfering with the Link connection. Name it something unique like “VR_Network” and only connect your Quest and VR PC to it.
Pro Tip: If you’re still having connection issues, try connecting your PC directly to the router via ethernet. This creates the most stable link between your PC and Quest.
Meta Quest Link Not Working: FAQs
If you are having trouble setting up Meta Quest Link, we’ve compiled some questions and answers to some of the most popular questions on the internet.
Why does my Quest connect to my PC and then quickly crash?
Most often, this is because of incompatible specs on your gaming PC. To check this:
- Go to your PC or laptop’s spec page and look up the GPU, CPU, Memory, operating system, and USB ports.
- Compare these specs against the minimum requirements I stated above.
- Check your GPU against Meta’s official table. If your GPU is not currently supported, you may be able to setup Meta Quest Link with your device but is more likely to have performance issues with Meta Quest Link.
My computer won’t recognize Meta Quest Link when it’s connected.
Ensure your operating system is up to date on your PC and Quest. Then, restart your computer and see if that fixes things.
I can’t see where to select the Meta Quest in the Oculus PC software.
If you can’t see the option to add the Quest, log out of the PC software and log back in. Also, make sure you have the latest version installed.
I can’t see the “Enable Link” option on the Meta Quest.
If you can’t see the “Enable Link” option under Settings on your Meta Quest, turn the headset off completely and restart.
My Height is Incorrect When Using Meta Quest Link
Some users report that their height is calibrated incorrectly while using Meta Quest Link. To fix this issue, you need to unplug your Link cable and plug it back in.
Doing this will pass the room size information between the headset and the Oculus Home software again.
Can you setup Meta Quest Link with a Mac?
The Oculus PC software is only available for Windows. This means that you can’t get Meta Quest Link working with Mac natively.
However, some users have reported using Bootcamp to install a virtual version of Windows on their Mac. Then, you can install the Oculus software in Bootcamp and run Meta Quest Link if your Mac specs are good enough.
Were you able to setup Meta Quest Link with your Meta Quest? If you have any questions, let us know below!
I’m getting poor performance and stuttering with Link
Lower your graphics settings in the Oculus PC app and make sure your cable is properly connected. I recommend starting at 72Hz refresh rate and gradually increasing if performance allows.
Air Link keeps failing to connect
Double check that your PC and Quest are on the same network. Try restarting your router and positioning your Quest closer to your WiFi access point
The image quality looks blurry or compressed
Increase the encoding bitrate in Oculus Debug Tool. I find 250-300 Mbps works well for USB 3.0 connections. Also verify your render resolution isn’t set too low.


