Before you play any VR games using the PlayStation VR2 headset, there are a few features in the settings you should look to update.
By tweaking a few settings on your Playstation 5, you can add functionality, configure buttons in new ways, and improve your Playstation VR2 experience.
These settings give you a better experience in VR mode. Setting them up only takes a few minutes too. This is a complement to our overall Playstation VR2 tips guide!
Here are the PSVR2 settings you should update:
Best PlayStation VR2 Settings for Optimum VR Gaming
Enable Enhanced Tracking
If you go into Settings > Accessories > Playstation VR2, scroll down and enable “Tracking Support.”
This option will give you enhanced tracking, which is helpful in games where you have to aim, point, and shoot at anything.
When you enable Tracking Support, your PS5 will add a small border around the outside of your display. For the most part, this display will not be visible and will sit outside your TV boundaries. However, this frame helps the PlayStation VR2 understand where you point your controllers during games.
Give it a try, and your sense controllers will see improved tracking.
Enables 120Hz Support in Cinematic Mode
Go to Settings > Screen and Video > Video Output and change “120 Hz Output” to “Off.” Then, go to Settings > Accessories > Playstation VR2 > Video Output and Enable the options to “Output 120 Hz Video to VR Headset” and “HDR Output.”
After you do this, you can go back into your Screen and Video options and change your “120 Hz Output” back to “Automatic.
After you do this, games in cinematic mode will display at 120 Hz, and these games will run smooth as butter.
Enable Sidetone Volume
If you play PSVR2 with friends or family in the room, then navigate to Settings > Sound > Audio Output and change “Sidetone Volume” to 1 or 2.
Sidetone Volume allows some outside room noise to come through the noise cancellation of your PSVR2 headphones. You will be able to hear any outside chatter more easily.
If you are jumpy, this setting can help you hear when someone comes into the room better.

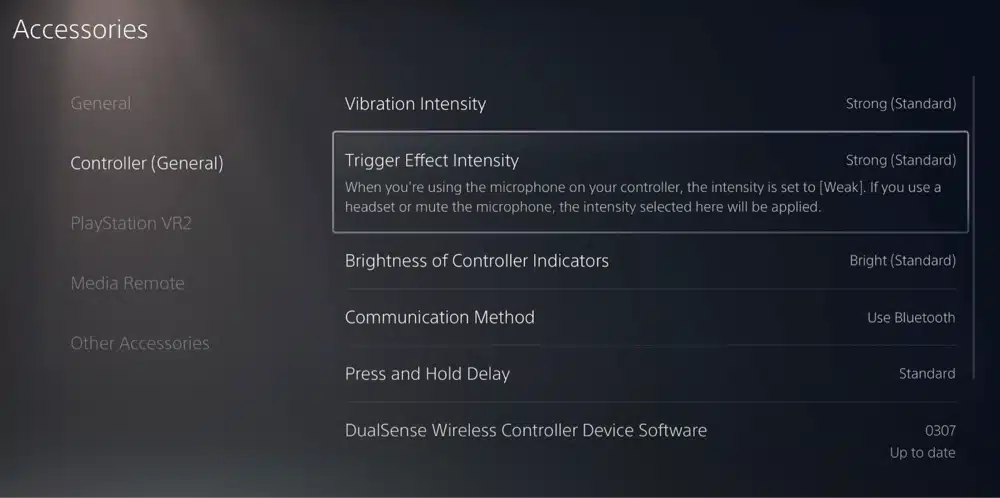
Improve Controller Vibration
Navigate to Settings > Controller (General) and make sure that “Vibration Internally” and “Trigger Effect Intensity” are both set to “Strong.”
This setting will ensure you get the most powerful vibrations in your PS5 DualSense and VR Sense controllers. These vibrations are key to feeling haptic feedback and other gameplay features, so you are better off using the strongest setting.
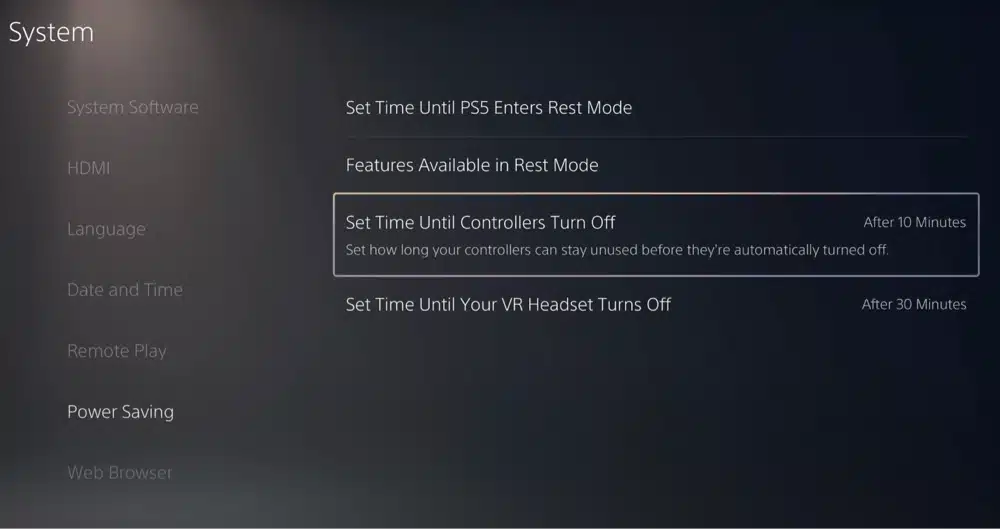
Enable Controller Power Saving
Navigate to Settings > System > Power Saving and change “Set Time Until Controllers Turn Off” to “After 10 Minutes”.
By default, this option is “Don’t Turn Off,” meaning you must remember to turn off your controllers yourself when you are done playing. This new setting will ensure that each Sense controller turns off when you are done playing in virtual reality.
Sense controllers last about 6 hours worth of gameplay, and this setting will maximize your playtime.
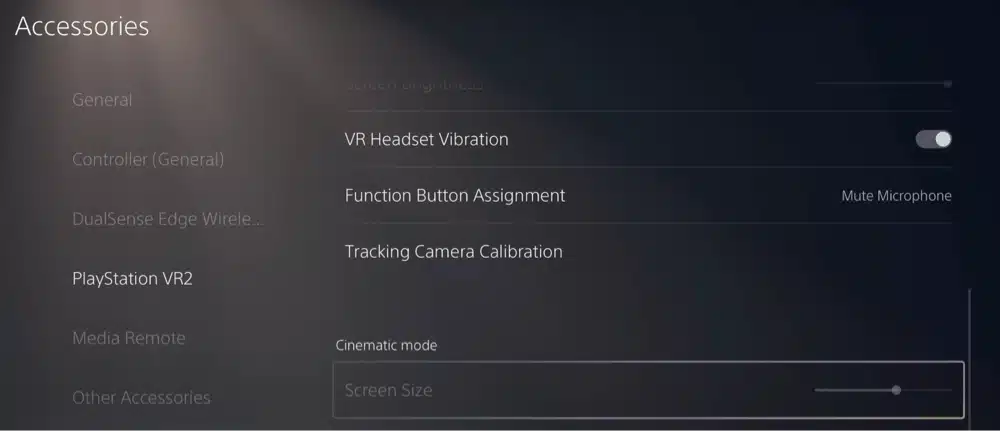
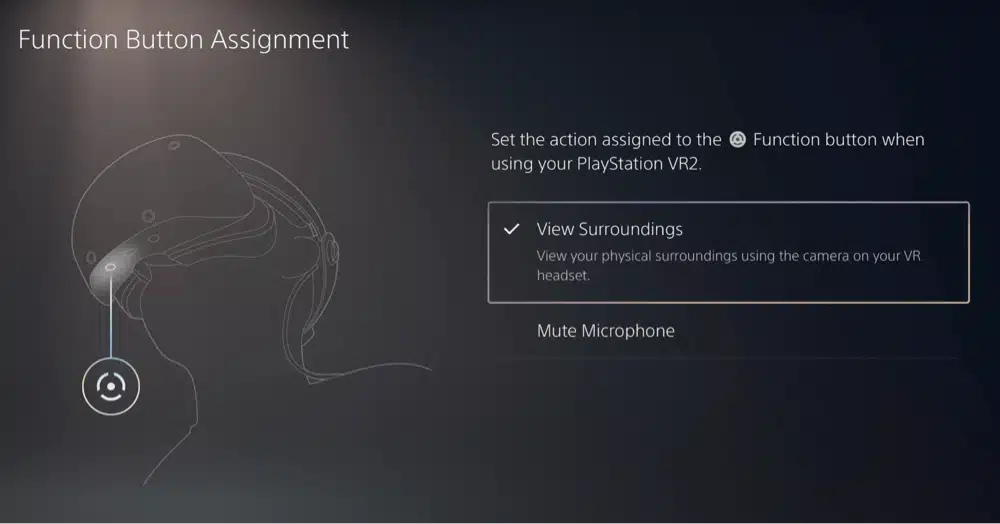
Change the Function Button
If you navigate to Settings > Accessories > Playstation VR2 > Function Button Assignment, you can change this button from “View Surroundings” to “Mute Microphone.”
If you don’t use passthrough mode to view your surroundings often, you can make the function button mute your microphone. This is very helpful if you play a lot of multiplayer VR games.
The function button is on the bottom of your headset and is a quick shortcut button.
Optimize Your Screen Size
Navigate to Settings > Accessories > Playstation VR2 > Screen Size and adjust this setting to bigger or smaller until you get the perfect value.
This setting ensures that all of your VR games look beautiful and take up the entire screen in your headset.
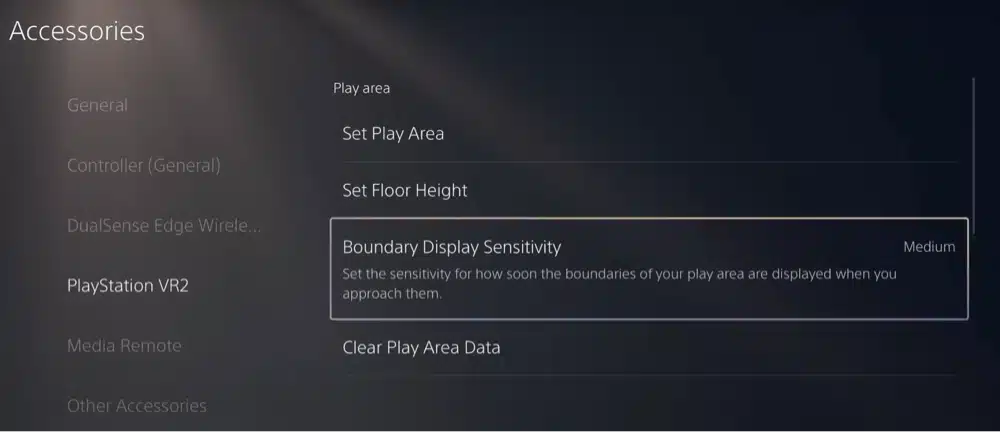
Lower Your Boundary Display Sensitivity
Navigate to Settings > Accessories > Playstation VR2 and set the “Boundary Display Sensitivity” to “Low.”
This setting adjusts how quickly the guardian boundary from your play area is displayed in your VR headset. When this happens, it breaks the immersion in your games. I play in a more open space, so the boundary doesn’t have to appear fast.
If you play in a tight space or forget you are playing in virtual reality, keep this setting at the default “Medium.”
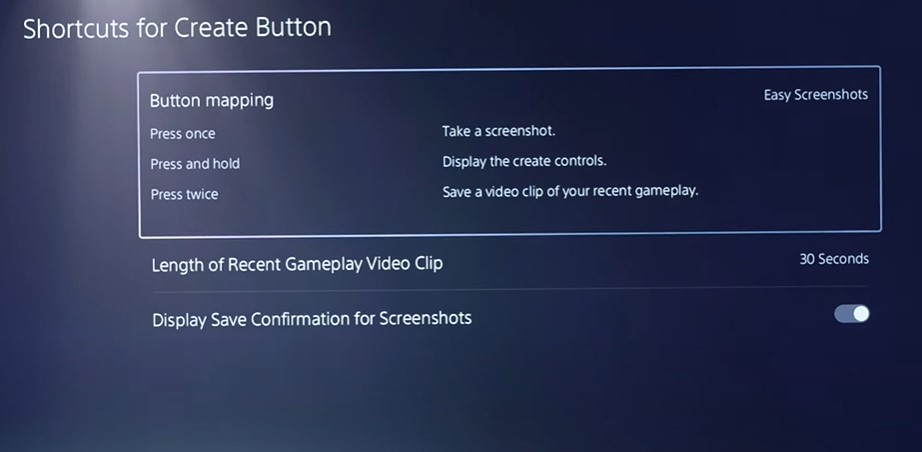
Reconfigure Create Button
Go to Settings > Captures and Broadcasts > Captures > Shortcuts for Create Button > Button Mapping > Easy Screenshots.
Like with the PS5, you can take instant screenshots of precisely what you are looking at through your VR2 headset. By mapping the create button to easy screenshots, one click will take a screenshot for you.
The create button is on the left-hand controller to the left of the joystick. Once you take a screenshot, you can export it in JPG or PNG format.
Give it a try, and now you don’t have to worry about missing out on a cool-looking visual while playing your game!
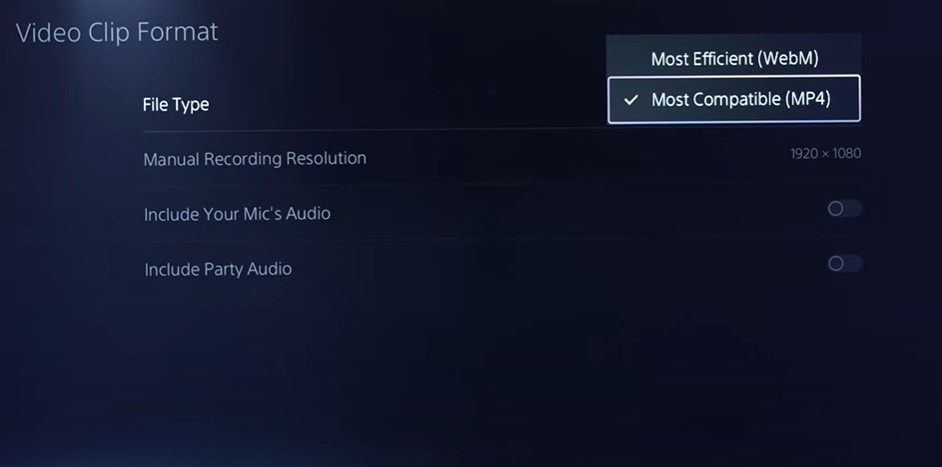
Change Recording Format
Go to Settings > Captures and Broadcasts > Captures > Video Clip Format, and change the file type to MP4.
For those who want to record gameplay and upload it for various reasons, you may want to change the recording format to MP4. This is the most compatible format used online for video clips.
The only thing to remember is that if you want to record your gameplay in 4K resolution, you will need to use the WebM format instead of MP4.
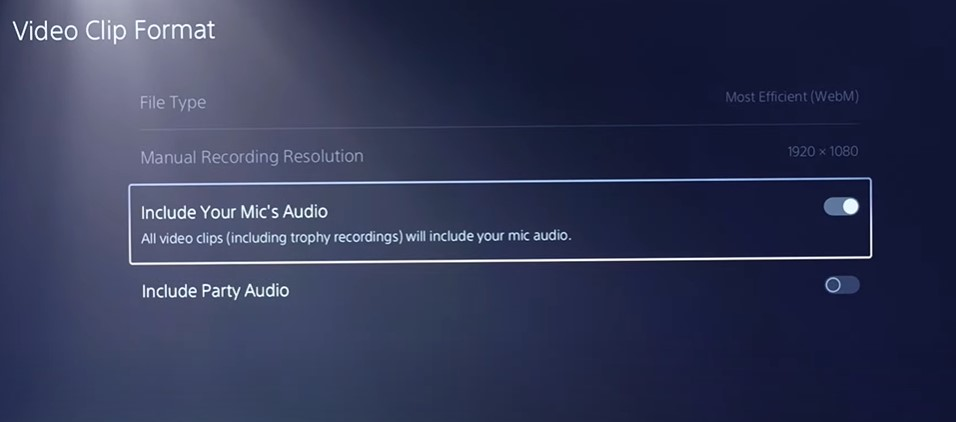
Record Mic Audio
In Settings > Captures and Broadcasts > Captures > Video Clip Format, scroll down and click on “Include Your Mic’s Audio.”
If you want to include your microphone’s audio while recording your gameplay, check this off in the video clip format area as well. This is great for someone who wants to provide tips and tricks while discussing their gameplay. This also works great for live streamers who like to showcase their talents.
Lower Screen Brightness
Enter Quick Settings by clicking the PS Button, and lower the brightness by scrolling the dial to the left.
Lowering the brightness of your VR2 screen can help with the ghosting and reduce some of the blur you are getting from certain games. Lowering the brightness also has the added benefit of reducing eye strain from extended play sessions.
Try it out and see if it works for you!

Conclusion
Hopefully, these PlayStation VR2 settings give you a more immersive experience. I will be playing around with more settings to optimize the PSVR2. If you have found anything worth sharing, comment below and let me know!