Meta and Steam have made it easier than ever to play Steam games on Meta Quest. In this step-by-step tutorial guide, I will show you 5 different ways to access Steam VR on your Oculus Quest.
I’ll go over all the main ways:
Oculus Link and Air Link are solutions offered by Meta, Virtual Desktop, and Bigscreen VR are third-party solutions, and Steam Link is offered directly from Valve/Steam! Which method works the best is different for everyone!
Comment below and let me know what your favorite way play Steam games on Meta Quest is.
RELATED: Click here to read about Steam VR vs Oculus Home.
- Requirements to Play Steam Games on a Quest VR Headset
- How to Play Steam Games on Meta Quest (Direct Method)
- How to Play Steam Games on Meta Quest (Steam Link Method)
- How to Play Steam Games on Meta Quest (Virtual Desktop Method)
- How to Play Steam Games on Meta Quest Using Bigscreen VR
- Oculus Link vs Air Link
- Conclusion
Requirements to Play Steam Games on a Quest VR Headset
No matter what option you choose below, you need a gaming PC that is capable of playing virtual reality games. You can see some top options here. Or, you can take a look at building your own PC here.
The requirements to play Steam games on Meta Quest vary by what option you choose. For Oculus Link, you need an Oculus Link cable, which connects from your VR headset to your computer.
You can buy your Link cable below:
[amazon box=”B081SHD773″]
You technically don’t need any extra hardware for Steam Link, Oculus Air Link, Virtual Desktop, and Bigscreen VR. These methods use your Wi-Fi connection to connect to your computer.
However, you should buy a dedicated router to use as a wireless access point (WAP). Your WAP allows you to connect directly from your Quest to your computer without interference from other Wi-Fi network devices.
I’ve listed my favorite two routers below. The first is a basic router with 100 Mbps ports and the second has full Gigabit speed capabilities and Wi-Fi 6.
[amazon box=”B00ES6ZQ7O”]
[amazon box=”B08BJHS3X7″]
How to Play Steam Games on Meta Quest (Direct Method)
Requirements
- Meta Quest headset
- Gaming PC with Steam installed
- SteamVR app
- Oculus app for PC
Here’s a step-by-step guide on how to play Steam games on Meta Quest (direct method):
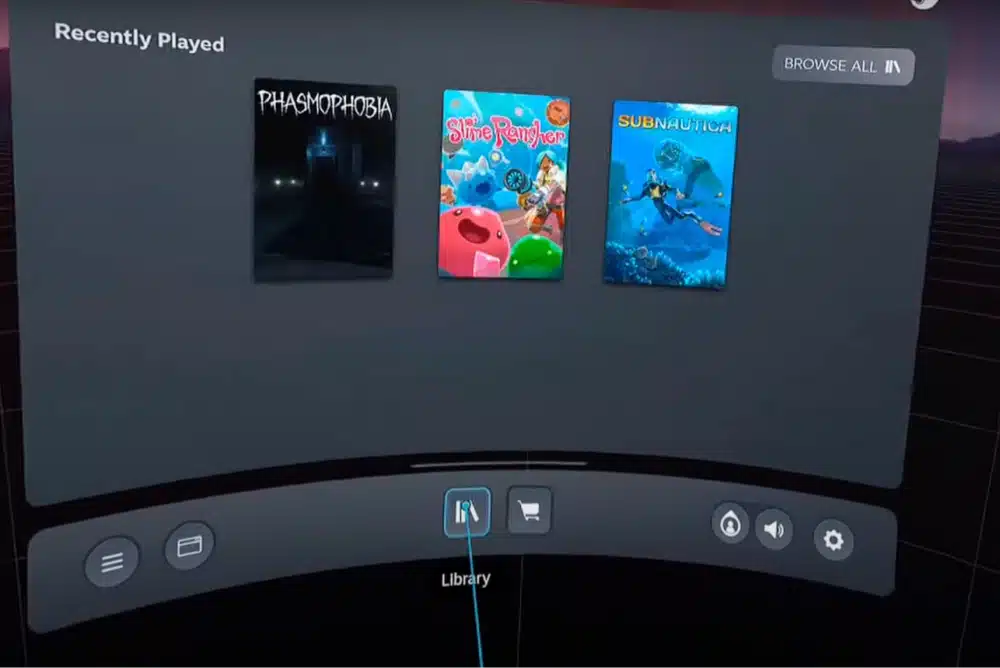
Install Necessary Software
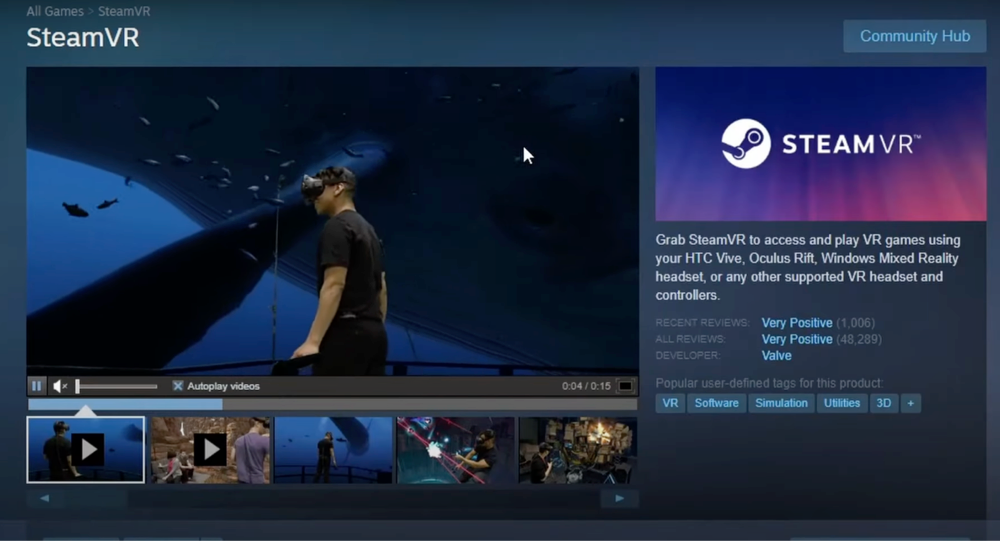
First, you need to download and Install SteamVR. To do this, open Steam on your PC. In the Store, search for “SteamVR.” Then, click “Install” to download and install the SteamVR app.
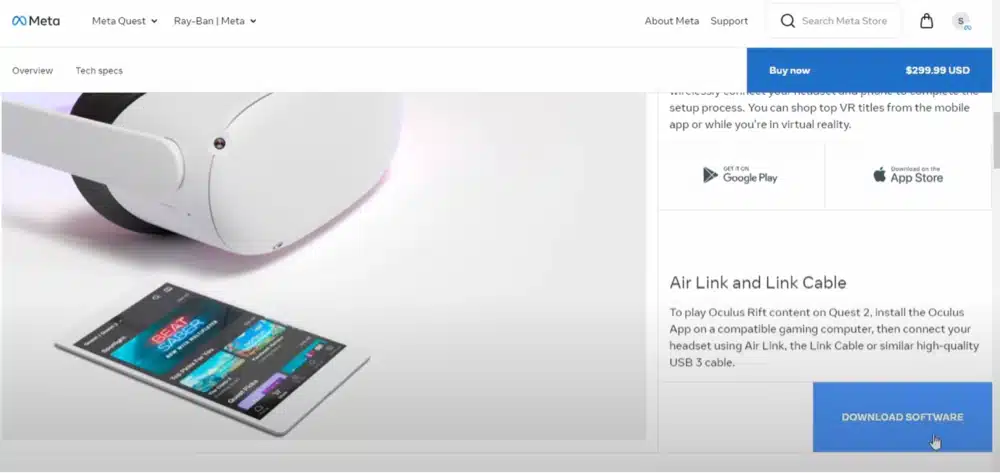
Next, you need to download and install the Oculus App (also known as the Meta Quest app). Go to the Oculus website and download the Oculus app for PC. Install the app by following the on-screen instructions.
Configure the Oculus App on Your PC
Launch the Oculus App on your computer.
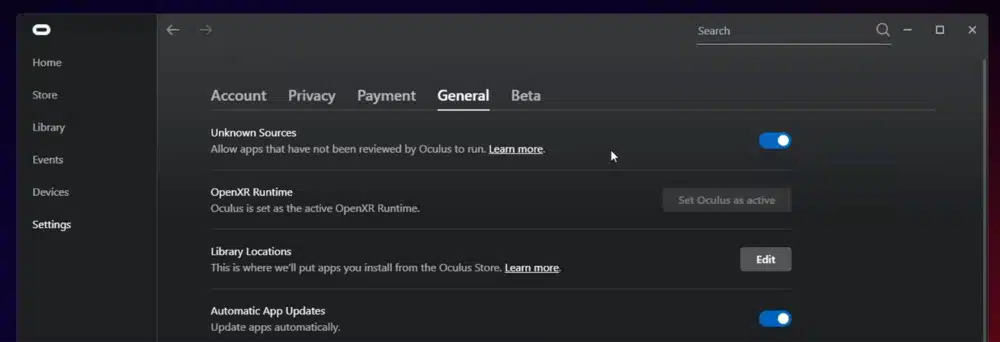
In the Oculus app, navigate to Settings. Select General from the menu. Enable the Allow Unknown Sources option. This allows the Oculus app to detect and run SteamVR.
In the Oculus app, go to Devices. Click Add Headset and select your Meta Quest model from the list.

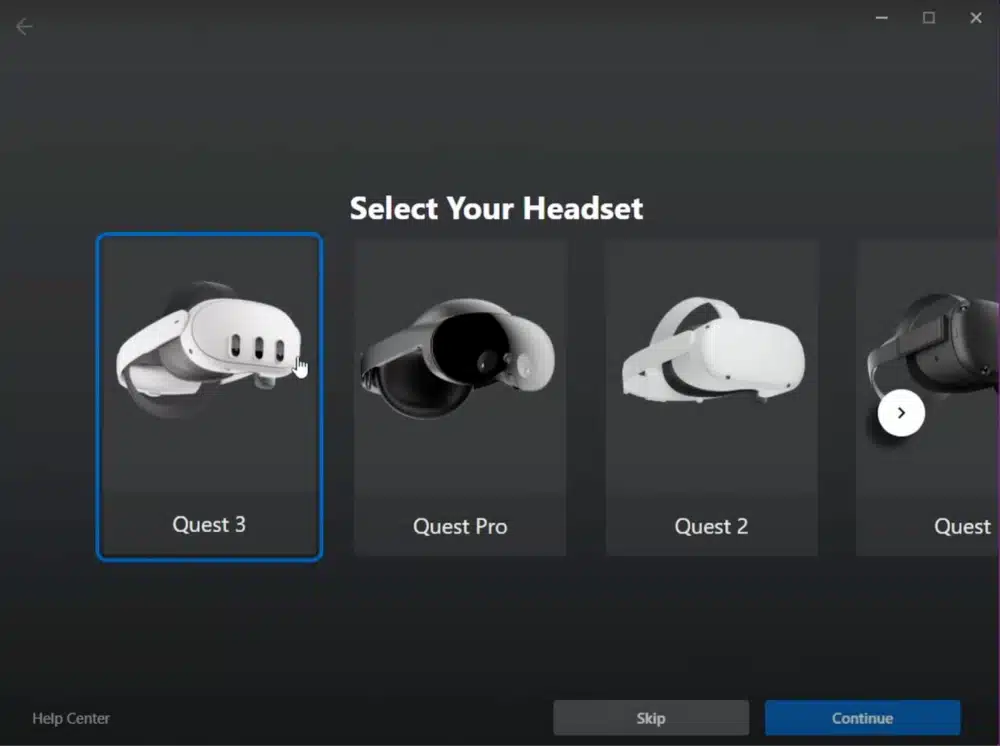
Follow the prompts to set up the connection between your PC and the headset. You can choose between using a Link cable or Air Link. Air Link will let you wirelessly play VR games, while Link requires the USB type C cable below in order to play Virtual Reality from Steam on your Quest.
![How to Play Steam Games on Meta Quest 5 Ways [Tutorial]](https://arvrtips.com/wp-content/uploads/2024/07/8-oculus-select-a-connection-method.webp)
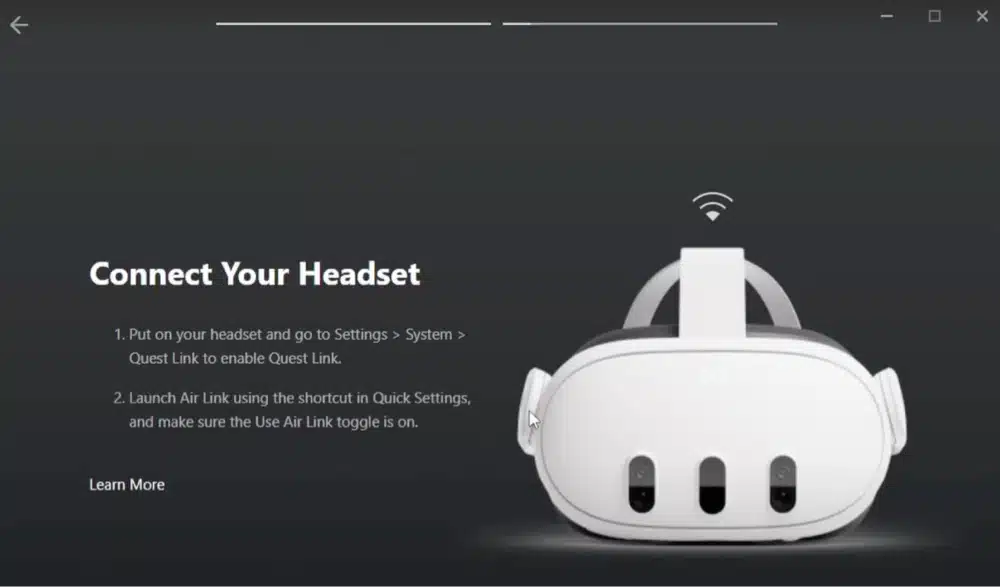
Set Up Your Meta Quest Headset
Ensure that your Meta Quest headset and your PC are connected to the same network for a stable Wi-Fi connection.
Next, you have to enable Quest Link on Your Headset. Put on your Meta Quest headset.
From the main menu, go to Settings. At the top, select System. Scroll down and select Quest Link. Enable Quest Link.
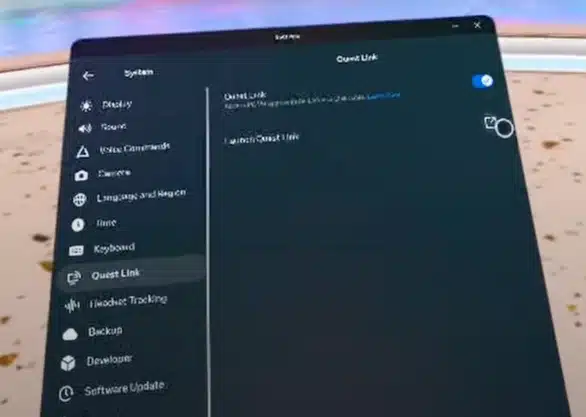
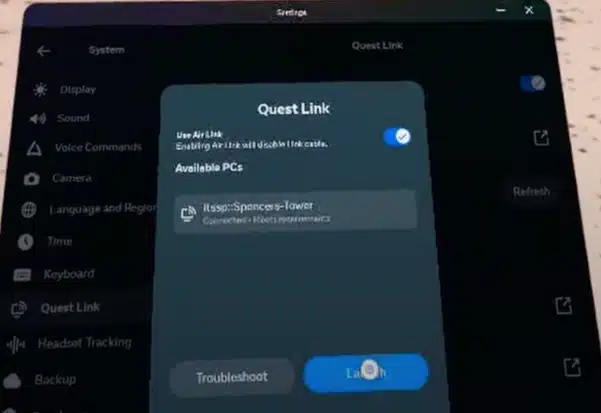
In the Quest Link settings, enable Air Link. You should see your PC listed as an available device. Select your PC and click Pair.
A pairing code will appear on your headset screen. Go to your PC and confirm that the same code is displayed. Click Confirm on your PC to complete the pairing process.
Click Launch to enter the Oculus desktop environment in the Quest Link menu.
Start SteamVR
In the Oculus desktop environment, select Desktop. Choose your monitor to view your PC desktop within the VR environment.
Open Steam on your PC. In your Steam Library, find and launch the SteamVR app. This will open SteamVR in your Meta Quest headset.
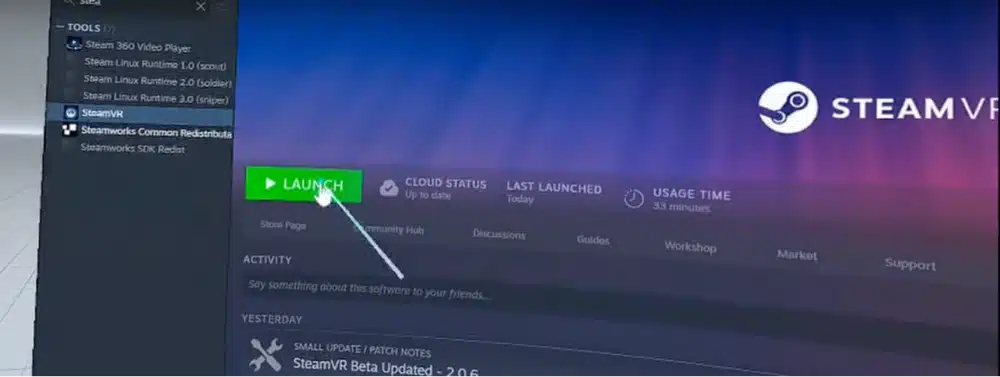
Run Steam Games
Press the button with three horizontal lines on your left controller to open the SteamVR menu. Make sure the Library is selected to view your available SteamVR games.
Select a game from your library and start playing.
Exiting SteamVR
To exit SteamVR, press the button with three horizontal lines again to open the menu. Select Exit VR to close SteamVR.
In the Oculus desktop environment, go to Settings. Ensure the Headset is selected and click Disable to return to the standard Meta Quest interface.
Following these detailed steps above, you can play Steam VR games on your Meta Quest headset.
How to Play Steam Games on Meta Quest (Steam Link Method)
Requirements
- Meta Quest 2 or Quest 3 headset
- Gaming PC with Steam installed
- Steam Link app on your Meta Quest
Here’s a step-by-step guide on how to play Steam games on Meta Quest (Steam Link method):
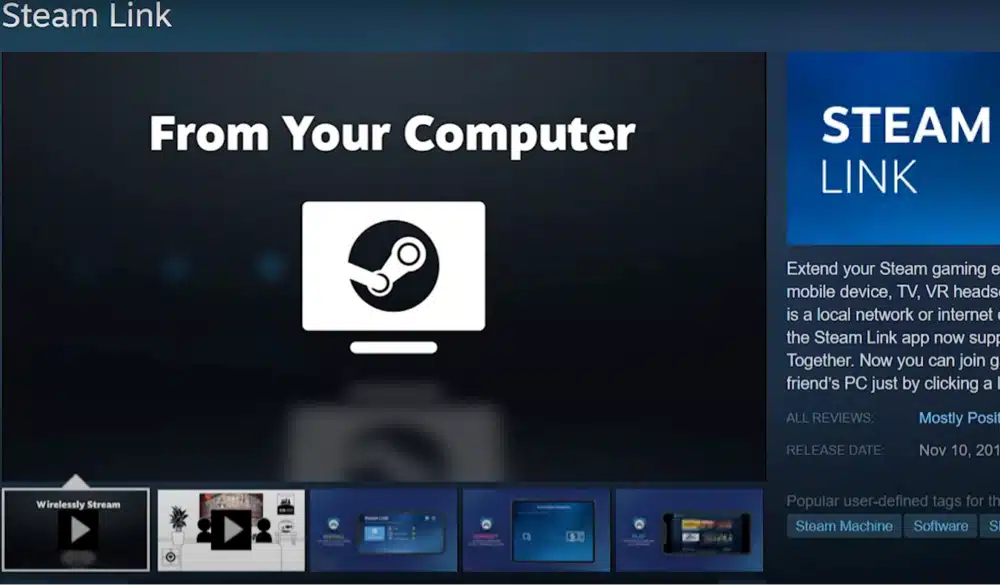
Install Steam Link on Meta Quest
Open the Meta Quest Store on your headset. Type “Steam Link” in the search bar. Click the “Install” button to download and install the Steam Link app.
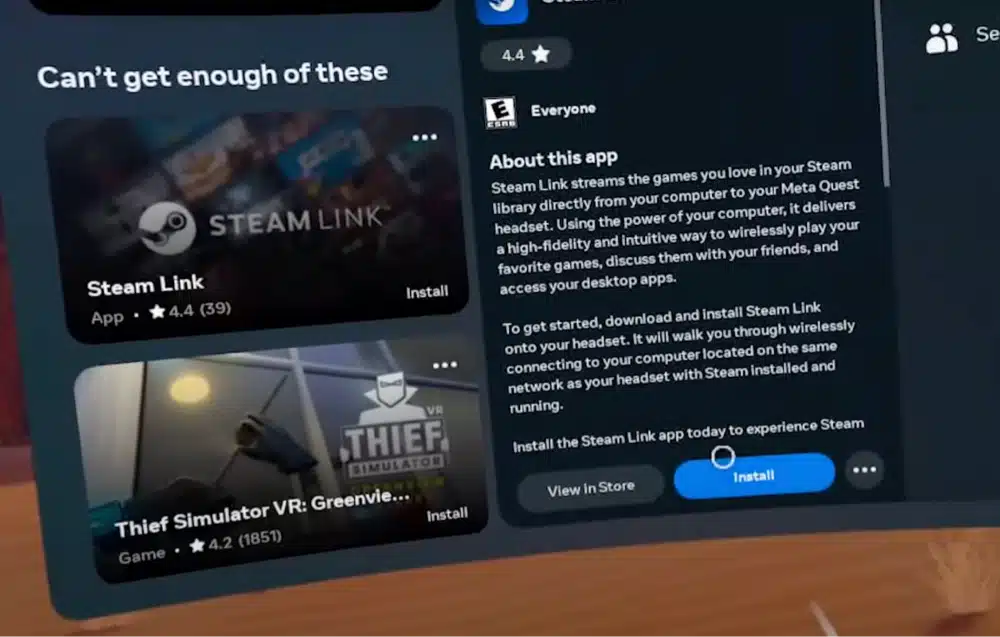
Set Up Steam Link on Meta Quest
Once the installation is complete, open the Steam Link app on your Meta Quest headset.
Ensure your Meta Quest headset and gaming PC are connected to the same Wi-Fi network for a seamless streaming experience.
Pair Your Meta Quest with Your PC
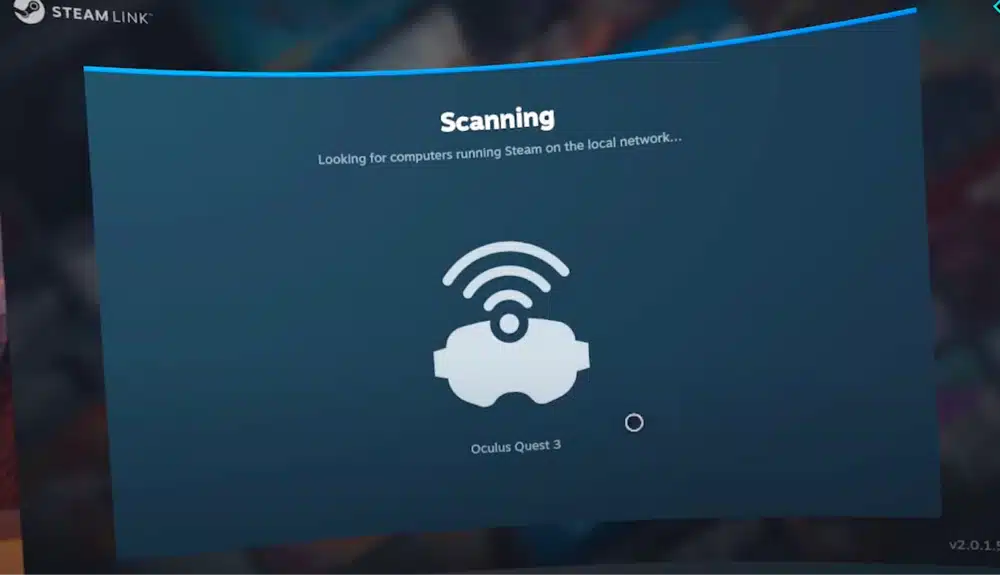
You will be prompted to allow the connection upon opening the Steam Link app. Click “Allow.”
A pairing code will appear on your Meta Quest headset. On your PC, a browser window should automatically pop up, asking for the pairing code. Enter the code from your headset into the browser.
Click “Continue” on your PC after entering the code to complete the pairing process.
Configure Steam Link Settings
You can tweak various settings in the Steam Link app to optimize your experience. This includes adjusting the resolution and bitrate for better performance.
In the Steam Link app, you can open the virtual keyboard for text input and scale the display up or down, although it might not be very fluid.
One cool feature is attaching your display directly to your controllers. This allows you to see important information without interrupting gameplay.
Start Gaming
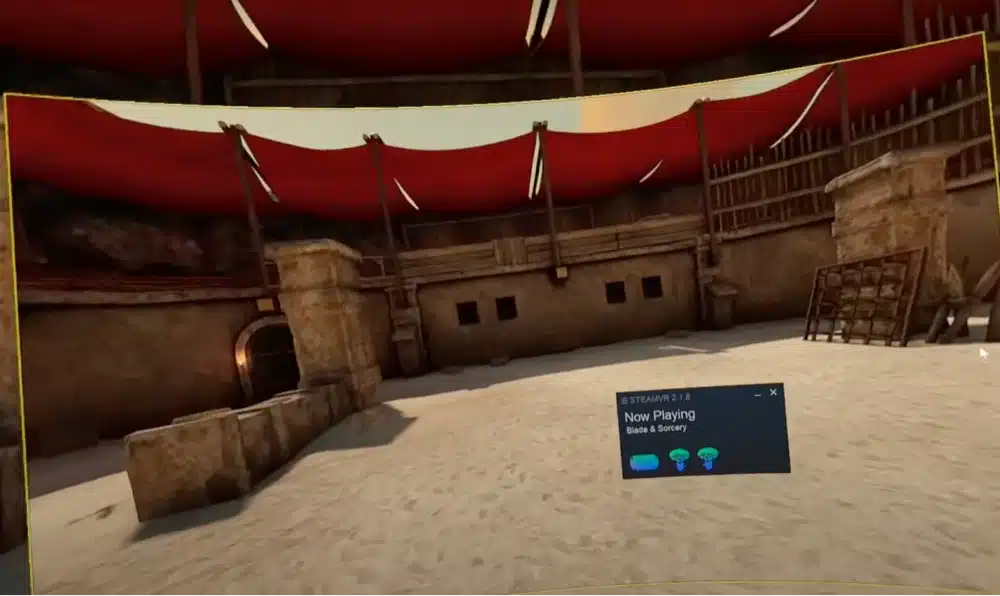
With everything set up, you are now in the SteamVR environment on your Meta Quest. Navigate through SteamVR to select and stream Steam Games into your headset.
You can now enjoy playing your Steam games on Meta Quest. The Steam Link app ensures a steady frame rate and smooth gameplay, even in demanding games.
Use Display Mode
Steam Link includes a display mode that lets you see your screen while in the middle of any game or app. This is useful for multitasking or checking notifications without leaving the VR environment.
How to Play Steam Games on Meta Quest (Virtual Desktop Method)
Virtual Desktop is an application that lets you mirror your nearby PC inside your VR headset. With a little setup time, you can play PC-VR games in your headset with no latency and high quality.
Virtual Desktop is developed by Guy Godin, who has supported and updated the Oculus Quest version of the application for over 5 years. It was the original wireless streaming solution before Oculus Air Link was released in early 2021.
Click here to read our full Virtual Desktop guide, which goes into more detail.
Check out our guide comparing Virtual Desktop vs Air Link for a close look at the two options above.
Requirements
- Meta Quest 2, Quest 3, or other compatible headsets (Quest Pro, Pico Neo3, Pico 4, HTC Vive Focus 3, XR Elite)
- Gaming PC with Steam installed
- Virtual Desktop app on your Meta Quest
- Strong Wi-Fi connection
Here’s how to play Steam games on your Meta Quest headset wirelessly with Virtual Desktop:
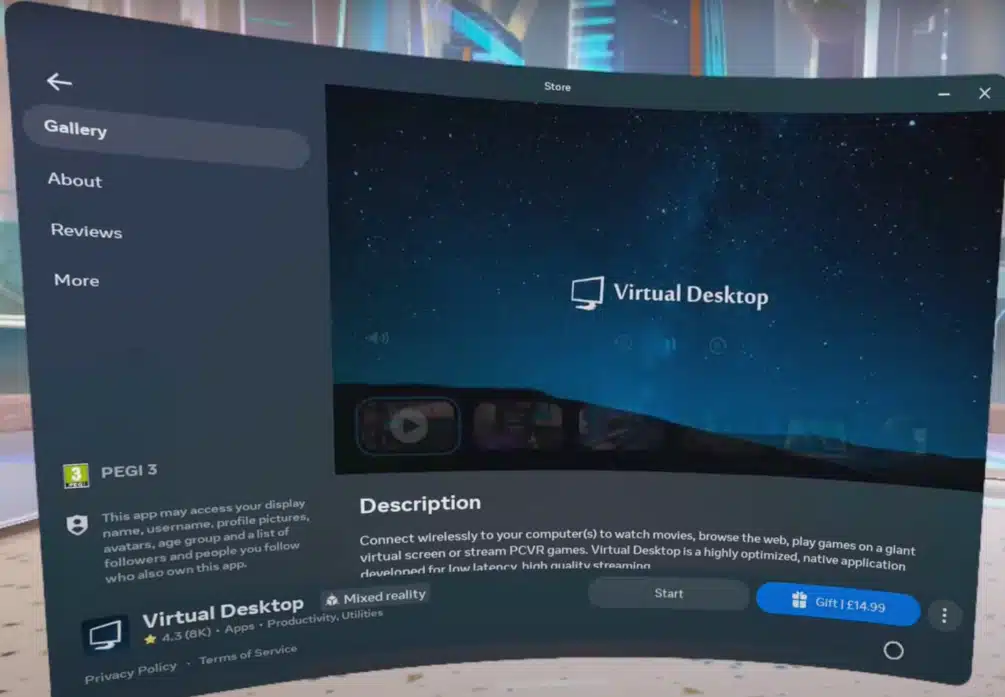
Purchase and Install Virtual Desktop on Your Quest
Open the Meta Store on your Quest headset.
Search for “Virtual Desktop.”
Purchase and install the app. Make sure to buy the Meta Quest version.
Install the Virtual Desktop Streamer App on Your PC
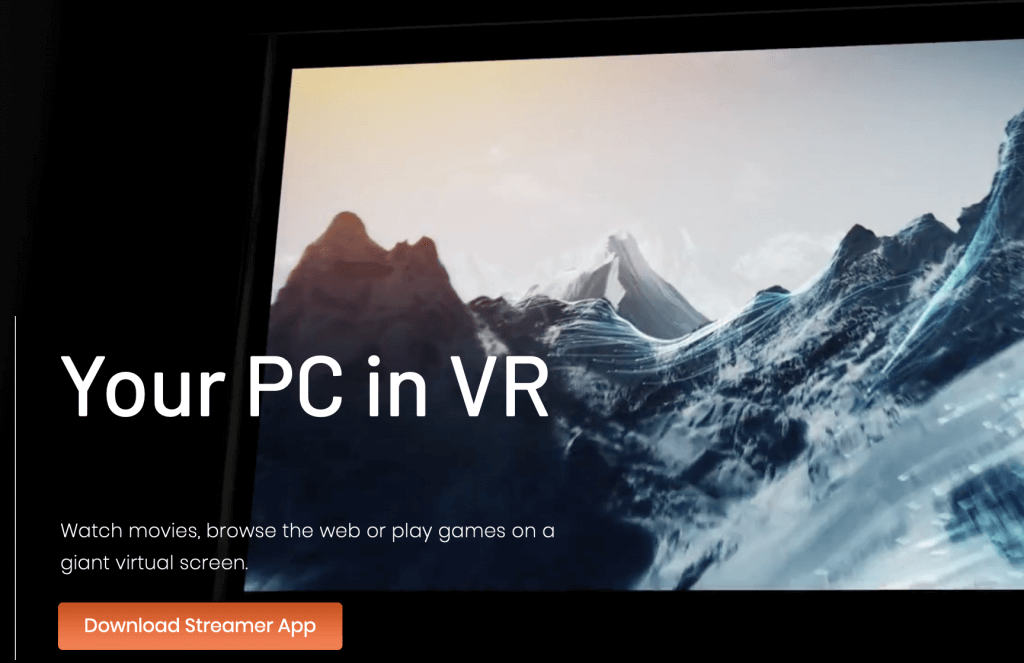
Visit the Virtual Desktop website on your PC. Download and install the Virtual Desktop Streamer app.
Optimize Settings on the PC Streamer App
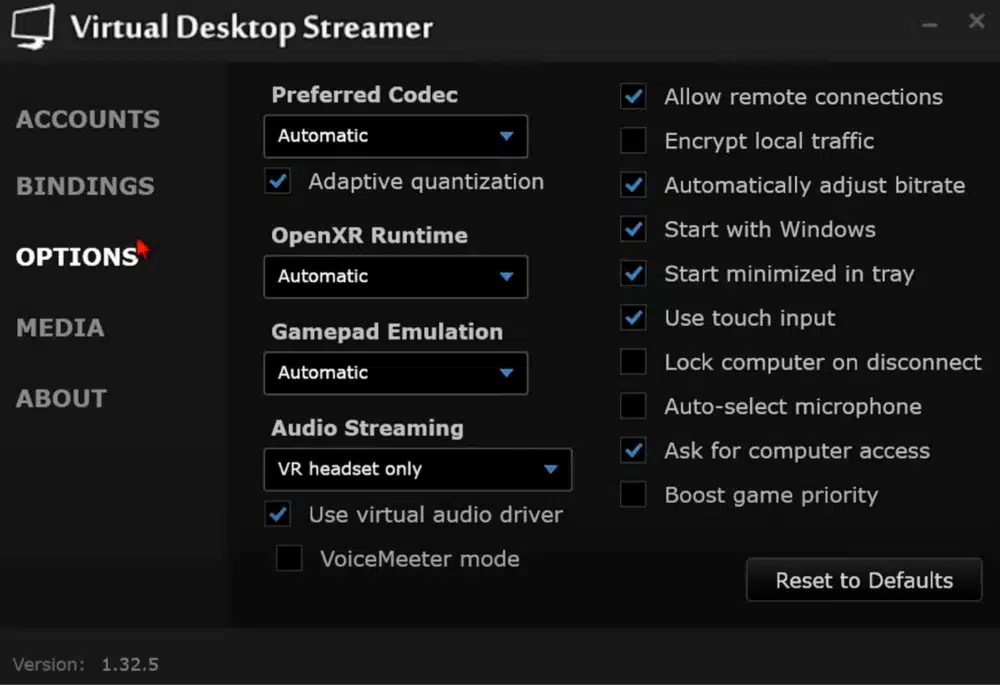
Open the Streamer app settings.
Input your Meta, Pico, and Viveport usernames under the Accounts tab and click on Change.
Set up hotkeys under Bindings.
Check “Automatically adjust bit rate” in the Streaming tab.
Ensure your PC specs are up-to-date and no interfering apps are under the About tab.
Optimize Settings on the Quest App
In the Computer tab, verify the connection speed to your PC.
In the Settings tab, uncheck “Use optimal resolution” if you are using twin 4K monitors.
In the Streaming tab, set these settings:
- Set VR Graphics Quality according to your GPU specs.
- Set VR Frame Rate to 90 FPS (adjust as needed).
- Ensure “Automatically adjust bit rate” is checked in the Streamer app.
- Set Sharpening to 75%.
- Leave VR Pass Through unchecked.
- Set Gamma to 1.0.
- Disable Synchronous Space Warp (SSW).
- Enable Snapdragon Game Super Resolution.
- Uncheck Video Buffering.
- Check Center to Play Space.
- Check Tracked Controller.
- Uncheck Forward Tracking Data to PC.
- Check Increase Color Vibrance.
- Uncheck Increase Video Nominal Range.
- Use Show Performance Overlay for real-time tuning.
Ensure Optimal Network Setup
Connect your PC to your router via an Ethernet cable. Connect your Quest to the same router’s 5GHz or 6GHz Wi-Fi channel.
For best performance, consider a dedicated router for Virtual Desktop.
Try OpenXR Runtime and Codec Preferences
Use the VD XR runtime in the Streamer app for potential performance gains.
Select the codec that best suits your preference:
- H.264 for lowest latency.
- H.264+ for up to 400 Mbps.
- HEVC and HEVC 10-bit for better graphics at 200 Mbps.
- AV1 10-bit for best graphics on Quest 3 and RTX 40-series GPUs.
How to Play Steam Games on Meta Quest Using Bigscreen VR
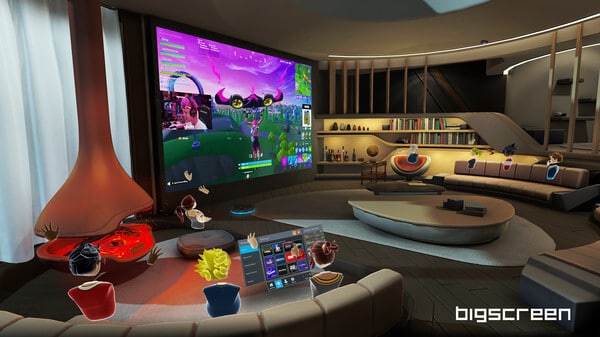
Bigscreen VR is a virtual world you can visit alone or with other friends. You can socialize, watch media, and play games inside one of the apps included with Bigscreen.
Some of the biggest uses of Bigscreen are to:
- Watch movies, TV, and live TV on-demand in VR
- Play PC games remotely in VR
- Socialize with friends
- Check out live events with virtual friends around the world
You can also meet new friends in the app too, hanging out in lobbies and watching things with 11 other players.
Bigscreen is a Virtual Desktop alternative with more social features included. Playing Steam games on Meta Quest with Bigscreen VR is one of the main features to try out.
To get started:
- From Steam (or Oculus Home) on your computer, search for Bigscreen VR and install the application (it’s free). Open it up and have it running.
- Download and launch Bigscreen VR in your Oculus Quest and choose to launch the “Remote Desktop” mode.
- In your headset, note the room ID code, which you have to enter on your PC before you click on Connect.
- If you put your headset back on, your PC screen will now be displayed, and you can play Steam games on Meta Quest.
Oculus Link vs Air Link
Link and Air Link are Meta’s wired and wireless solutions to play Steam Games on Meta Quest. Both accomplish the same thing in the end but are set up slightly differently.
Oculus Link
Oculus Link is the original official wired method to play Steam games on Meta Quest. With a special cable, Oculus Link turns your Oculus Quest into only a VR headset display.
When you set up Oculus Link, it gives you the ability to run all of those awesome Steam VR games. You use your Quest display and controllers, but the games are powered by your PC.
Plus, the selection of VR games available for PC in the Oculus Home store or Steam VR is far greater than the Quest. So by setting up Oculus Link, you’ve just multiplied the number of games to check out. Like Roblox VR or any of the awesome multiplayer VR games we’ve featured before.
Click here to read our full Oculus Link guide.
Oculus Air Link
Oculus Air Link is a wireless alternative to Oculus Link that requires no Link cable or tethered connection to your PC. It lets you mirror your nearby PC inside your VR headset without any hardwired connection.
Once connected, you can play any PC VR game from the Oculus or Steam VR store on your Quest 2. This gives you access to all the best PC VR games as long as you have a gaming PC to play them.
Oculus Air Link will turn off in the PC Home app every 24 hours for security reasons, so you’ll have to re-enable it in there each time.
Click here for our complete Oculus Air Link tutorial guide.
Conclusion
And that’s it! I’ve just gone through 5 completely capable ways to play Steam games on Meta Quest. When configured correctly, any of the options above are fine to use.
Which solution gives you the least latency? Comment down below and let us know.
Each guide above goes into a lot more detail, including:
- How to optimize your connection
- Other hardware accessories to improve your game streaming
- A more in depth comparison about each option
- Other cool features to try out.
If any other ways to use your PC with your Meta Quest come out, I will update this guide and let you know.

![How to Play Steam Games on Meta Quest 5 Ways [Tutorial] how to play steam games on the oculus quest](https://arvrtips.com/wp-content/uploads/2021/06/how-to-play-steam-games-on-the-oculus-quest-300x225.jpg)
